How to create a store on Sendd
Sign up and launch a free Sendd storefront in minutes, no subscription required
Category: Getting started
Starting an online store on Sendd takes just a few minutes and costs nothing to begin. There is no subscription and no monthly fee: you only pay a small platform fee when you actually make a sale, plus standard payment processing fees from Stripe or your chosen processor. This guide walks you through creating your account, naming your store and landing on your setup dashboard so you can start building right away.
What it is and when to use it
Creating a store is the first step for any new seller on Sendd, whether you plan to sell physical goods, digital downloads, subscriptions or services. You can build your entire storefront, add products and set up your pages before you ever connect payments, so there is no pressure to have everything ready on day one.
Steps:
- Go to sendd.store in your browser and select
Sign up. - Choose
Continue with GoogleorContinue with Apple, or enter your name, email and a password. - Tick the box to accept the Terms of Use and Privacy Policy.
- Select
Create an account.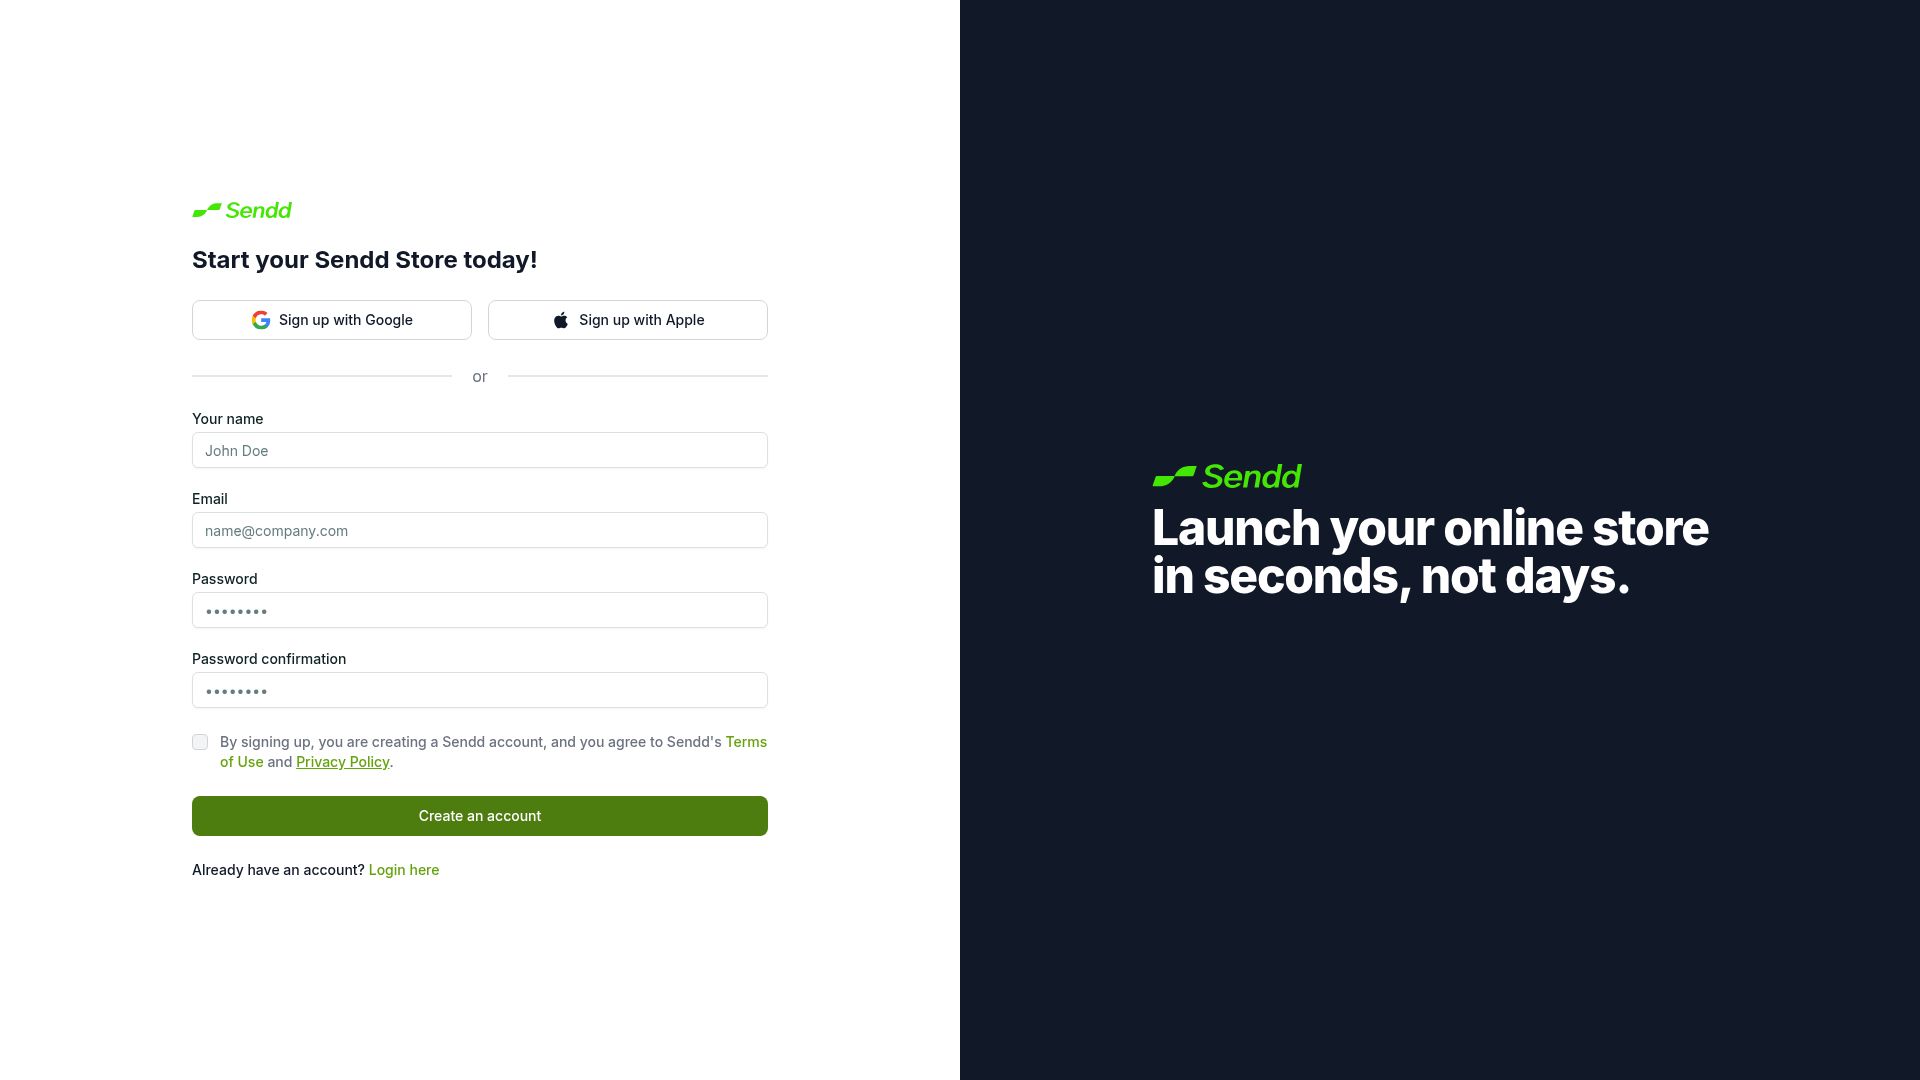
The sign-up screen. Already have an account? Use Login here.
- On the naming screen, type a handle for your store. Your handle becomes your public web address at sendd.store/your-handle.
- Watch for a green border around the handle field, which means that handle is available. A different colour means you need to try another one.
- Select
Create store.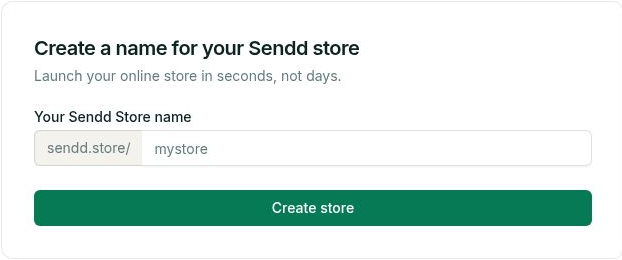
Your handle becomes your storefront web address.
Once your store is created, you land on the Get started dashboard. This shows a checklist tracking your progress toward launch: providing your shop info, adding a product and connecting Stripe. You will also see the left sidebar, which is where you manage every part of your store going forward, including My store, My products, Orders, Marketplaces, Referrals and Settings.
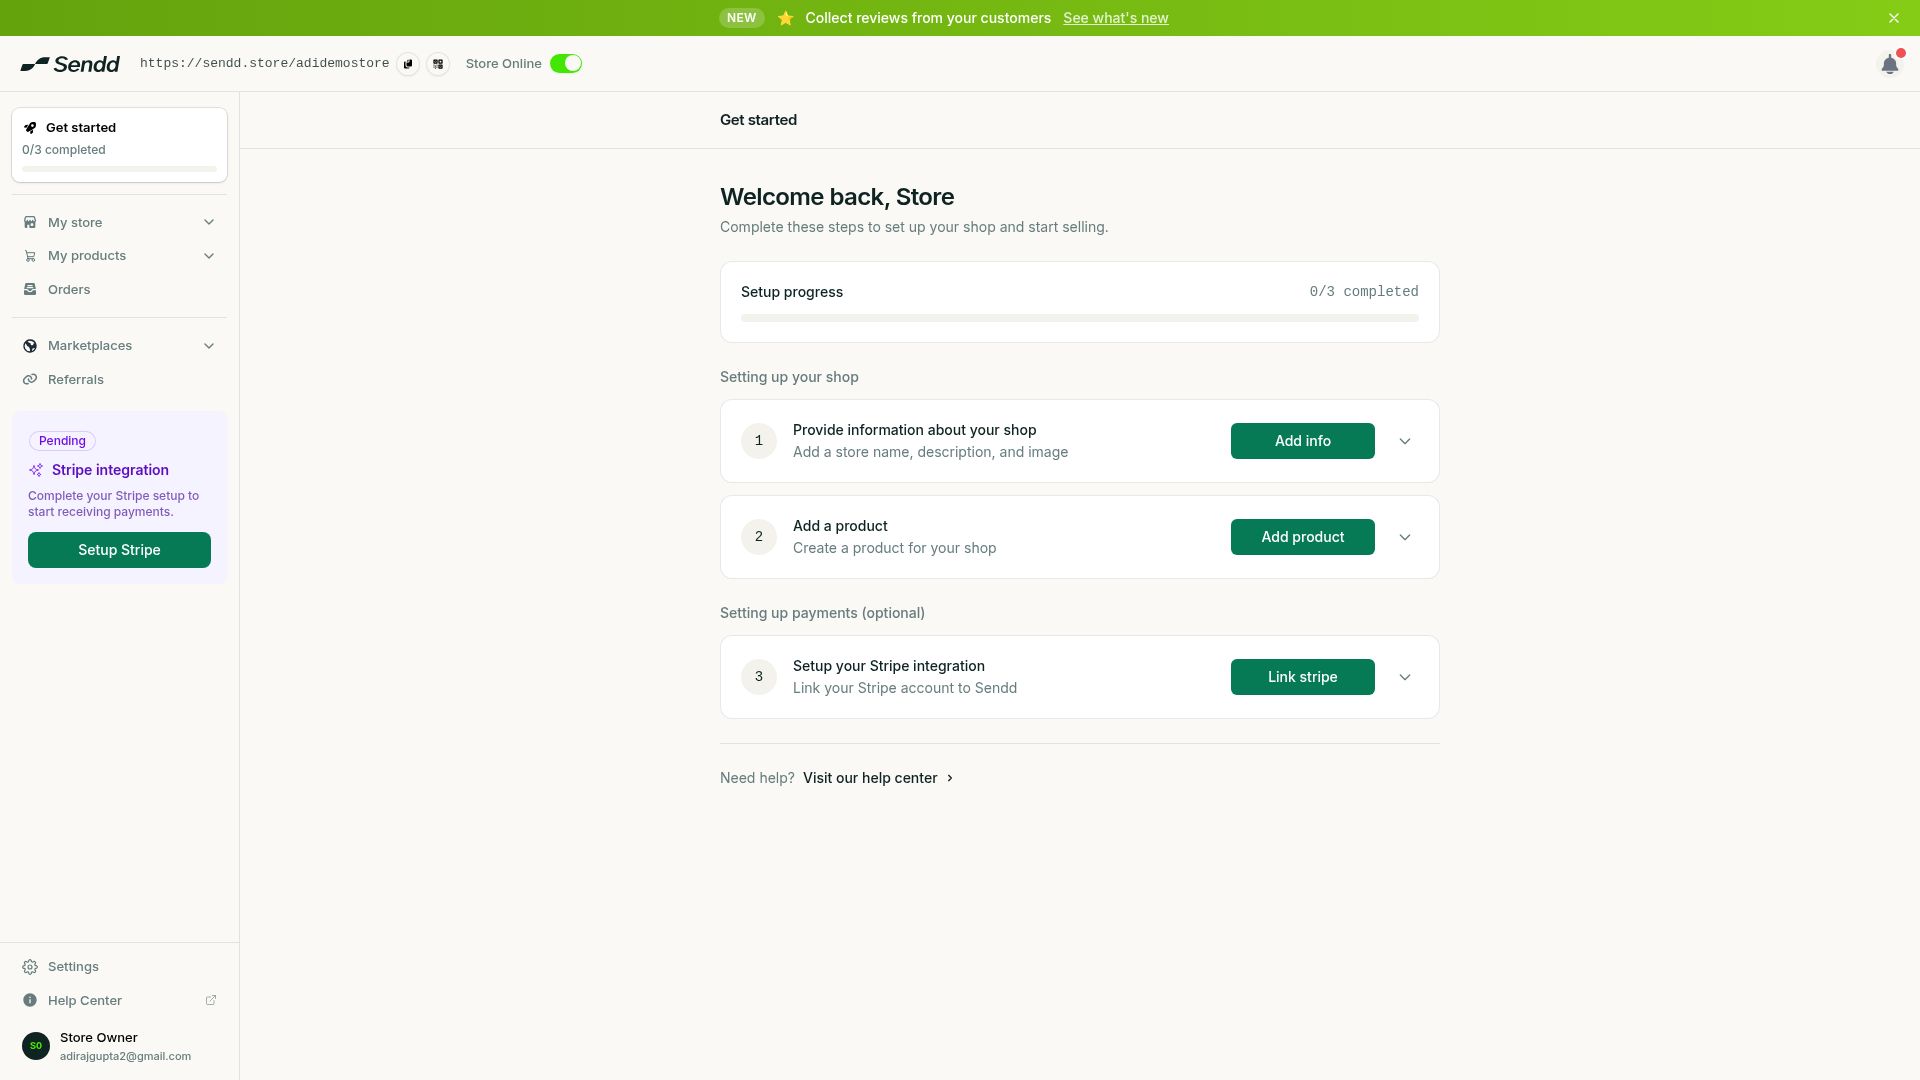
The Get started checklist walks you through setup.
Understanding the checklist and sidebar
The 0/3 checklist on your dashboard is not a hard requirement, it is a guide. You can complete the three items in any order, and you can keep building your store (adding products, writing descriptions, choosing a theme) long before you connect a payment processor. Products can be created and previewed without payments set up, but they can only be sold once Stripe is connected to your store.
Use-case examples
- A hobbyist wants to test whether an idea is worth pursuing: they create a store, add a couple of products with descriptions and images and share the link with friends before deciding to connect Stripe.
- A small business owner in Wellington, New Zealand sets their store currency to NZD by default and builds out their catalogue over a weekend before going live the following week.
- A digital creator signs up with Google in seconds, names their store after their brand and immediately starts drafting their first digital product.
💡 Tip. Pick a handle that is short, memorable and closely tied to your brand name. It becomes part of your storefront URL, but you can change it later from your store settings if you need to.
ℹ️ Note. There is no cost to sign up or build your store. Sendd only charges a 1% platform fee per sale once you start selling, and payment processing fees from your provider are separate and added on top.
Frequently asked questions
Is Sendd free to sign up for?
Yes. Sendd has no subscription and no monthly fee. You only pay a 1% platform fee on sales you actually make, plus standard payment processing fees.
Can I change my store handle after I create my store?
Yes. Your handle sets your storefront address at sendd.store/your-handle, and while it is worth choosing carefully so it reflects your brand, you can change it later from your store settings if you need to. Keep in mind that changing your handle changes your storefront address.
Do I need a credit card to sign up?
No. Signing up and building your store does not require any payment details. You can add products and design your storefront before connecting a payment processor.
Can I sign up with Google or Apple instead of an email and password?
Yes. On the sign-up screen you can select Continue with Google or Continue with Apple, or enter your name, email and a password manually.
What happens after I create my store?
You land on the Get started dashboard, which shows a checklist for providing your shop info, adding a product and connecting Stripe, along with the sidebar you will use to manage your store.
Can I sell products right after creating my store?
You can build and preview products right away, but you can only sell them once you connect Stripe to your store.
What if my chosen handle is already taken?
If the handle field does not show a green border, that handle is unavailable and you need to try a different one.
How do I get back into my store if I already have an account?
Go to sendd.store and use the Login option instead of Sign up.
Next steps. Now that your store exists, fill in your shop info by heading to How to set up your Sendd store details, then start building your catalogue with How to add a product on Sendd.
Related articles