How to sell event tickets on Sendd
Sell tickets to seminars, workshops, expos and online events with built in date and time settings
Category: Ways to sell
If you are organizing a seminar, workshop, expo, conference, class or gig, the Event product type on Sendd lets you sell tickets directly from your store with a built in date and time section. You can run in-person or online events, offer multiple ticket types and even host free RSVP events, all using the same familiar three-step product builder.
What it is and when to use it
An event product is designed for anything that happens at a specific time rather than a physical item you ship. Alongside the usual title, description, gallery and price fields, an event product includes a dedicated Date and time section so attendees always know exactly when your event starts and ends. Use it for:
- Seminars and workshops
- Expos and conferences
- Online events and webinars
- Classes and lessons
- Gigs and live performances
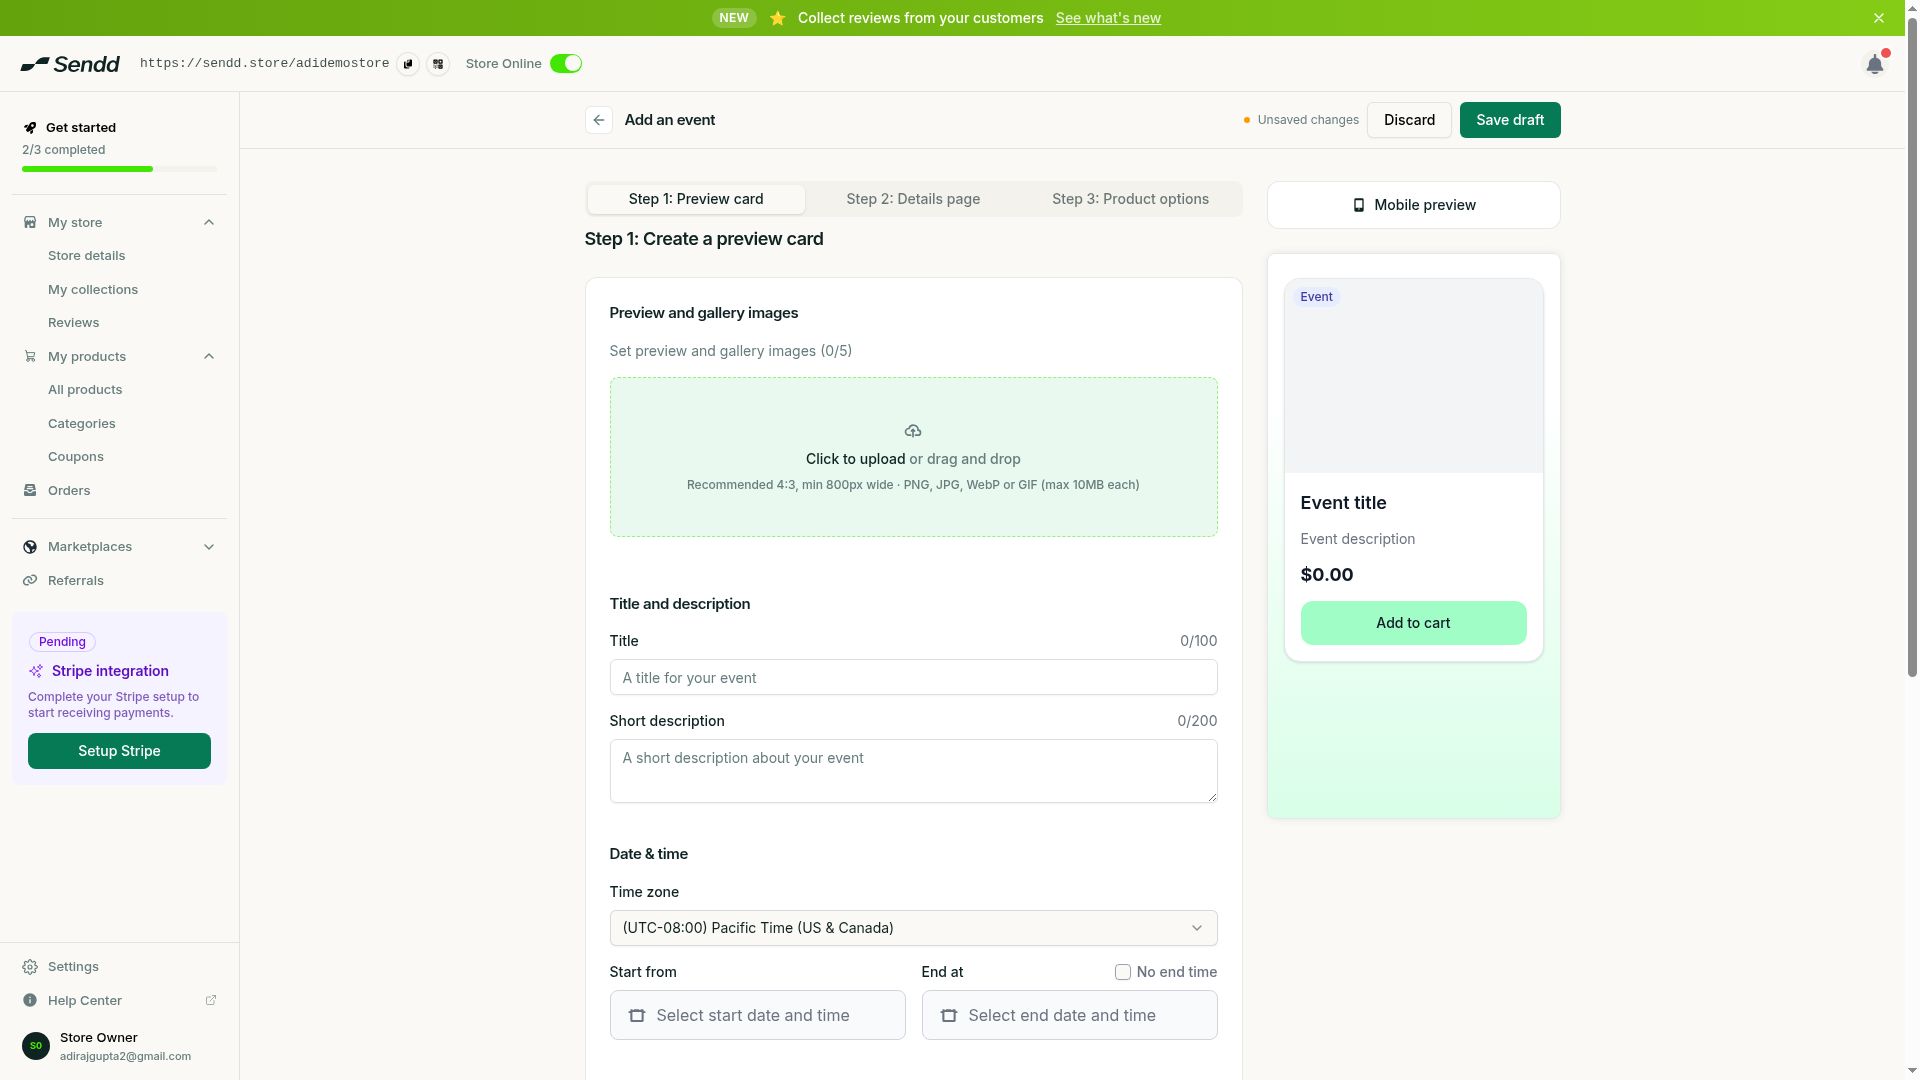 Events add a time zone with start and end date and time.
How to create an event ticket product
Steps:
- Go to
My products, then selectAll productsand selectAdd new product. - Choose the
Eventproduct type. - In Step 1, add your event title, description and gallery images just as you would for any other product.
- Scroll to the
Date and timesection. Set aTime zoneso attendees see the correct local time. - Fill in
Start fromwith the date and time your event begins. - Fill in
End atwith the date and time your event finishes, or switch onNo end timeif your event is open-ended. - Set your ticket price. For a free event or RSVP, set the price to 0.
- If you want multiple ticket types (for example General and VIP), use the stock and variations options to create separate ticket options, each with its own stock count to cap capacity.
- Move through Step 2 for your details page and Step 3 to confirm product options, then select
Publish.
Understanding the options and fields
- Time zone. The time zone your start and end times are displayed in, so attendees in different regions know exactly when to log in or arrive.
- Start from. The date and time your event begins.
- End at. The date and time your event finishes. Switch on
No end timeif you do not want to set a fixed end. - Stock and variations. Use these to create multiple ticket types on one product, each with its own price and stock count, so you can cap how many of each ticket type are sold.
- Price. Set a normal price for paid tickets, or set the price to 0 to run a free RSVP event.
Use case examples
- Paid workshop. A trainer sells “General admission” and “Front row” ticket variations, each with its own stock limit, for an in-person seminar in a fixed time zone.
- Online conference. A conference organizer sets a Start from and End at time in their local time zone so international attendees can convert it to their own, and sells a single ticket type with generous stock.
- Free community meetup. A local group creates an event with the price set to 0 so people can RSVP without payment, while still capping attendance using stock.
Tip. Always double-check your time zone before publishing, especially for online events with an international audience, so attendees do not show up at the wrong time.
Note. Setting
No end timeis useful for events without a strict finish, but it is still worth adding a rough duration in your description so attendees know what to expect.
Frequently asked questions
Can I sell multiple ticket types for one event?
Yes. Use stock and variations to add different ticket types, such as General and VIP, each with its own price and stock count on the same event product.
How do I limit how many tickets I sell?
Set a stock amount on your ticket type or variation. Once stock runs out, that ticket type stops being available for purchase.
Can I sell tickets to an online event?
Yes. The Date and time section works the same for online and in-person events. Set your time zone, start time and end time (or turn on No end time) and share your event link in the description.
Why do I need to set a time zone?
The time zone ensures the start and end times you enter are displayed correctly to attendees, which matters most for online or multi-region events.
Can I run a free event or RSVP?
Yes. Set the price to 0 and customers can register without paying, while you still control capacity using stock.
What happens if I need to cancel or refund a ticket?
Manage cancellations and refunds from your orders the same way you would for any other product, then let attendees know through your own communication channels.
Can I add images or additional details to my event listing?
Yes. Use the gallery and description in Step 1 and Step 2 to add photos, venue details, agendas or anything else attendees need to know.
Does the event product support both in-person and online formats?
Yes. The same Date and time section works for either, so you can host a physical venue event or an online session using the same product type.
Next steps. Once your event is published, consider running a promotion with Coupons to boost early ticket sales, and use Sharing your store to spread the word.
Related articles