How to manage your Sendd store settings
Find every setting for your account, store, payments and team in one place under Settings.
Category: Settings and sharing
Every configuration option for your Sendd store lives in one place: Settings, at the bottom of the sidebar. From here you manage your login and security, your store handle, shipping and analytics, payment providers and team access. This guide walks through each tab so you know exactly where to go when you need to change something.
What Settings covers and when to use it
Use Settings whenever you need to change something about how your store operates rather than what it sells. That includes updating your login details, changing your store’s URL handle, connecting analytics tools, choosing how customers pay you or giving a team member access to help run the store. Product and catalog changes still happen under My products, and order management stays under Orders: Settings is for the configuration layer underneath all of that.
How to open Settings and navigate its tabs
Steps:
- Scroll to the bottom of the sidebar and select
Settings. - Choose the tab you need:
Account,Store,Food and Beverage,PaymentsorTeam. - Make your changes within that tab and save before navigating away.
Account tab
The Account tab covers you as a person, not your store. Under Profile, update your name and email. Under Security, change your password whenever you want to update your login credentials.
Store tab
The Store tab covers how your storefront presents and behaves. Here you can change your store handle and see your resulting store URL, configure Shipping, set how Reviews display on your storefront, and connect Analytics using a Google Analytics Measurement ID and a Meta Pixel ID.
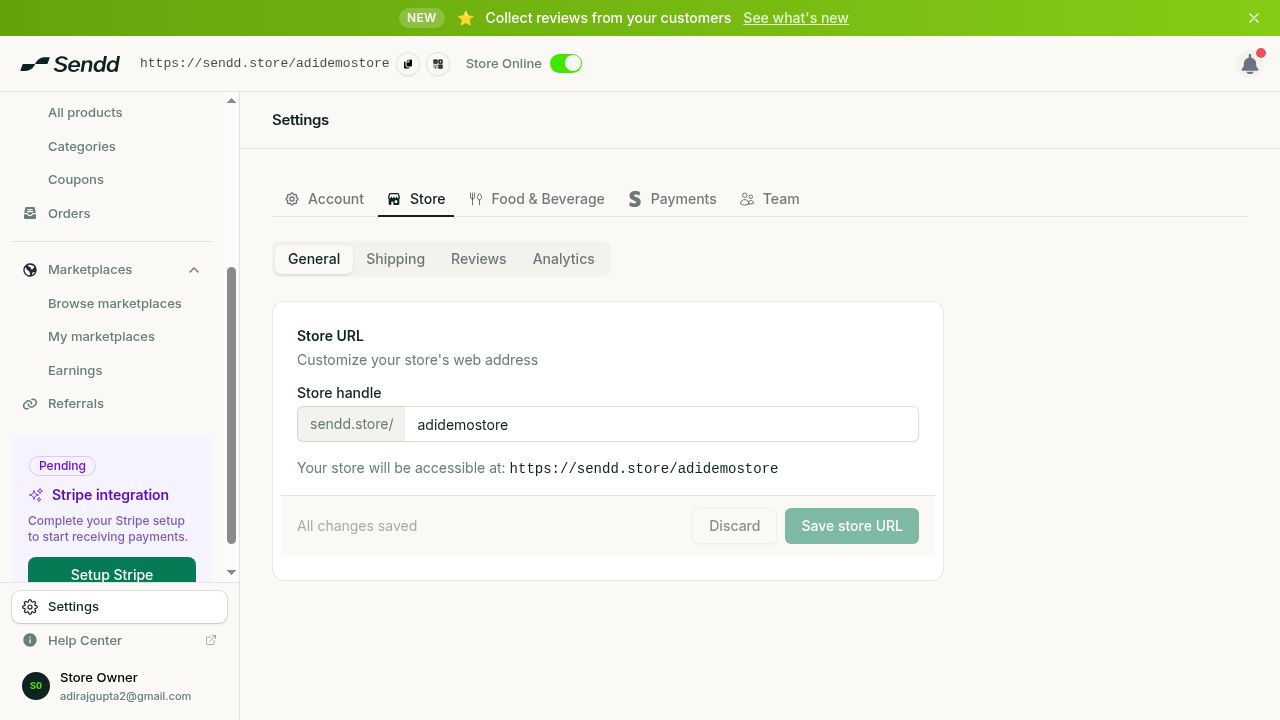 The Store tab, where you can change your storefront handle.
Connecting analytics
Steps:
- Open
SettingsthenStorethenAnalytics. - Enter your Google Analytics Measurement ID to track storefront visits in Google Analytics.
- Enter your Meta Pixel ID to track visits and conversions for Meta ad campaigns.
- Save your changes.
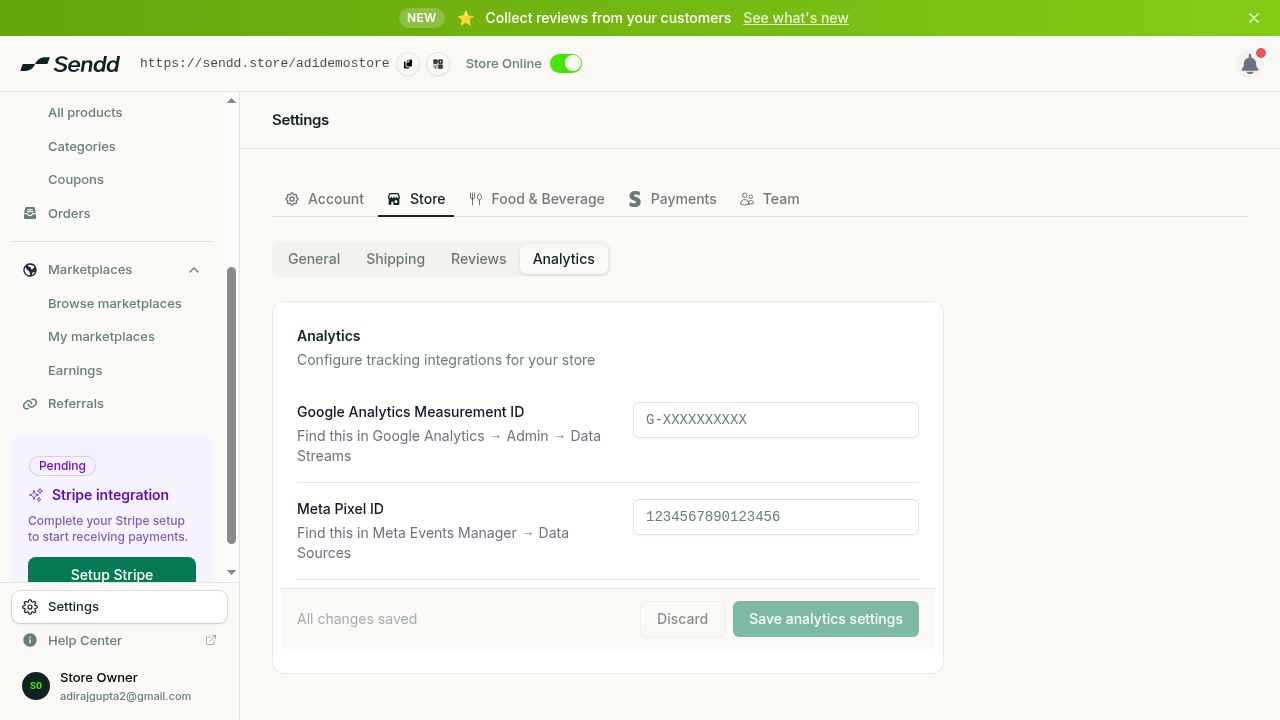 Connect Google Analytics and a Meta Pixel.
Tip. Connect both a Google Analytics Measurement ID and a Meta Pixel ID together if you run paid social ads, so you can compare organic traffic against ad-driven conversions in one view.
Food and Beverage tab
If your store sells menu items, the Food and Beverage tab lets you configure pickup, delivery and cancellation settings specific to those items.
Payments tab
The Payments tab is where you manage your payment providers and set your payout schedule, controlling how and when you get paid for orders.
Team tab
The Team tab lets you invite managers who help run your store with limited access, so you can bring on help without handing over full control of your account.
Steps:
- Open
SettingsthenTeam. - Invite a manager by entering their details.
- The manager gets access to run parts of the store with limited access, rather than full account control.
Reviews: where they are collected and where they display
Customer reviews themselves are collected under My store then Reviews. To control how those reviews display on your storefront, go to Settings then Store then Reviews.
Example: setting up analytics before a launch
Before launching a new collection, a seller opens Settings then Store then Analytics and adds both a Google Analytics Measurement ID and a Meta Pixel ID, so every visit and conversion from the launch campaign is tracked from day one.
Example: bringing on a part-time manager
A seller going on holiday opens Settings then Team and invites a trusted friend as a manager with limited access, so orders keep getting fulfilled while the seller is away.
Note. Changing your store handle changes your store URL as well, since the URL is built directly from your handle.
Frequently asked questions
How do I change my store URL?
Open Settings then Store and change your store handle. Your store URL updates to match the new handle.
How do I add a team member to my store?
Open Settings then Team and invite a manager, who then gets limited access to help run the store.
How do I connect Google Analytics or a Meta Pixel?
Open Settings then Store then Analytics, and enter your Google Analytics Measurement ID and your Meta Pixel ID.
Where do reviews appear on my storefront?
Reviews are collected under My store then Reviews, and how they display on your storefront is controlled under Settings then Store then Reviews.
How do I change my password?
Open Settings then Account then Security to change your password.
What can a manager see or do?
Managers invited under Settings then Team get limited access to help run the store, rather than full account control.
Where do I manage shipping settings?
Shipping is configured under Settings then Store then Shipping.
Where do I manage pickup and delivery settings for menu items?
Pickup, delivery and cancellation settings for menu items are under Settings then Food and Beverage.
Next steps. Review your
Paymentstab to confirm your payout schedule, then check out how to manage your Sendd orders once settings are configured.
Related articles