How to add a product on Sendd
Learn the three-step product builder every Sendd product type uses, from preview card to publish
Category: Products and catalog
Adding a product on Sendd follows the same three-step builder no matter what you are selling, whether that is a physical item, a digital download, a subscription or something else entirely. This guide walks you through the full process: choosing a product type, filling in your preview card, adding details and stock and setting product options before you publish. Once you know this flow, every product type guide will feel familiar.
What it is and when to use it
Use this builder any time you want to list something new for sale on your Sendd store. You can build and preview a product fully before connecting payments, but keep in mind that products can only be sold once Stripe is connected to your store.
Steps:
-
In the sidebar, select
My products, then selectAll products. -
Select
Add new product. -
Choose the product type that matches what you are selling.
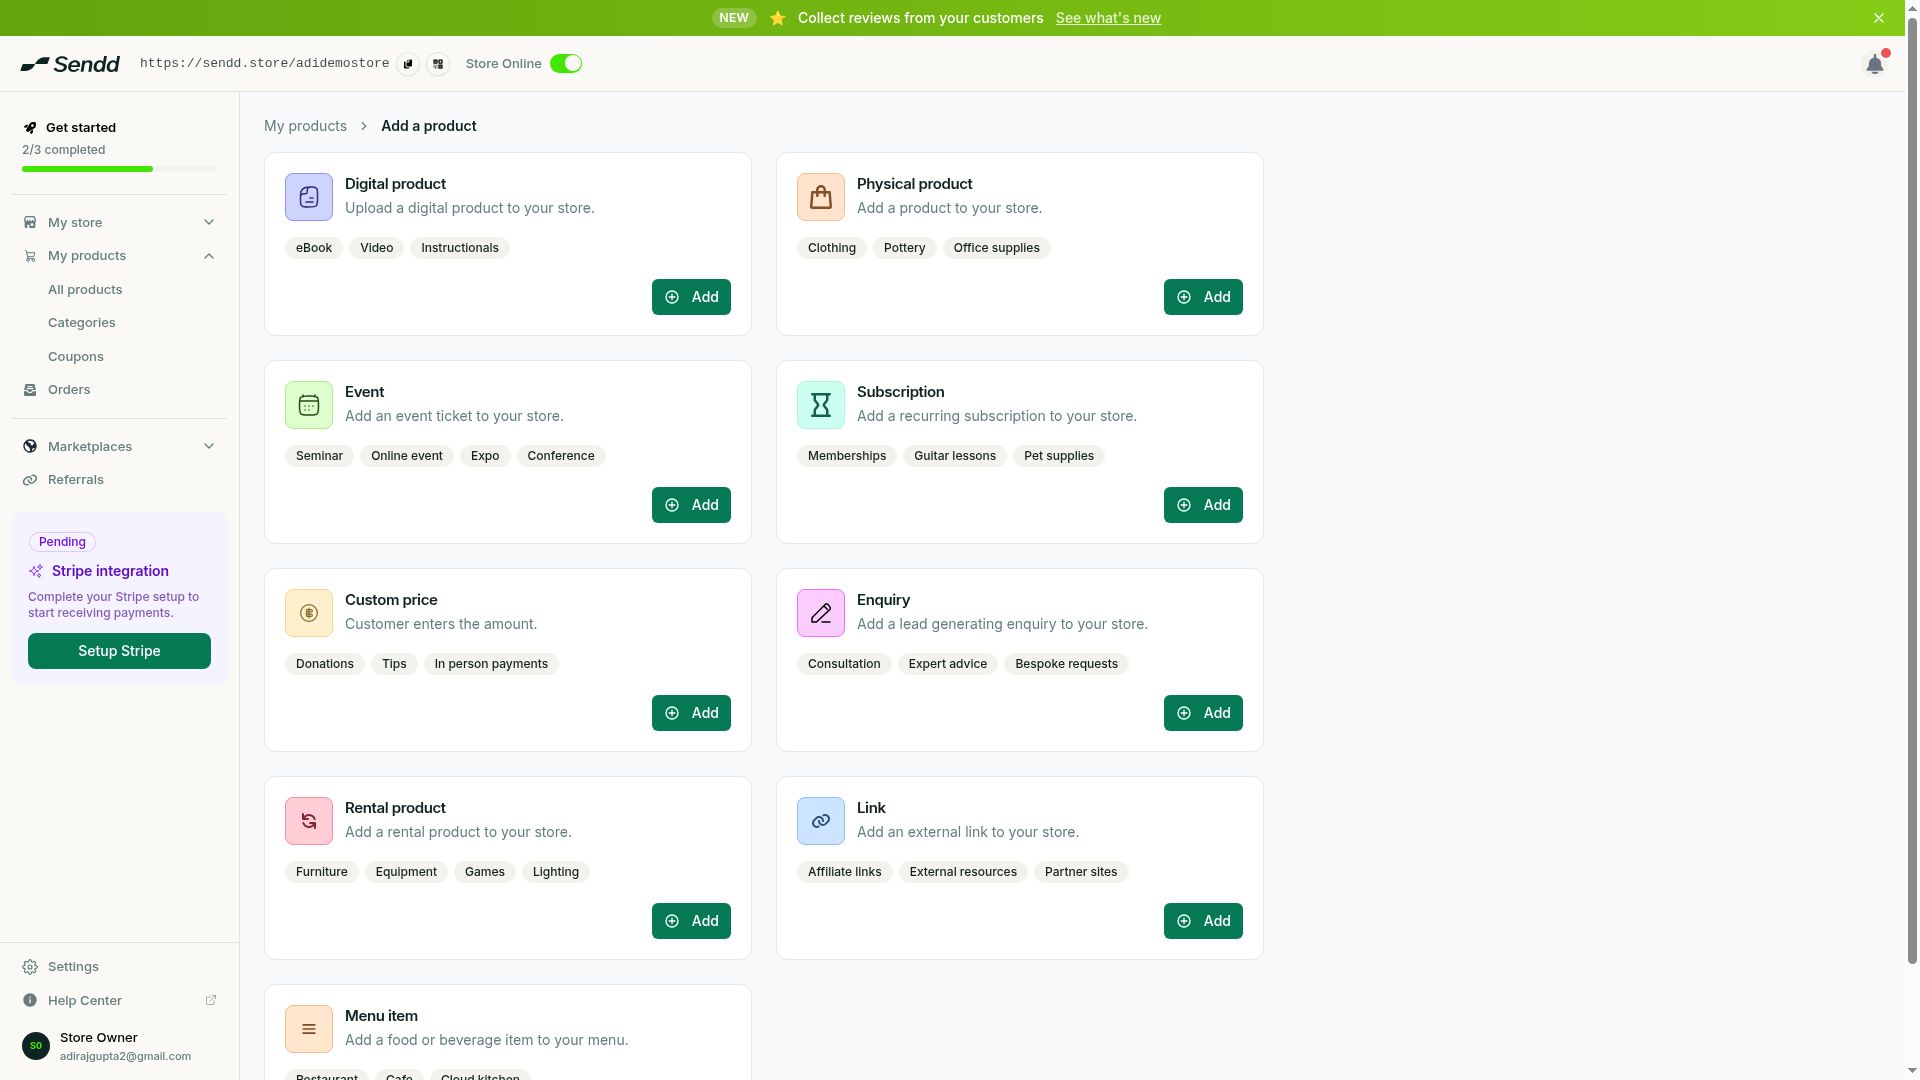 Choose from nine product types; all use the same builder.
 -
On Step 1, Preview card, fill in the
TitleandShort description. -
Upload
Preview and gallery images. Use a 4:3 aspect ratio and images at least 800px wide for the best result. -
Set the
Price. Enter 0 if the product is free.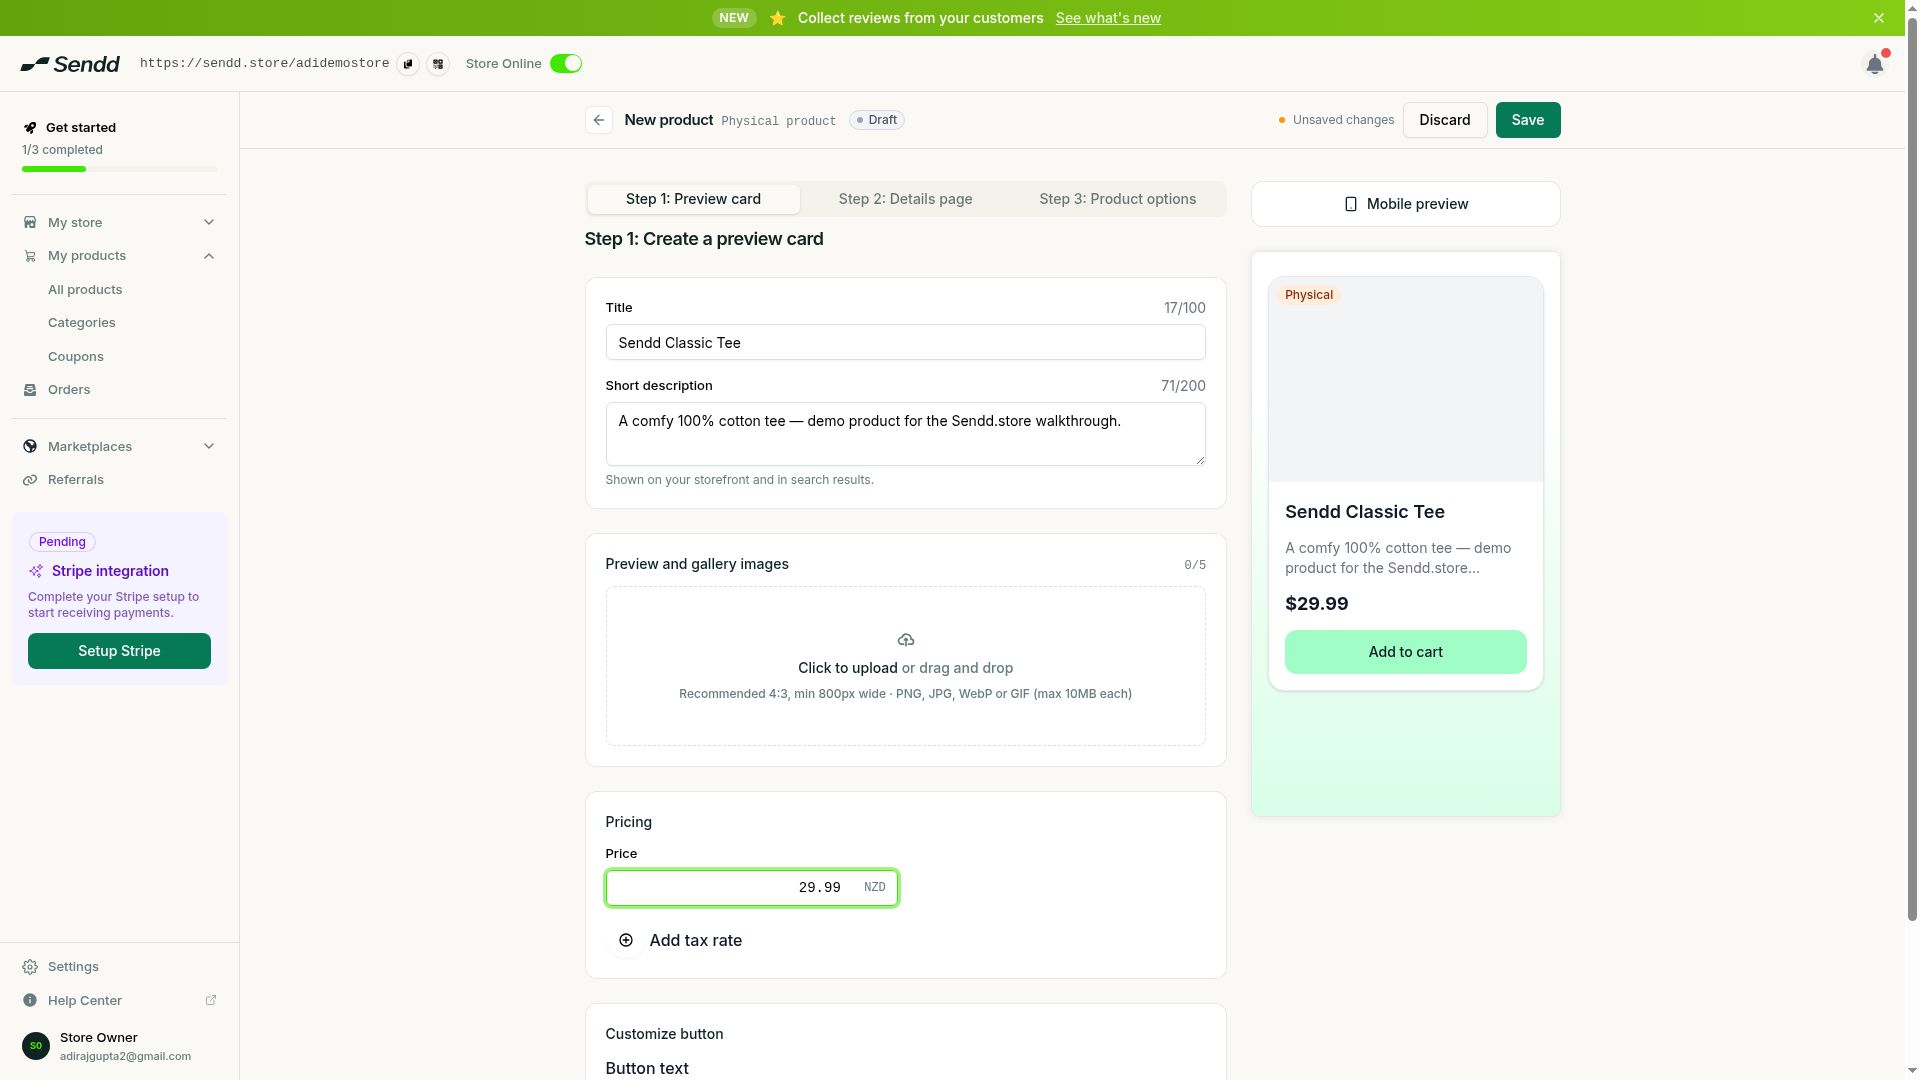 Step 1: the storefront preview card.
 -
Move to Step 2, Details page, and write a
Detailed description. -
Set up
Stock and variationsif relevant to your product. -
Review your
Sendd Marketplacessettings to control discoverability.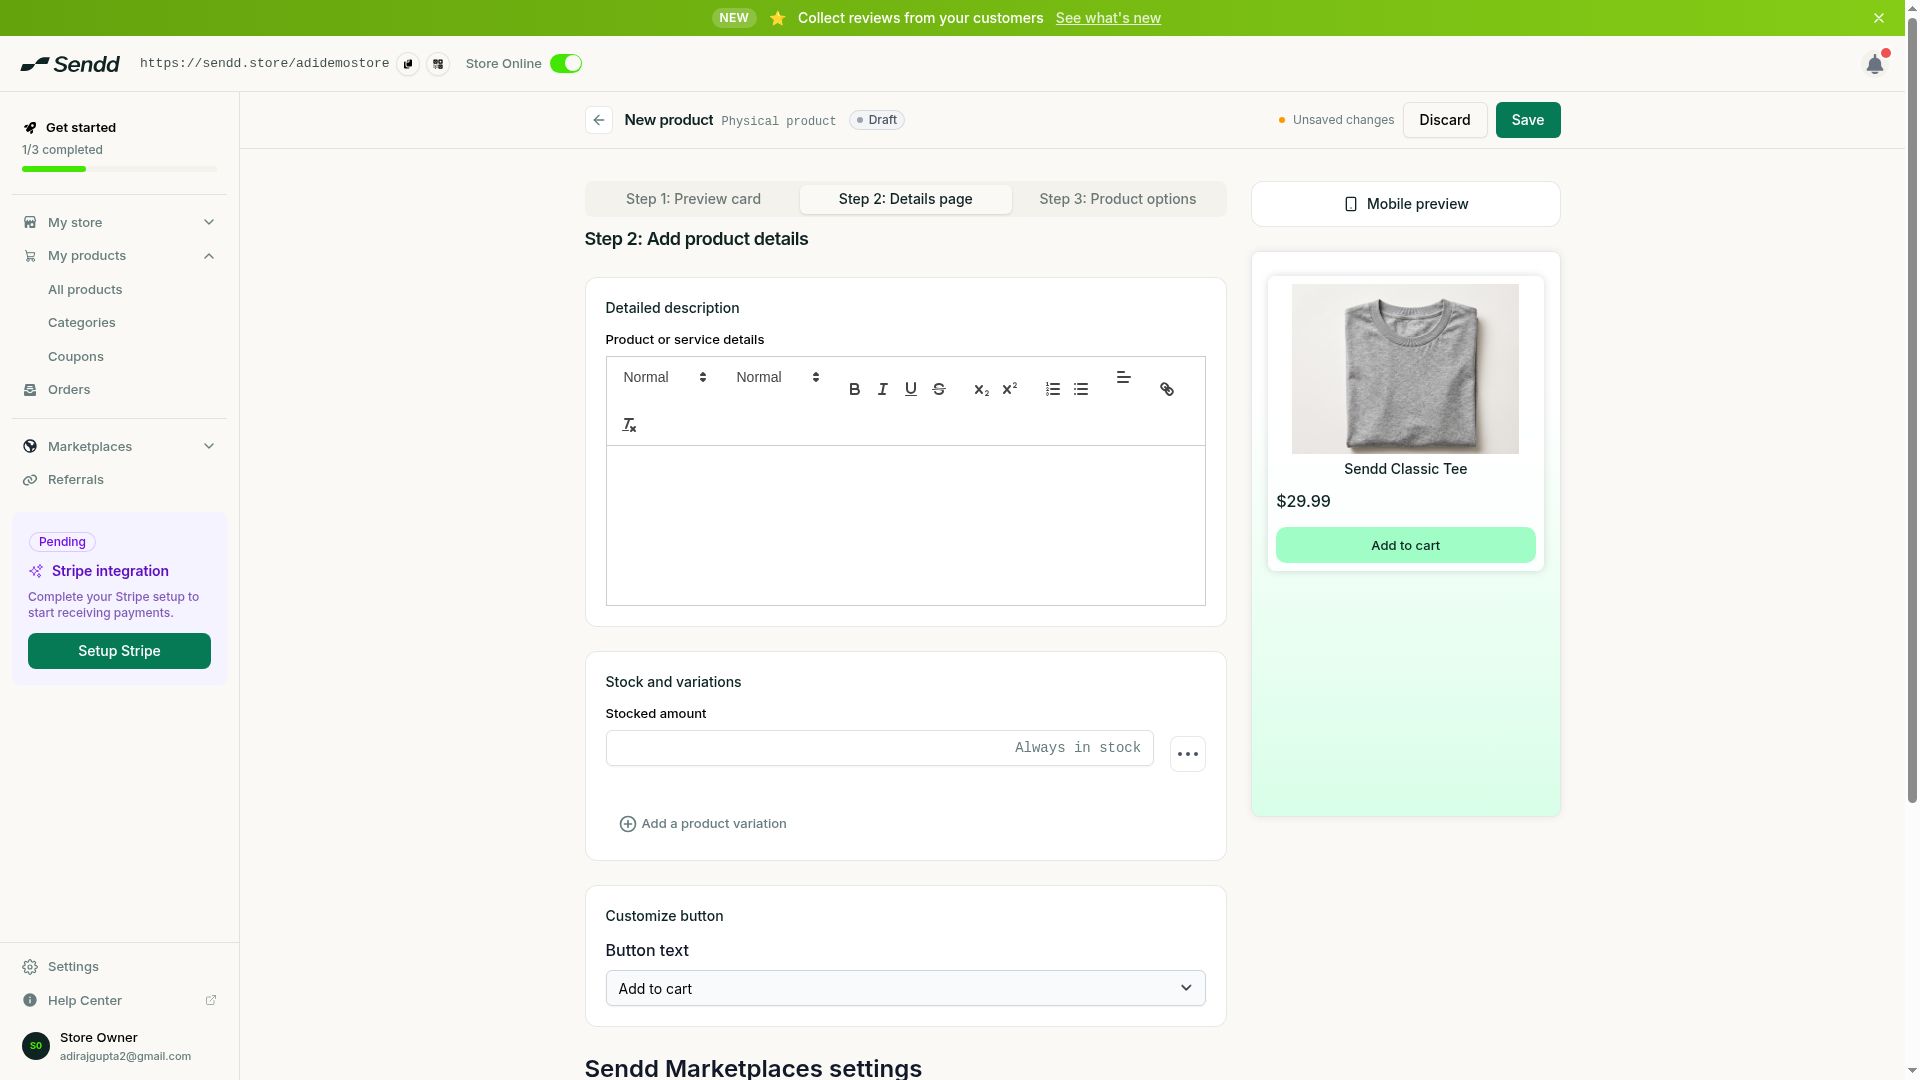 Step 2: detailed description, stock and marketplace settings.
 -
Move to Step 3, Product options, and toggle on
FAQs,Form collectionorShipping, delivery and pickupas needed. -
Select
Publishto make the product live, or selectSave as draftto finish later.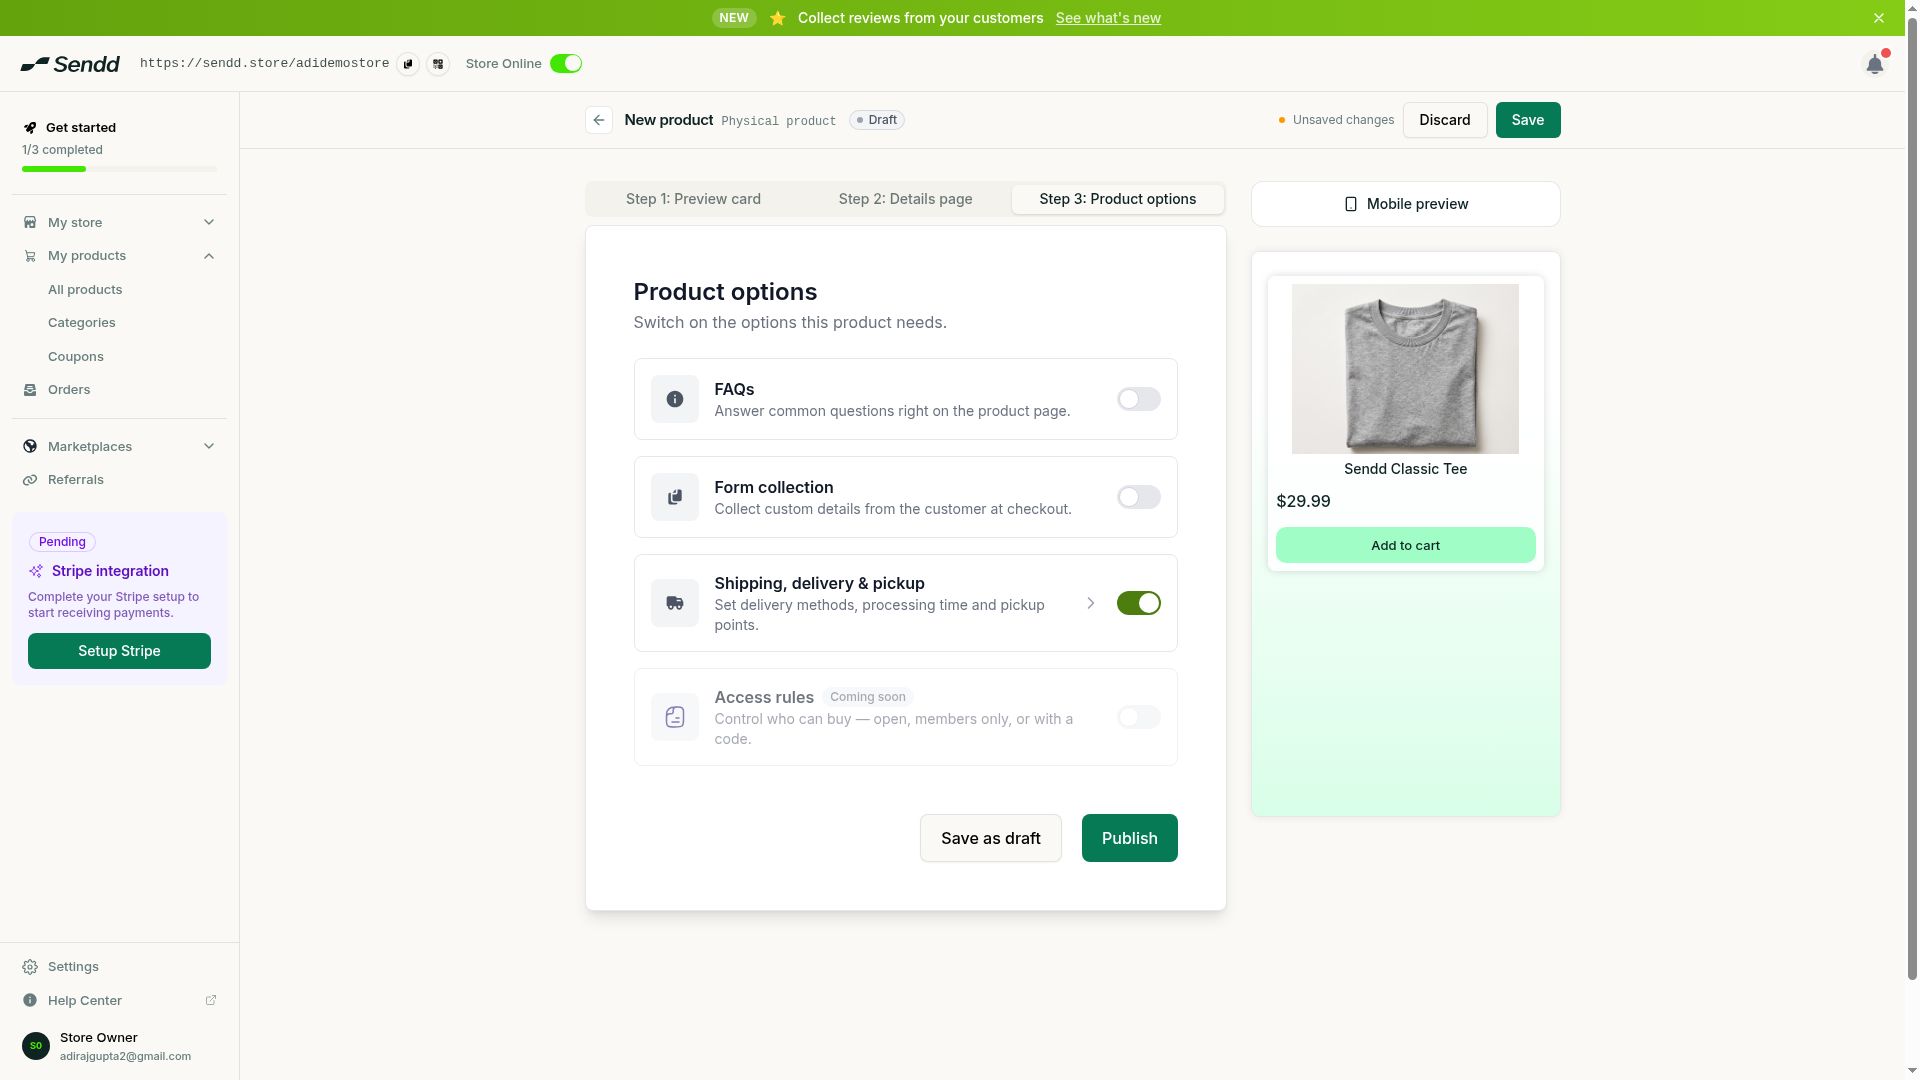 Step 3: product options, then publish.
Understanding the steps and fields
Step 1, the Preview card, is what shoppers see first on your storefront grid: the title, short description, gallery images and price. Step 2, the Details page, is where you go deeper with a full description, stock and variation options (like sizes or colours) and your Sendd Marketplaces settings, which control whether your product can be discovered beyond your own storefront. Step 3, Product options, lets you add FAQs to answer common questions upfront, collect extra information from buyers with Form collection, and configure Shipping, delivery and pickup if the product needs to physically reach the customer. A live mobile preview updates throughout so you always know how your product card looks.
Use-case examples
- A seller building a candle line uploads four gallery images per scent, writes a short and detailed description, sets stock per variation, then publishes.
- A coach creating a coaching call adds a price, toggles on Form collection to gather the client’s goals before the call, then publishes without any shipping settings.
- A store owner testing a new idea fills in Step 1 and Step 2, then selects Save as draft to finish the product options later before Stripe is even connected.
Tip. Fill in Step 1 with your best product photo first. Since it is what shoppers see in your storefront grid, a strong preview image does more to drive clicks than anything else on the card.
Note. You can build and publish a product before connecting Stripe, but it will only become sellable once Stripe is connected to your store.
Frequently asked questions
What product types can I choose from on Sendd?
Sendd supports many product types, including physical products, digital products, subscriptions, event tickets, rentals, custom price, enquiry, link products and menu items, all built on the same three-step builder.
Do all product types use the same builder?
Yes, every product type follows the same Step 1 Preview card, Step 2 Details page and Step 3 Product options flow.
What image size should I use for my product gallery?
Use a 4:3 aspect ratio with images at least 800px wide for the sharpest result on your storefront.
Can I create a free product?
Yes, set the Price field to 0 in Step 1 to list a free product.
What is Sendd Marketplaces in the product builder?
It is a setting in Step 2, Details page, that controls whether your product can be discovered through Sendd Marketplaces beyond your own storefront.
What does the Form collection option do in Step 3?
Form collection lets you gather extra information from buyers at checkout, useful for services or customizable products.
Can I save a product without publishing it?
Yes, select Save as draft at the end of Step 3 to keep working on it later instead of publishing right away.
Why can I not sell my product yet after publishing?
Products can only be sold once Stripe is connected to your store, even after they are published.
Next steps. If you are shipping something to customers, read How to sell physical products on Sendd. Selling files or courses instead? See How to sell digital products on Sendd.
Related articles