Payments
Set up Stripe payments on Sendd.store💵
Learn how to set-up Stripe on your Sendd Store
Setting Up Payments with Stripe
In this tutorial, we’ll show you how to connect Stripe to your **Sendd.store** so you can start accepting payments and getting paid — all in just a few minutes.
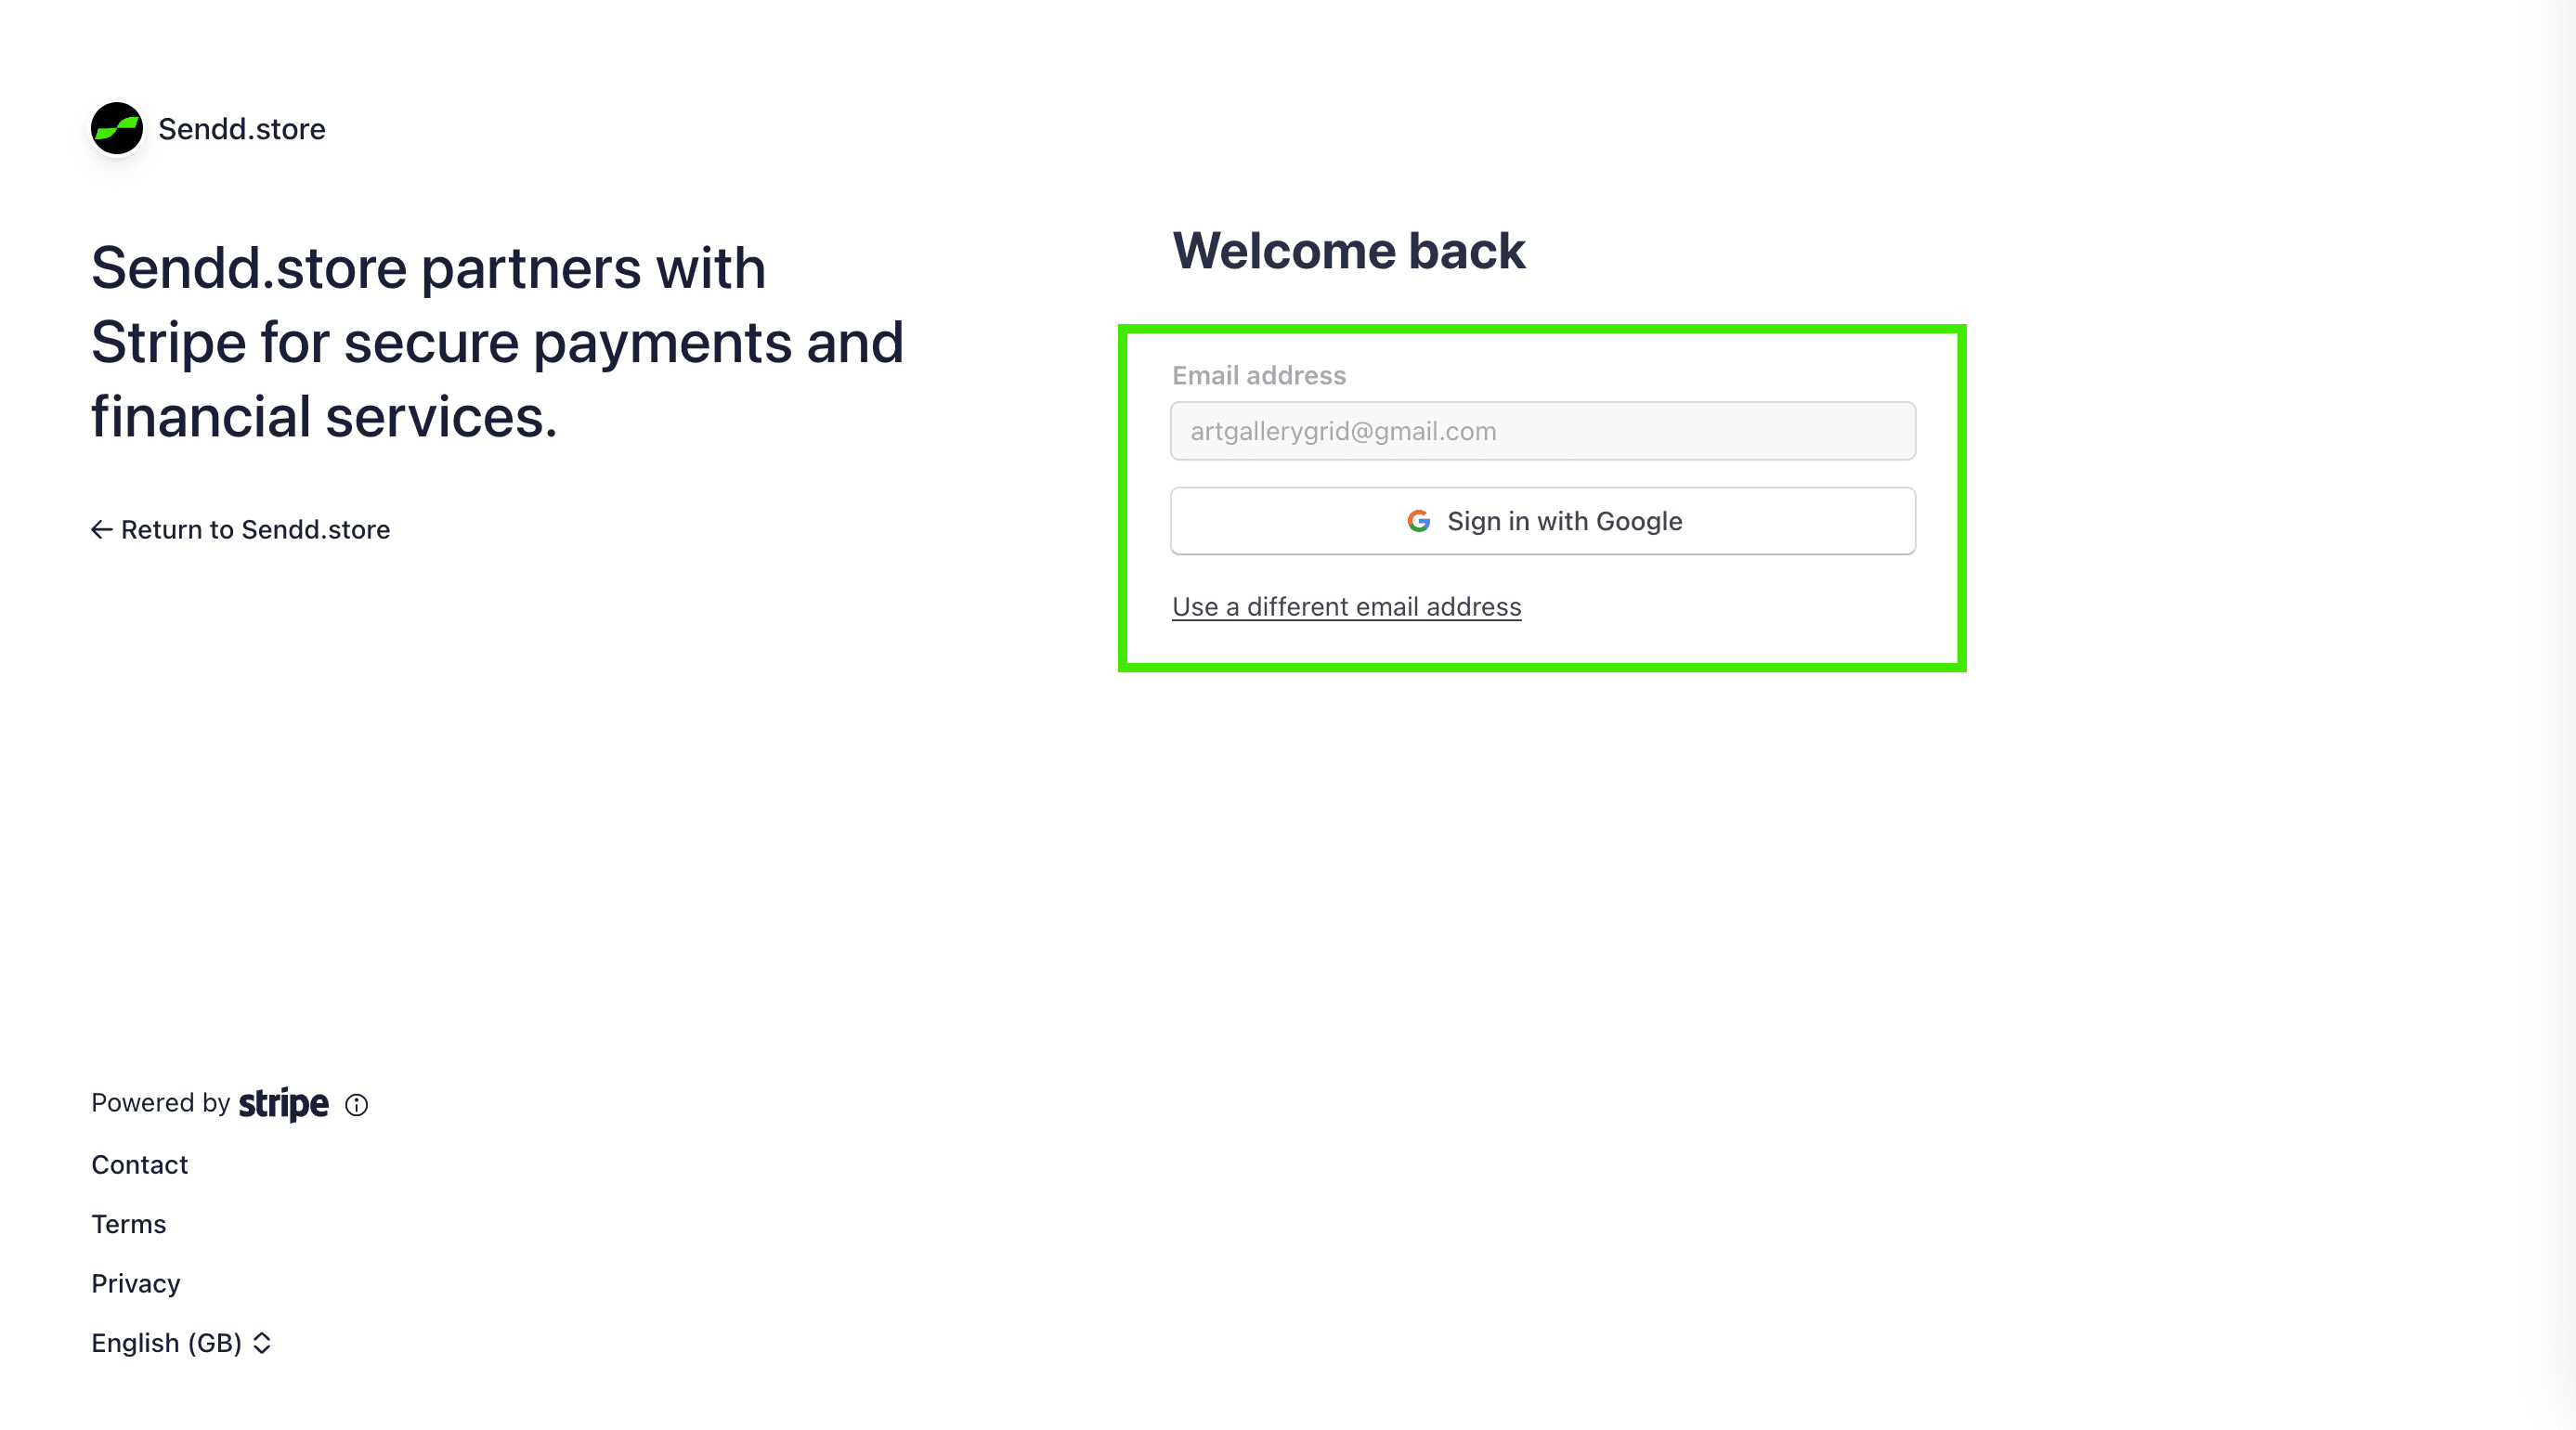
Go to **https://sendd.store** and sign in using your email and password, or click Sign in with Google for a faster login.
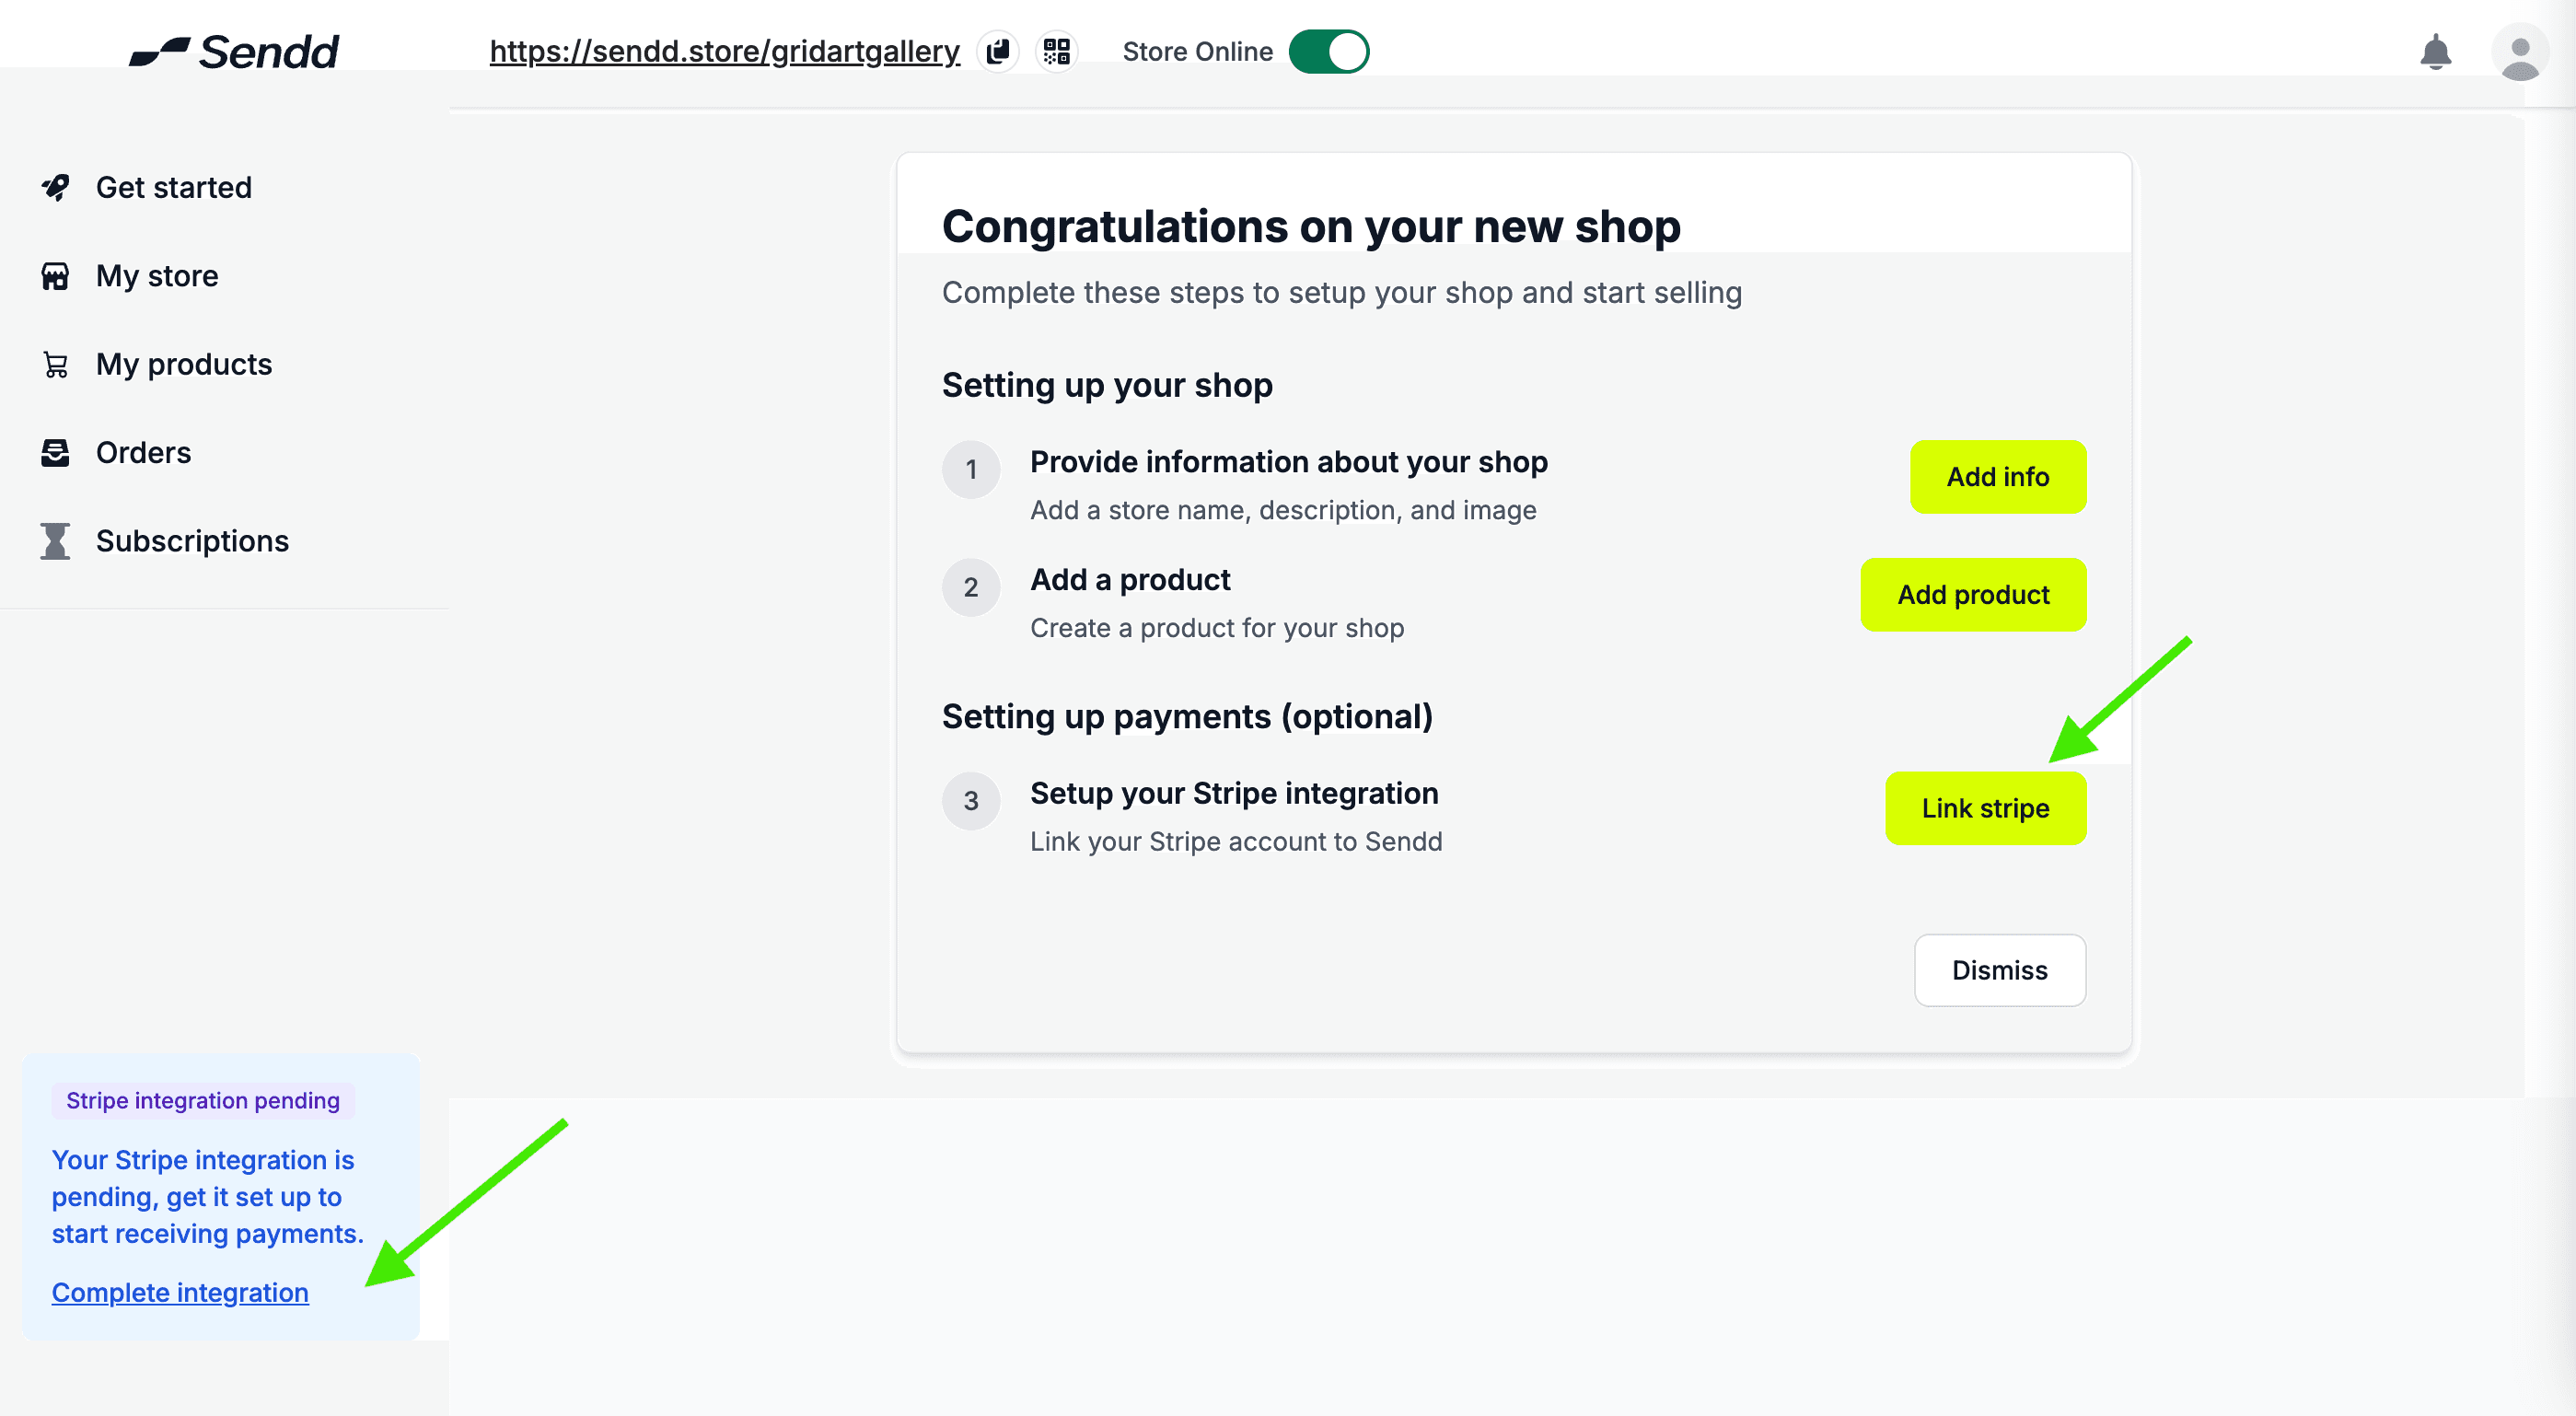
Once you’re logged in, head to your dashboard and look for the Stripe Integration Pending section.
Click Complete Integration (or Link Stripe) to begin connecting your Stripe account.
This will take you to Stripe’s secure onboarding flow.
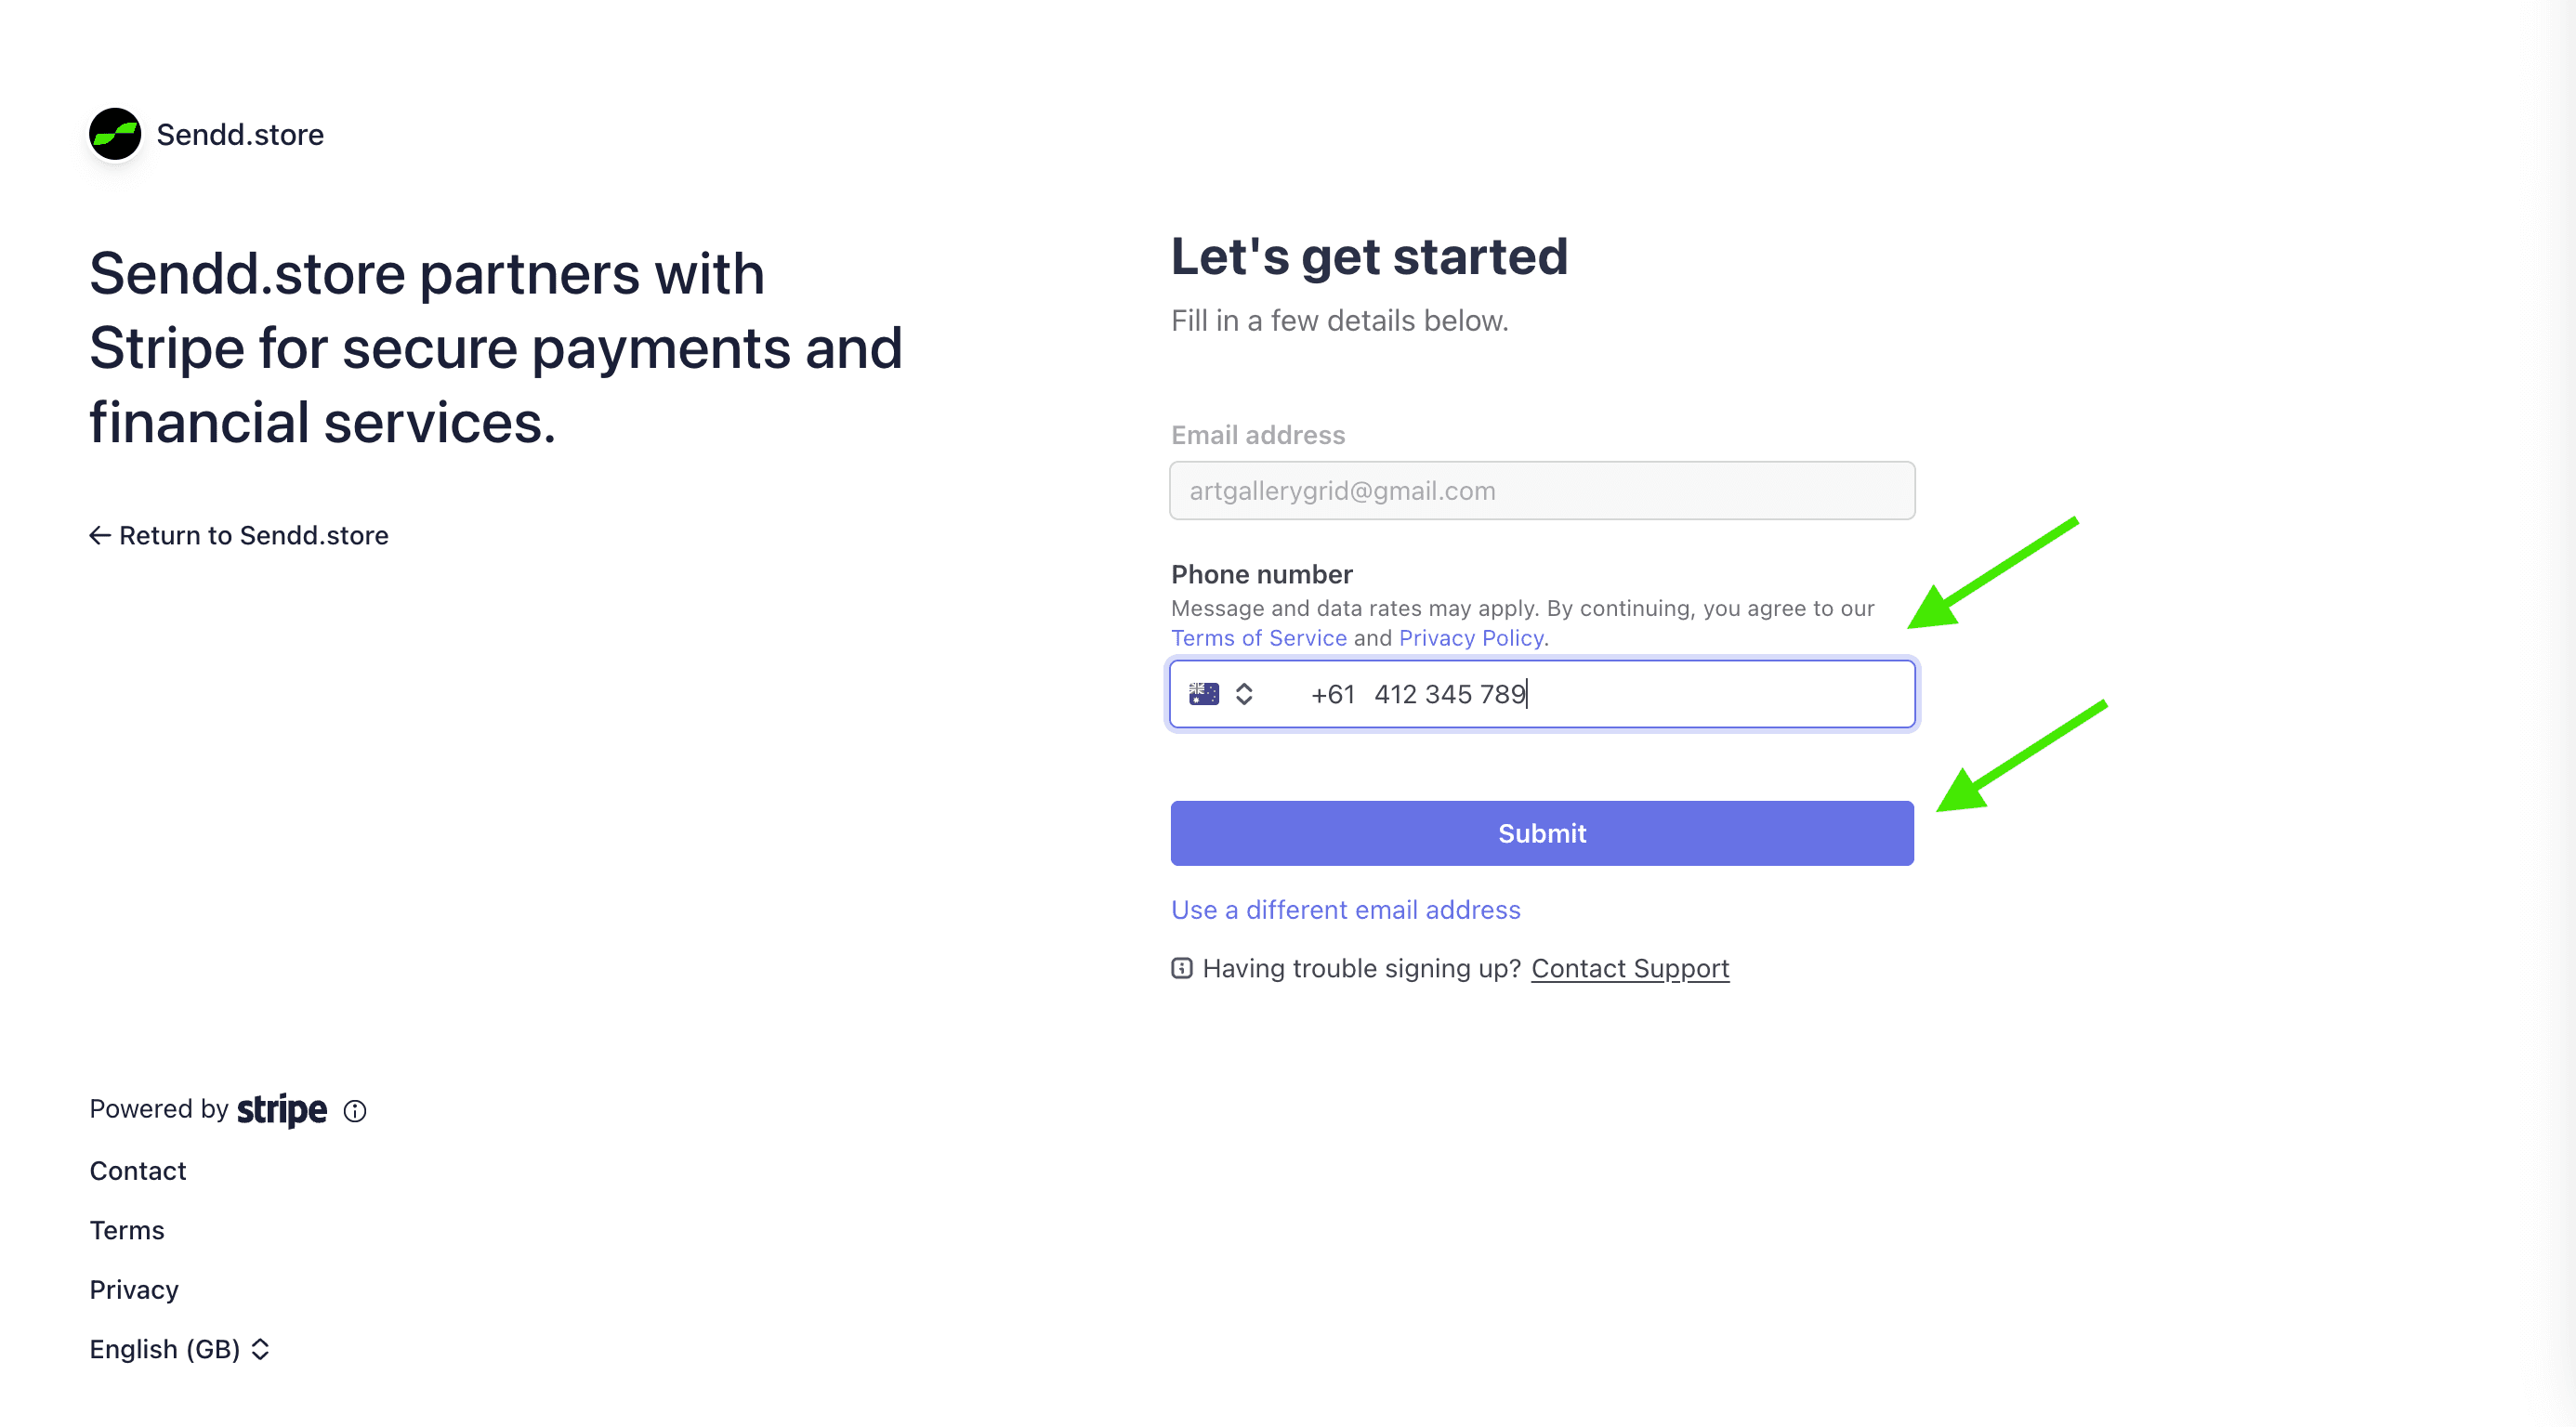
On the “Get started with Stripe” screen, enter your email and create a password, then click Submit.
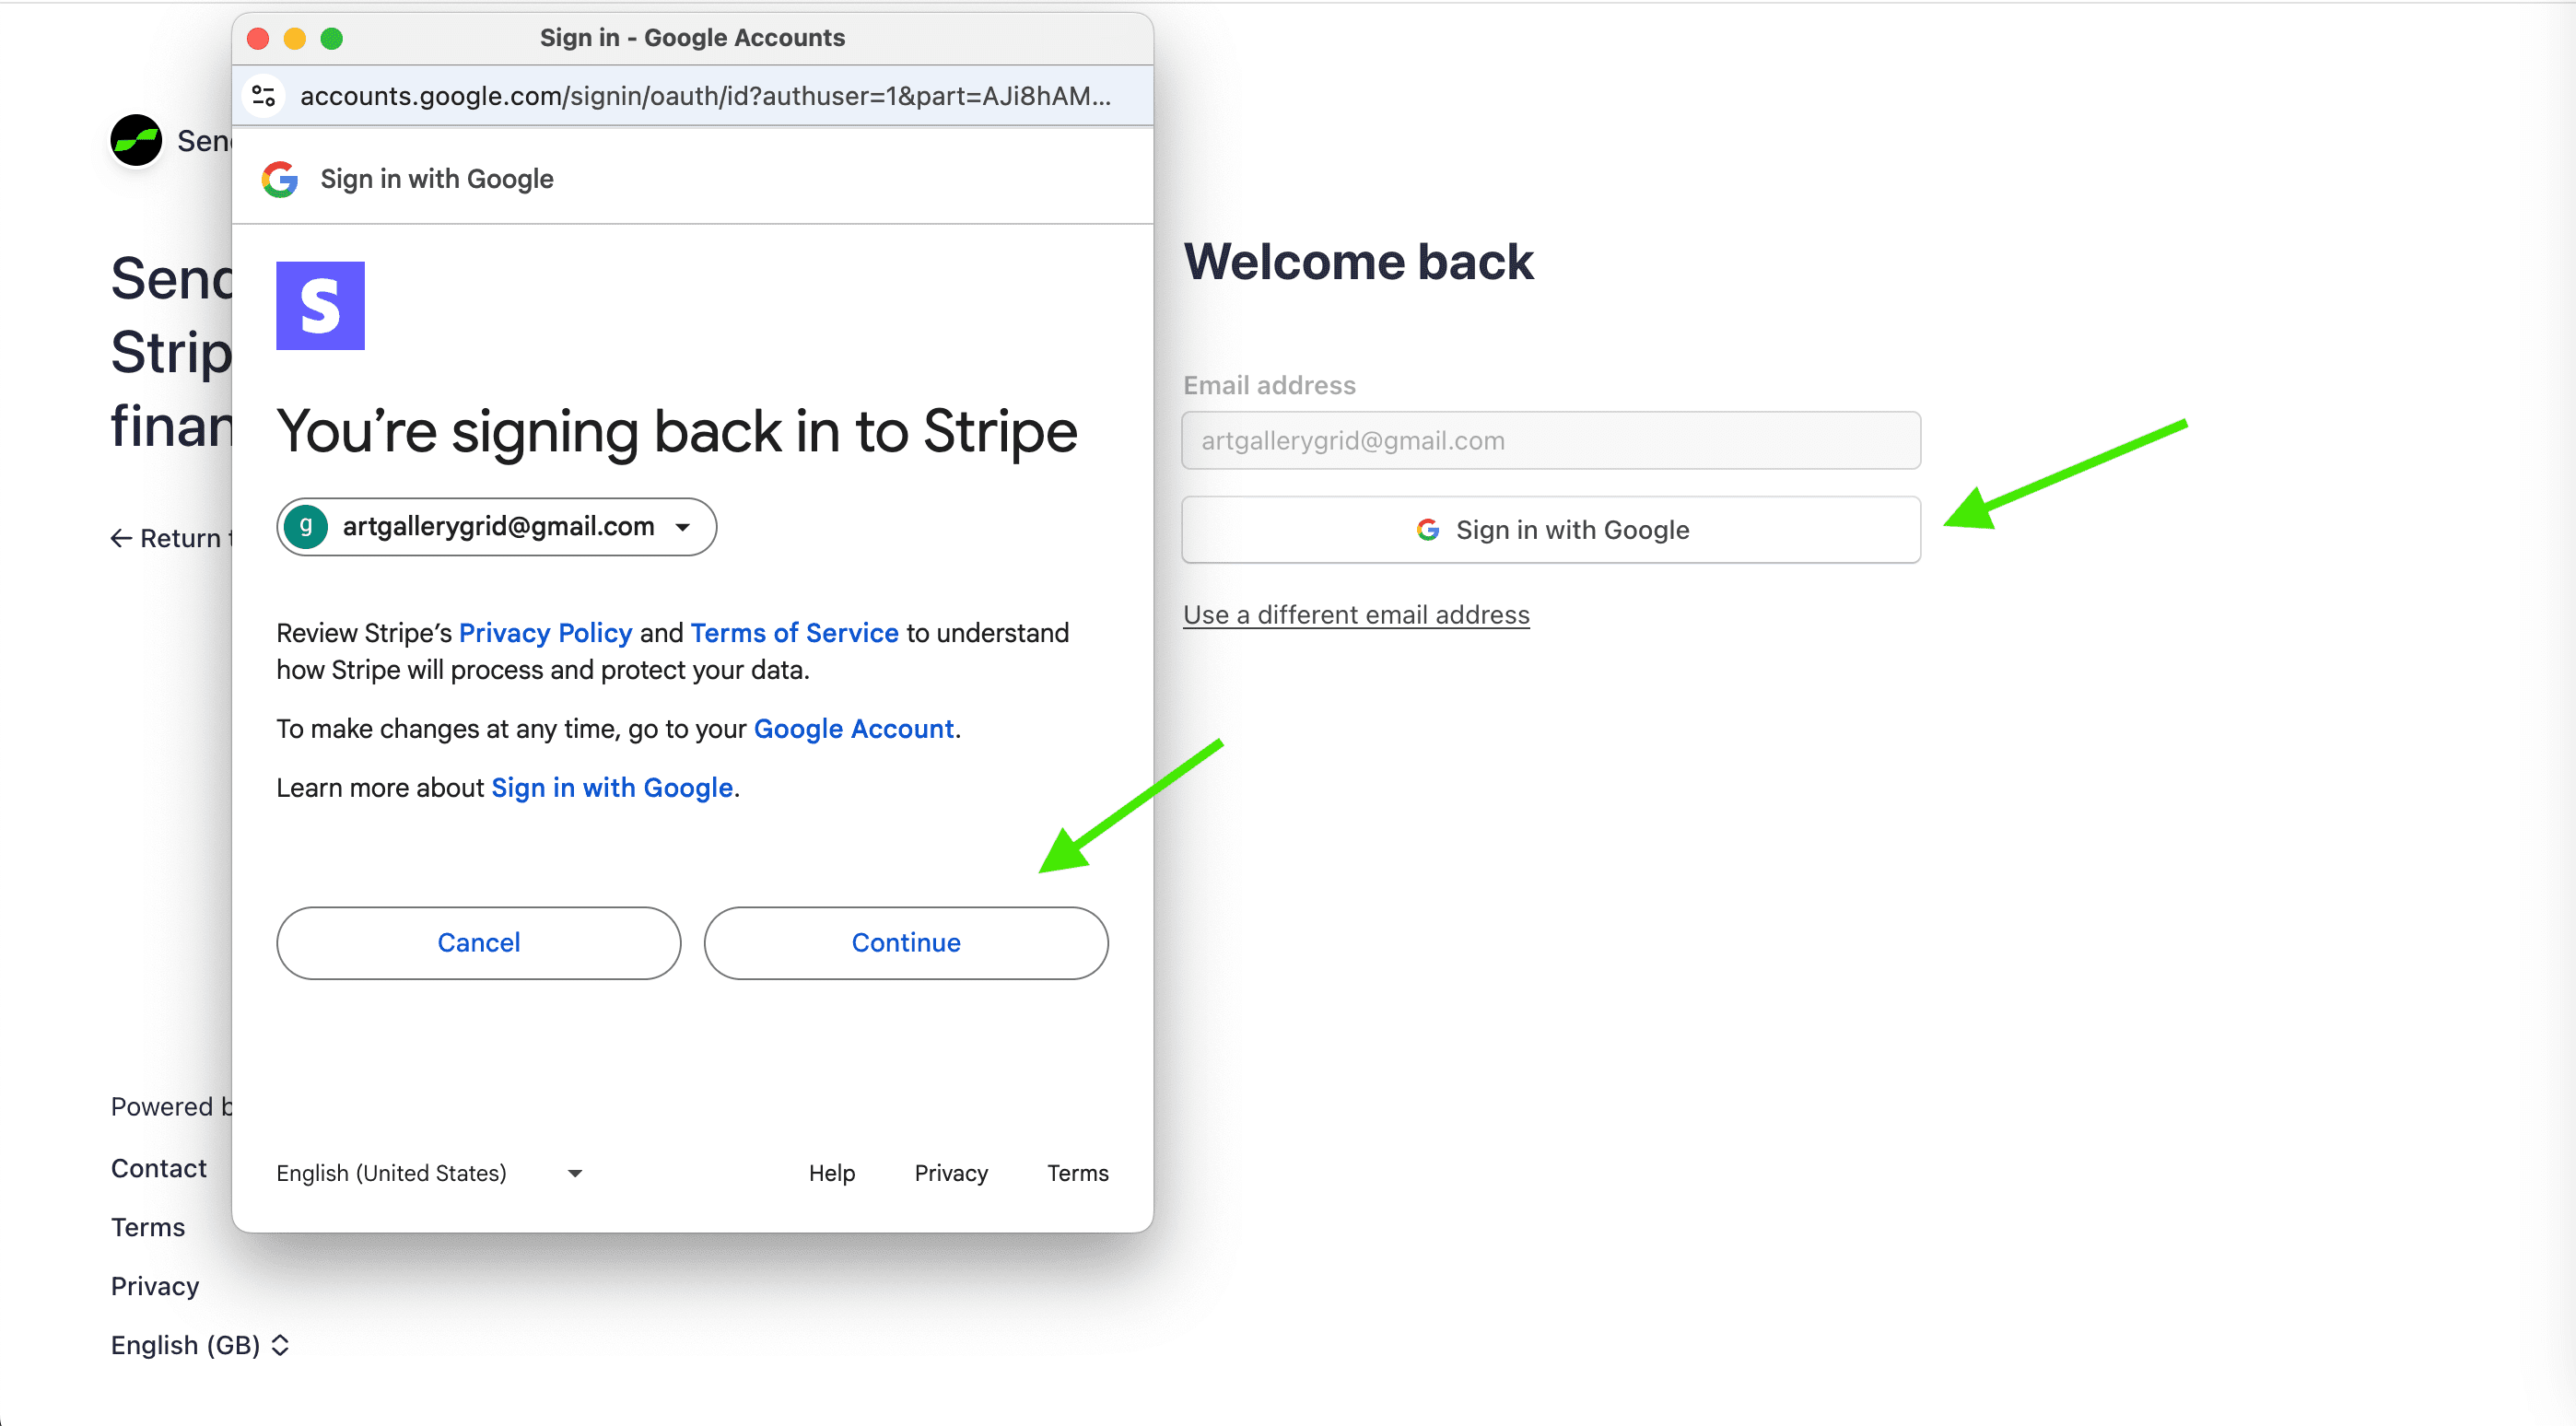
If you choose Google sign-in, select your Google account and click Continue to allow Stripe access.
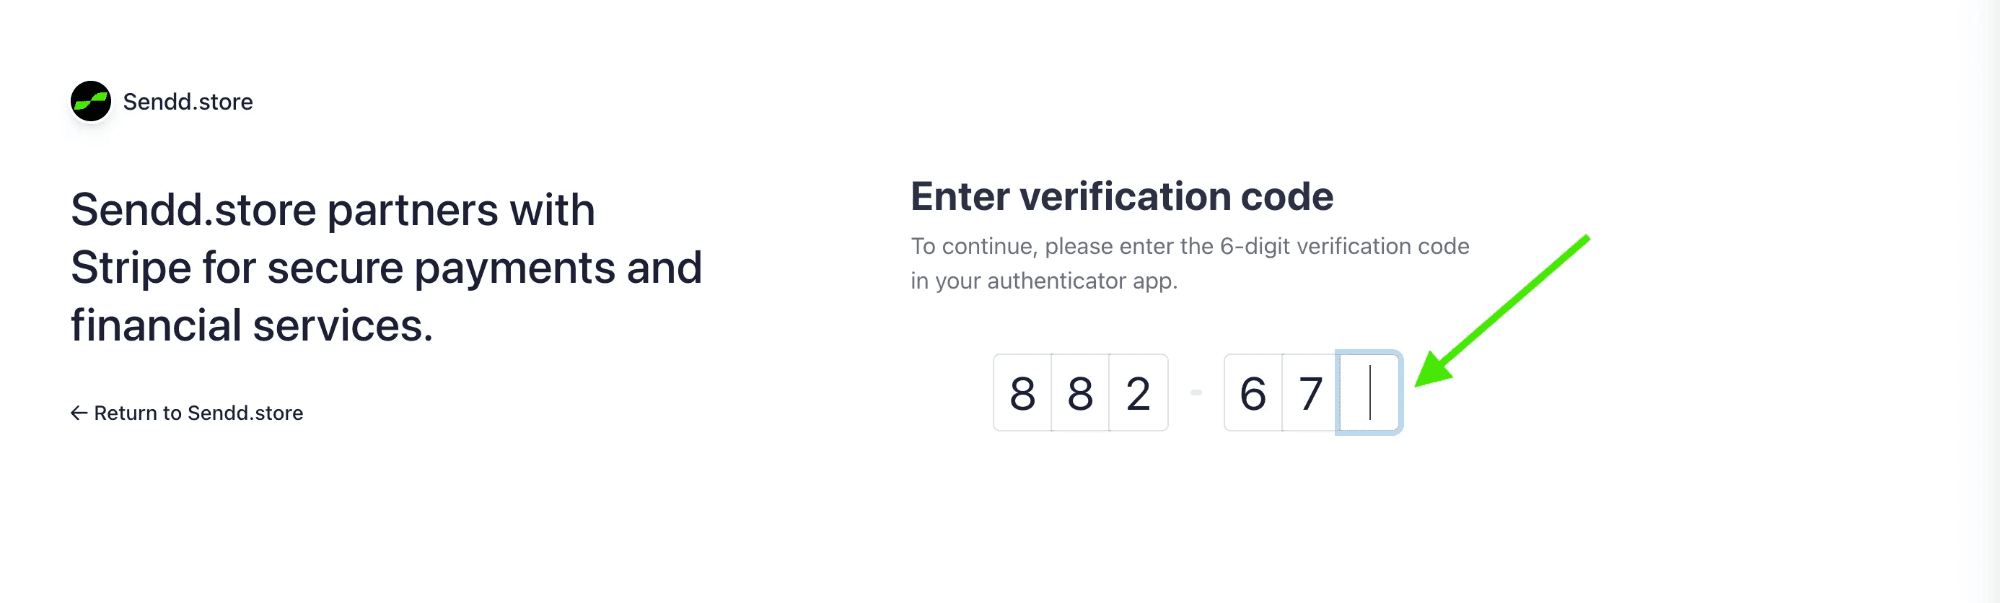
Open your authenticator app (such as Google Authenticator) and enter the 6-digit code shown for your Stripe account.
Once the code is entered, you’ll be taken to the next step automatically.
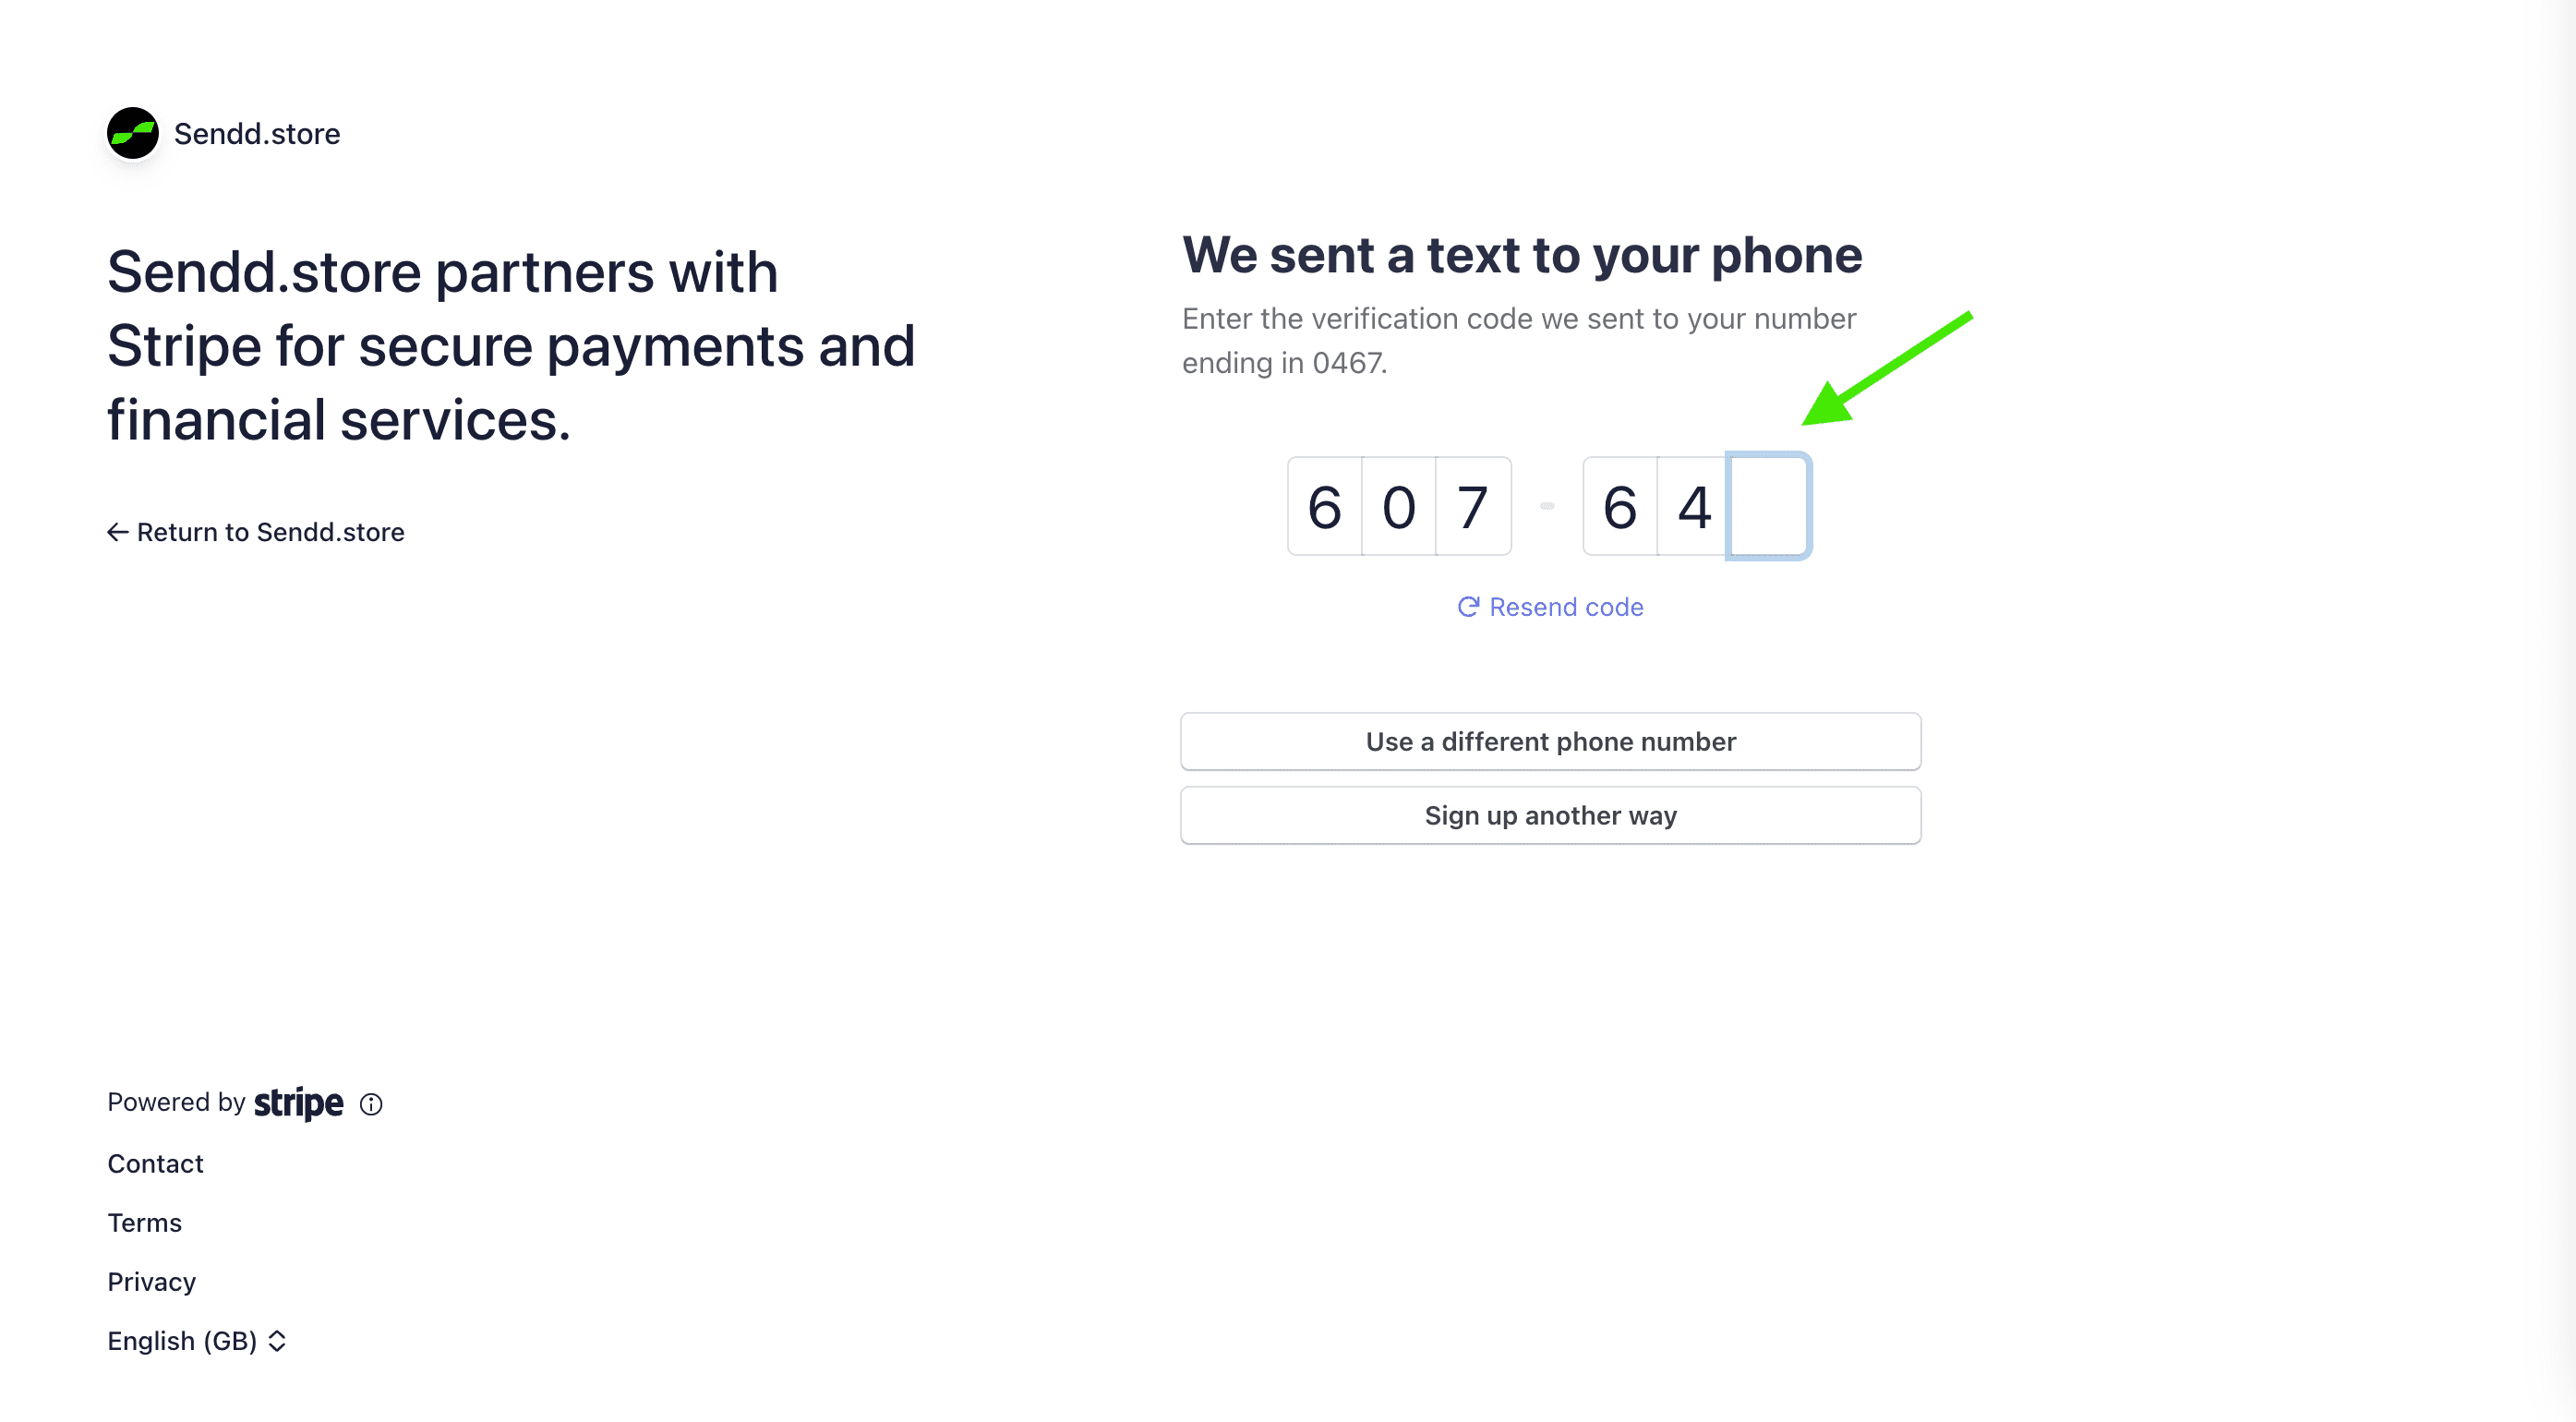
Stripe will send a 6-digit verification code to the phone number you entered.
Open the text message and enter the code on the screen to continue.
If you don’t receive the message, you can:
Click Resend code, or
Use a different phone number
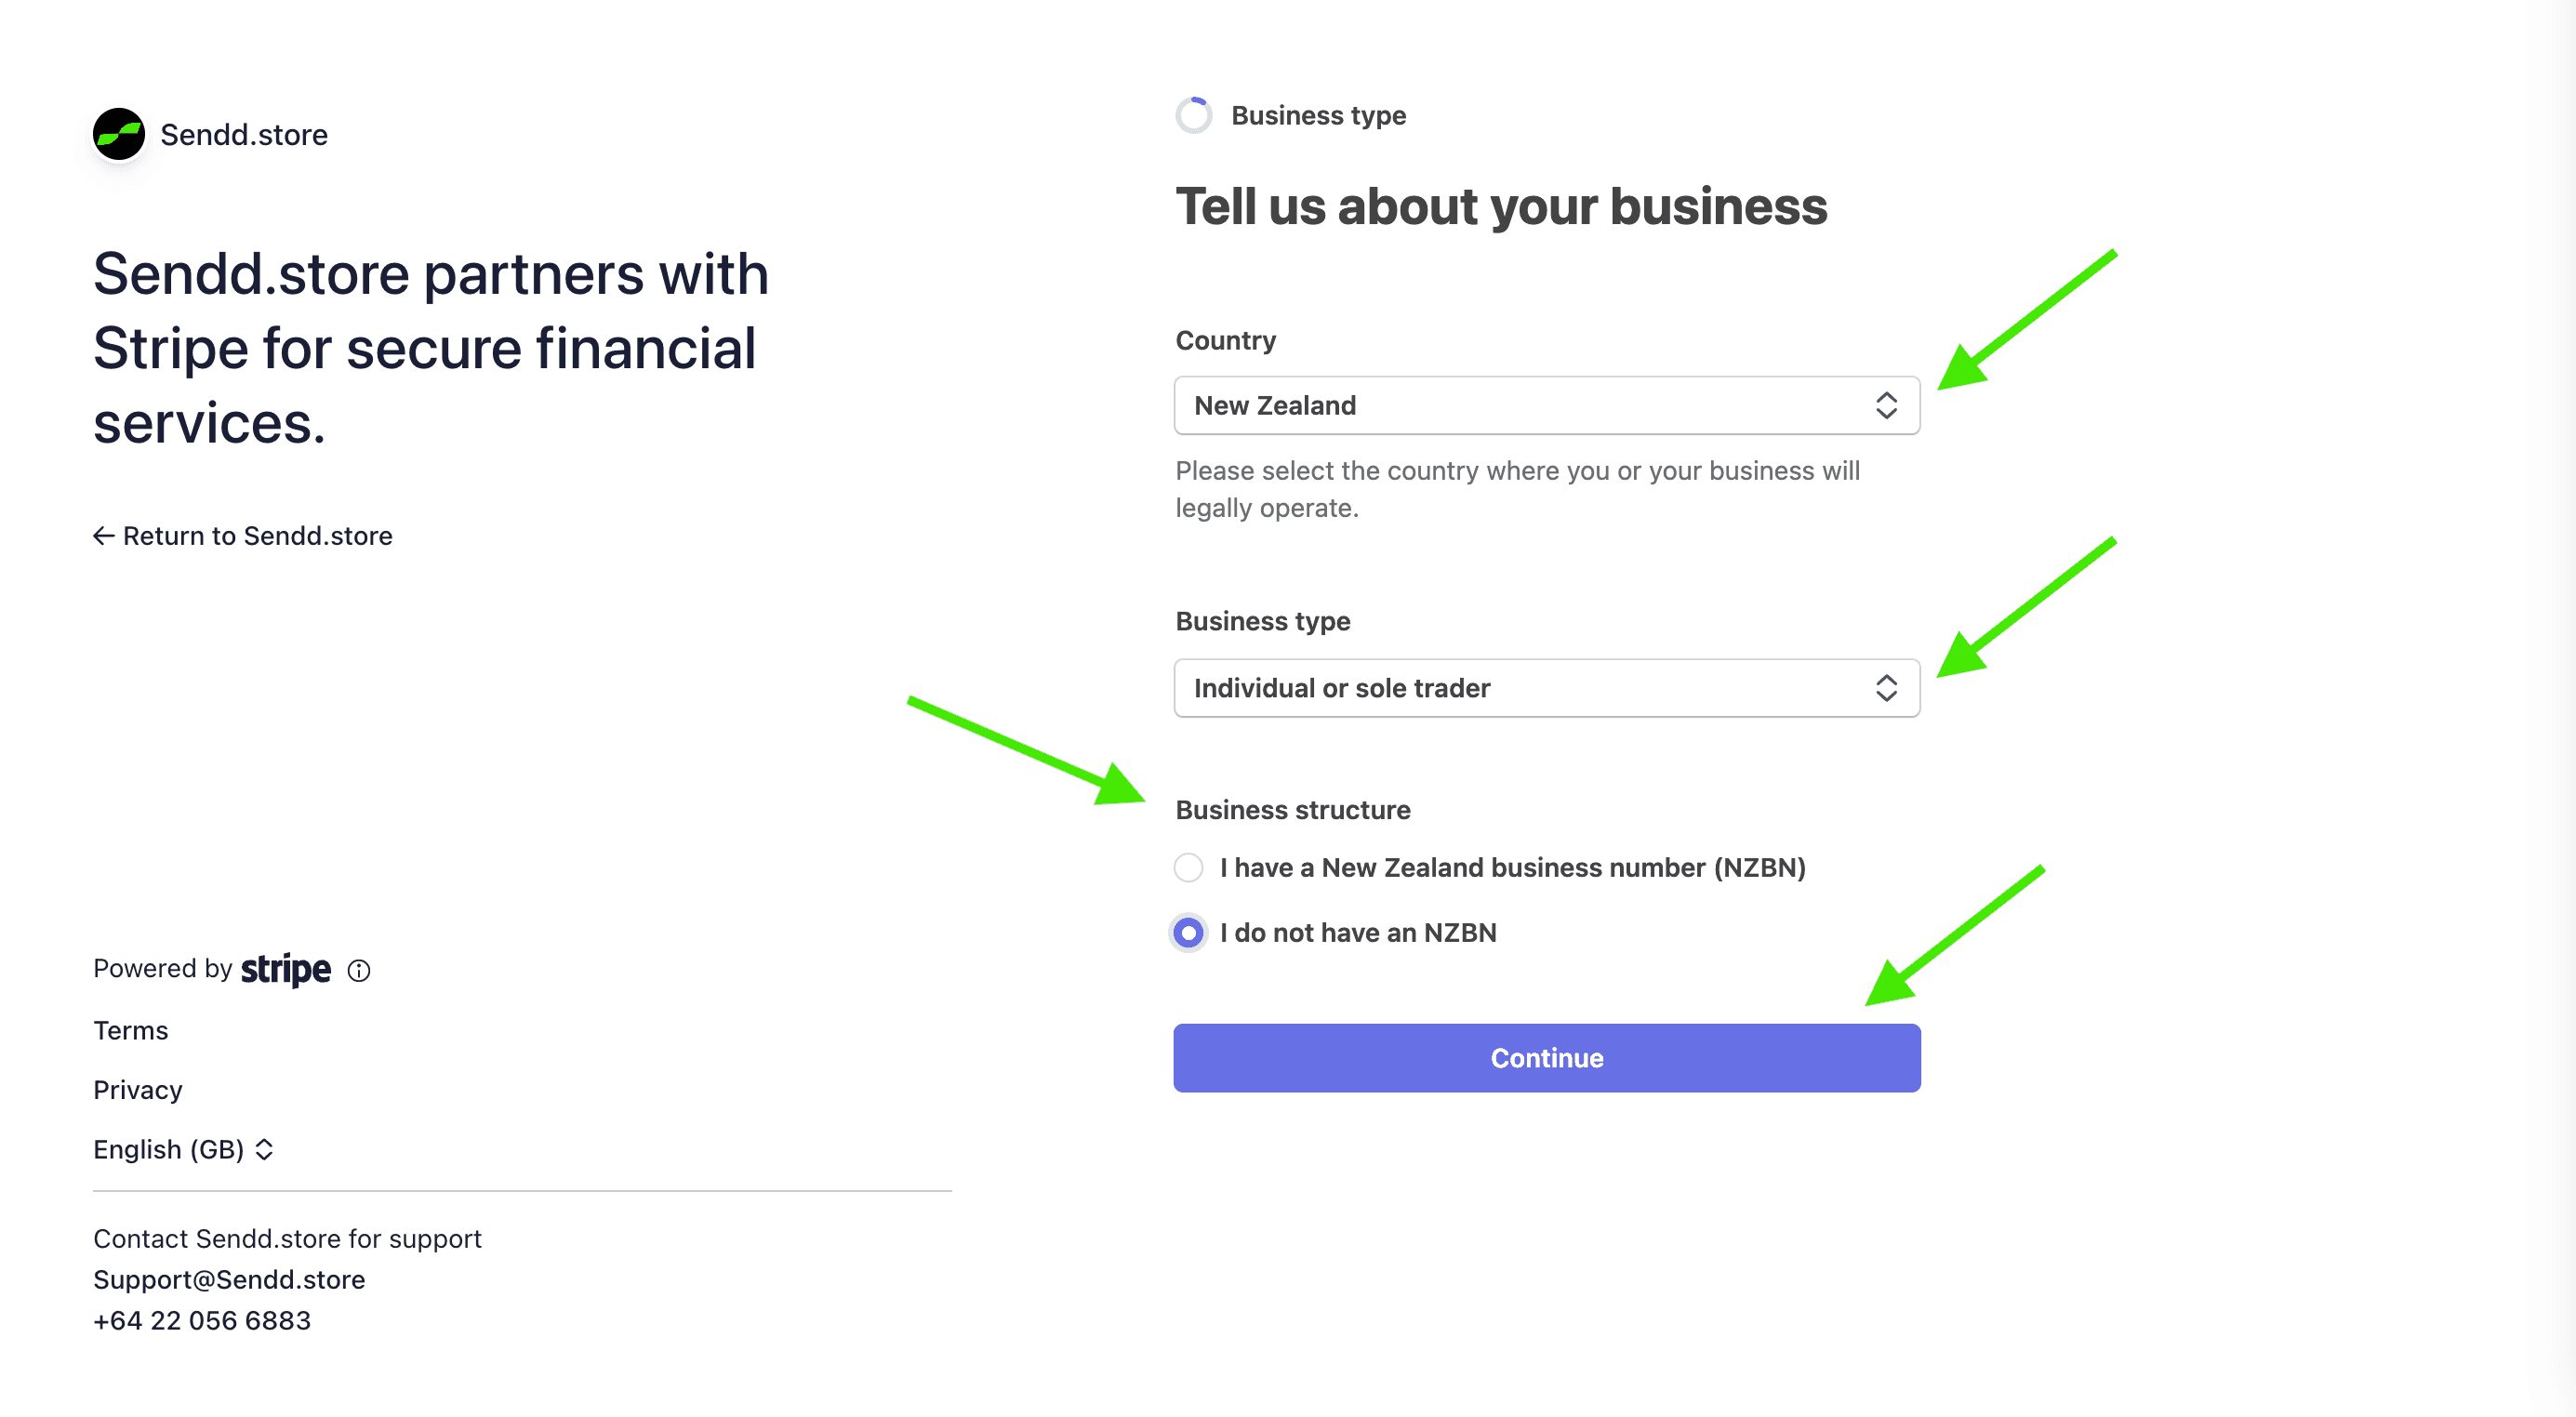
Stripe needs to know how your business is set up for legal and payout purposes.
First, select your Business location and Business type:
Individual / Sole Trader – One person running the business
Company – A registered company (e.g. LTD / PTY LTD)
Partnership – Two or more owners
Non-profit – A registered charity or trust
Not sure? Most creators and small sellers choose Individual / Sole Trader.
Select:
Your Business location
Your Business type (e.g. Individual or Sole Trader)
Next, confirm your business structure by selecting whether you have a New Zealand Business Number (NZBN).
Choose Yes if your business is officially registered
Choose No if you’re operating as an individual or informal business
Click Continue to proceed.
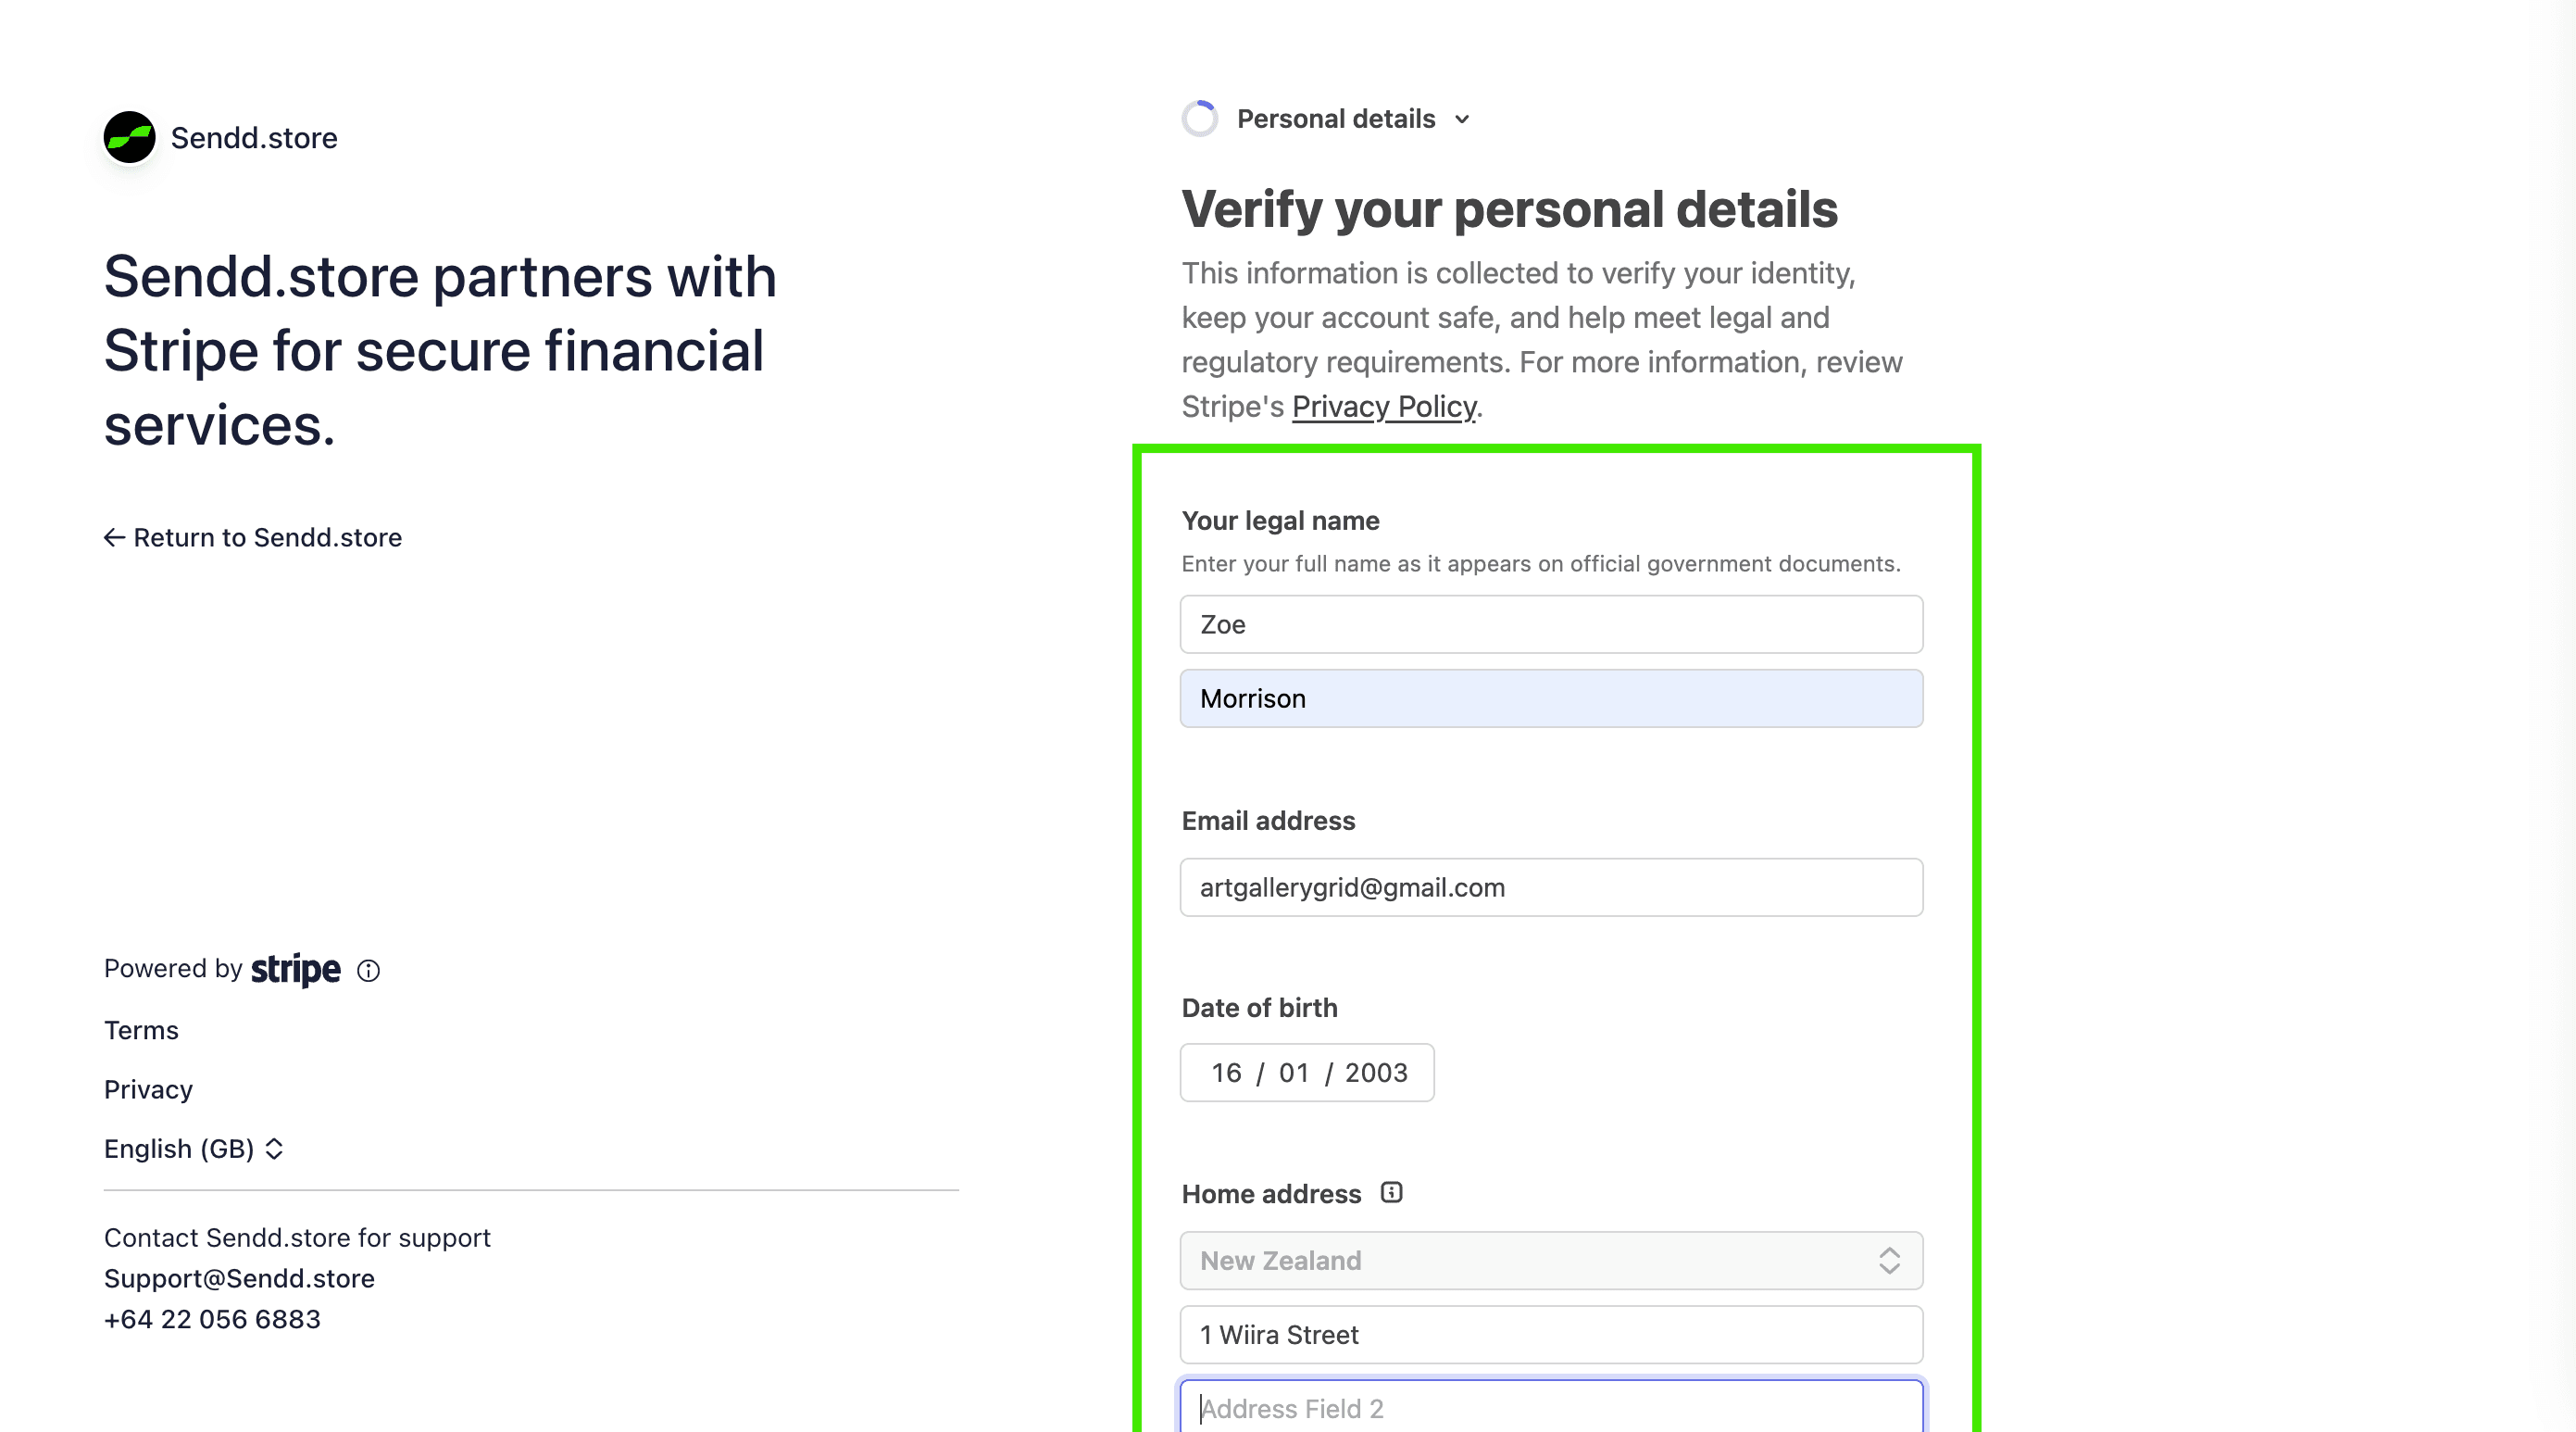
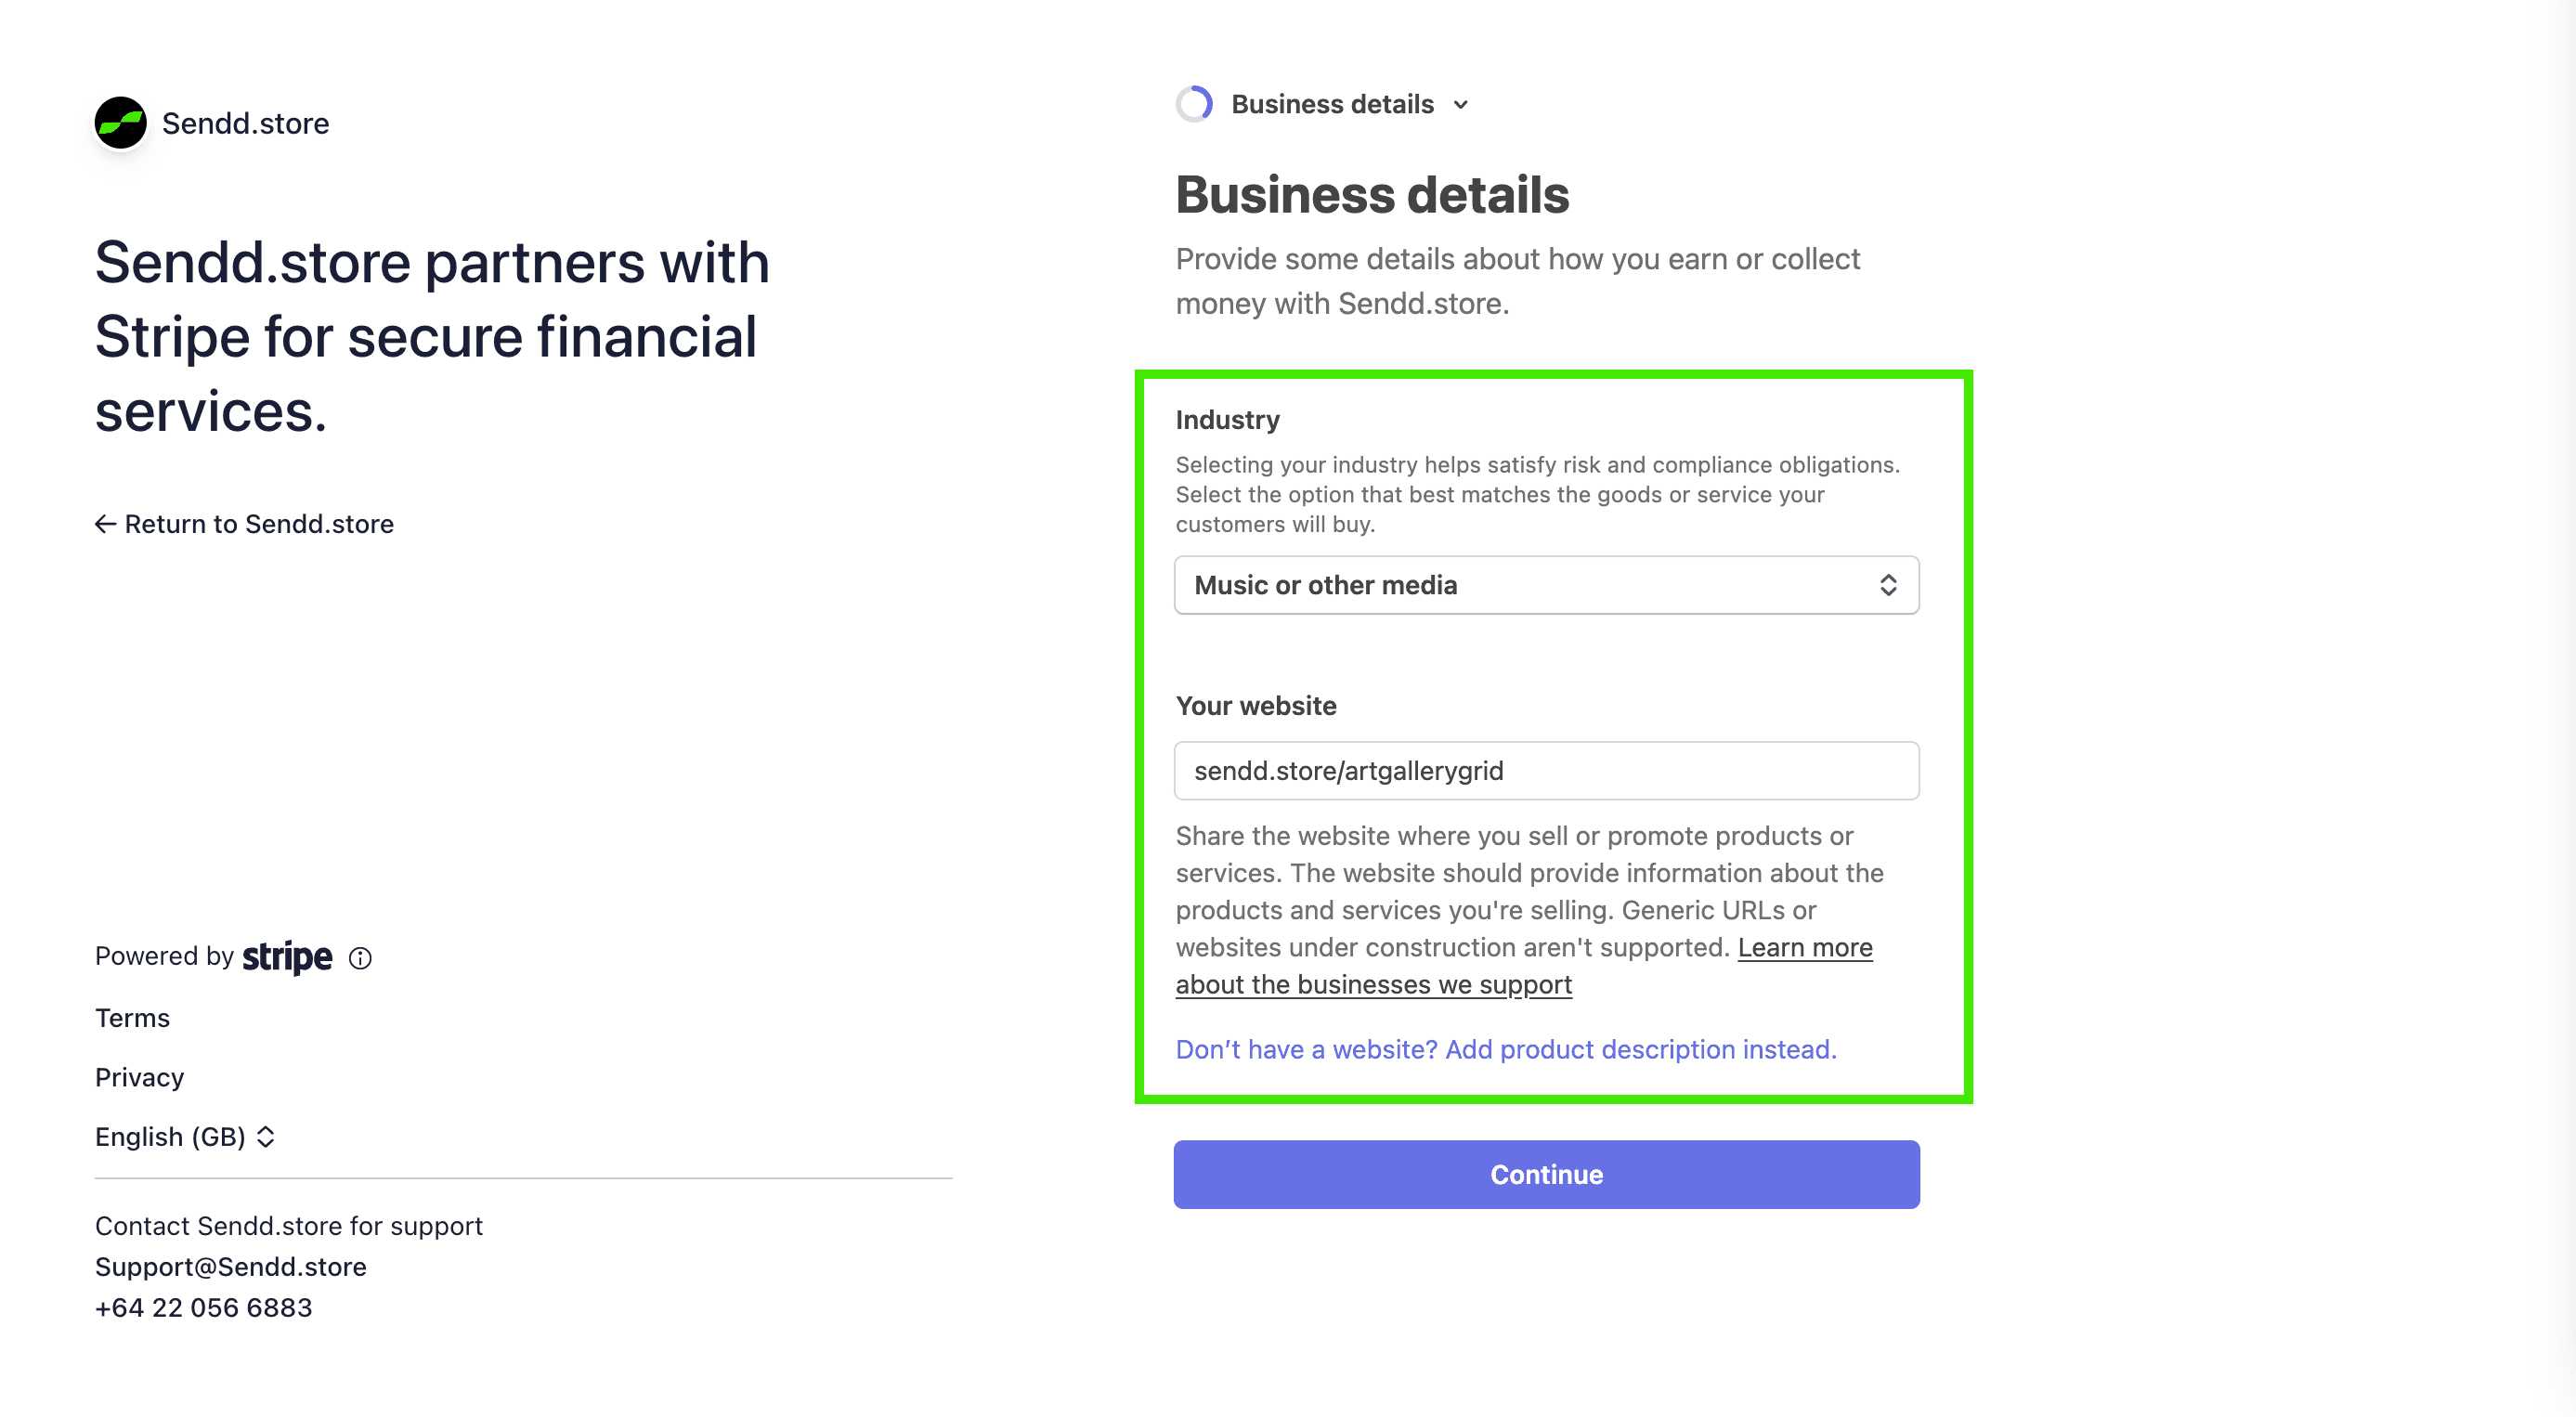
Stripe needs a few details to verify your identity and understand what you sell.
First, enter your personal information:
Legal name
Date of birth
Home address
Phone number
ID & home address verification
Next, describe your business:
Choose your industry
Add your website (your Sendd store link works perfectly)
Click Continue to proceed.
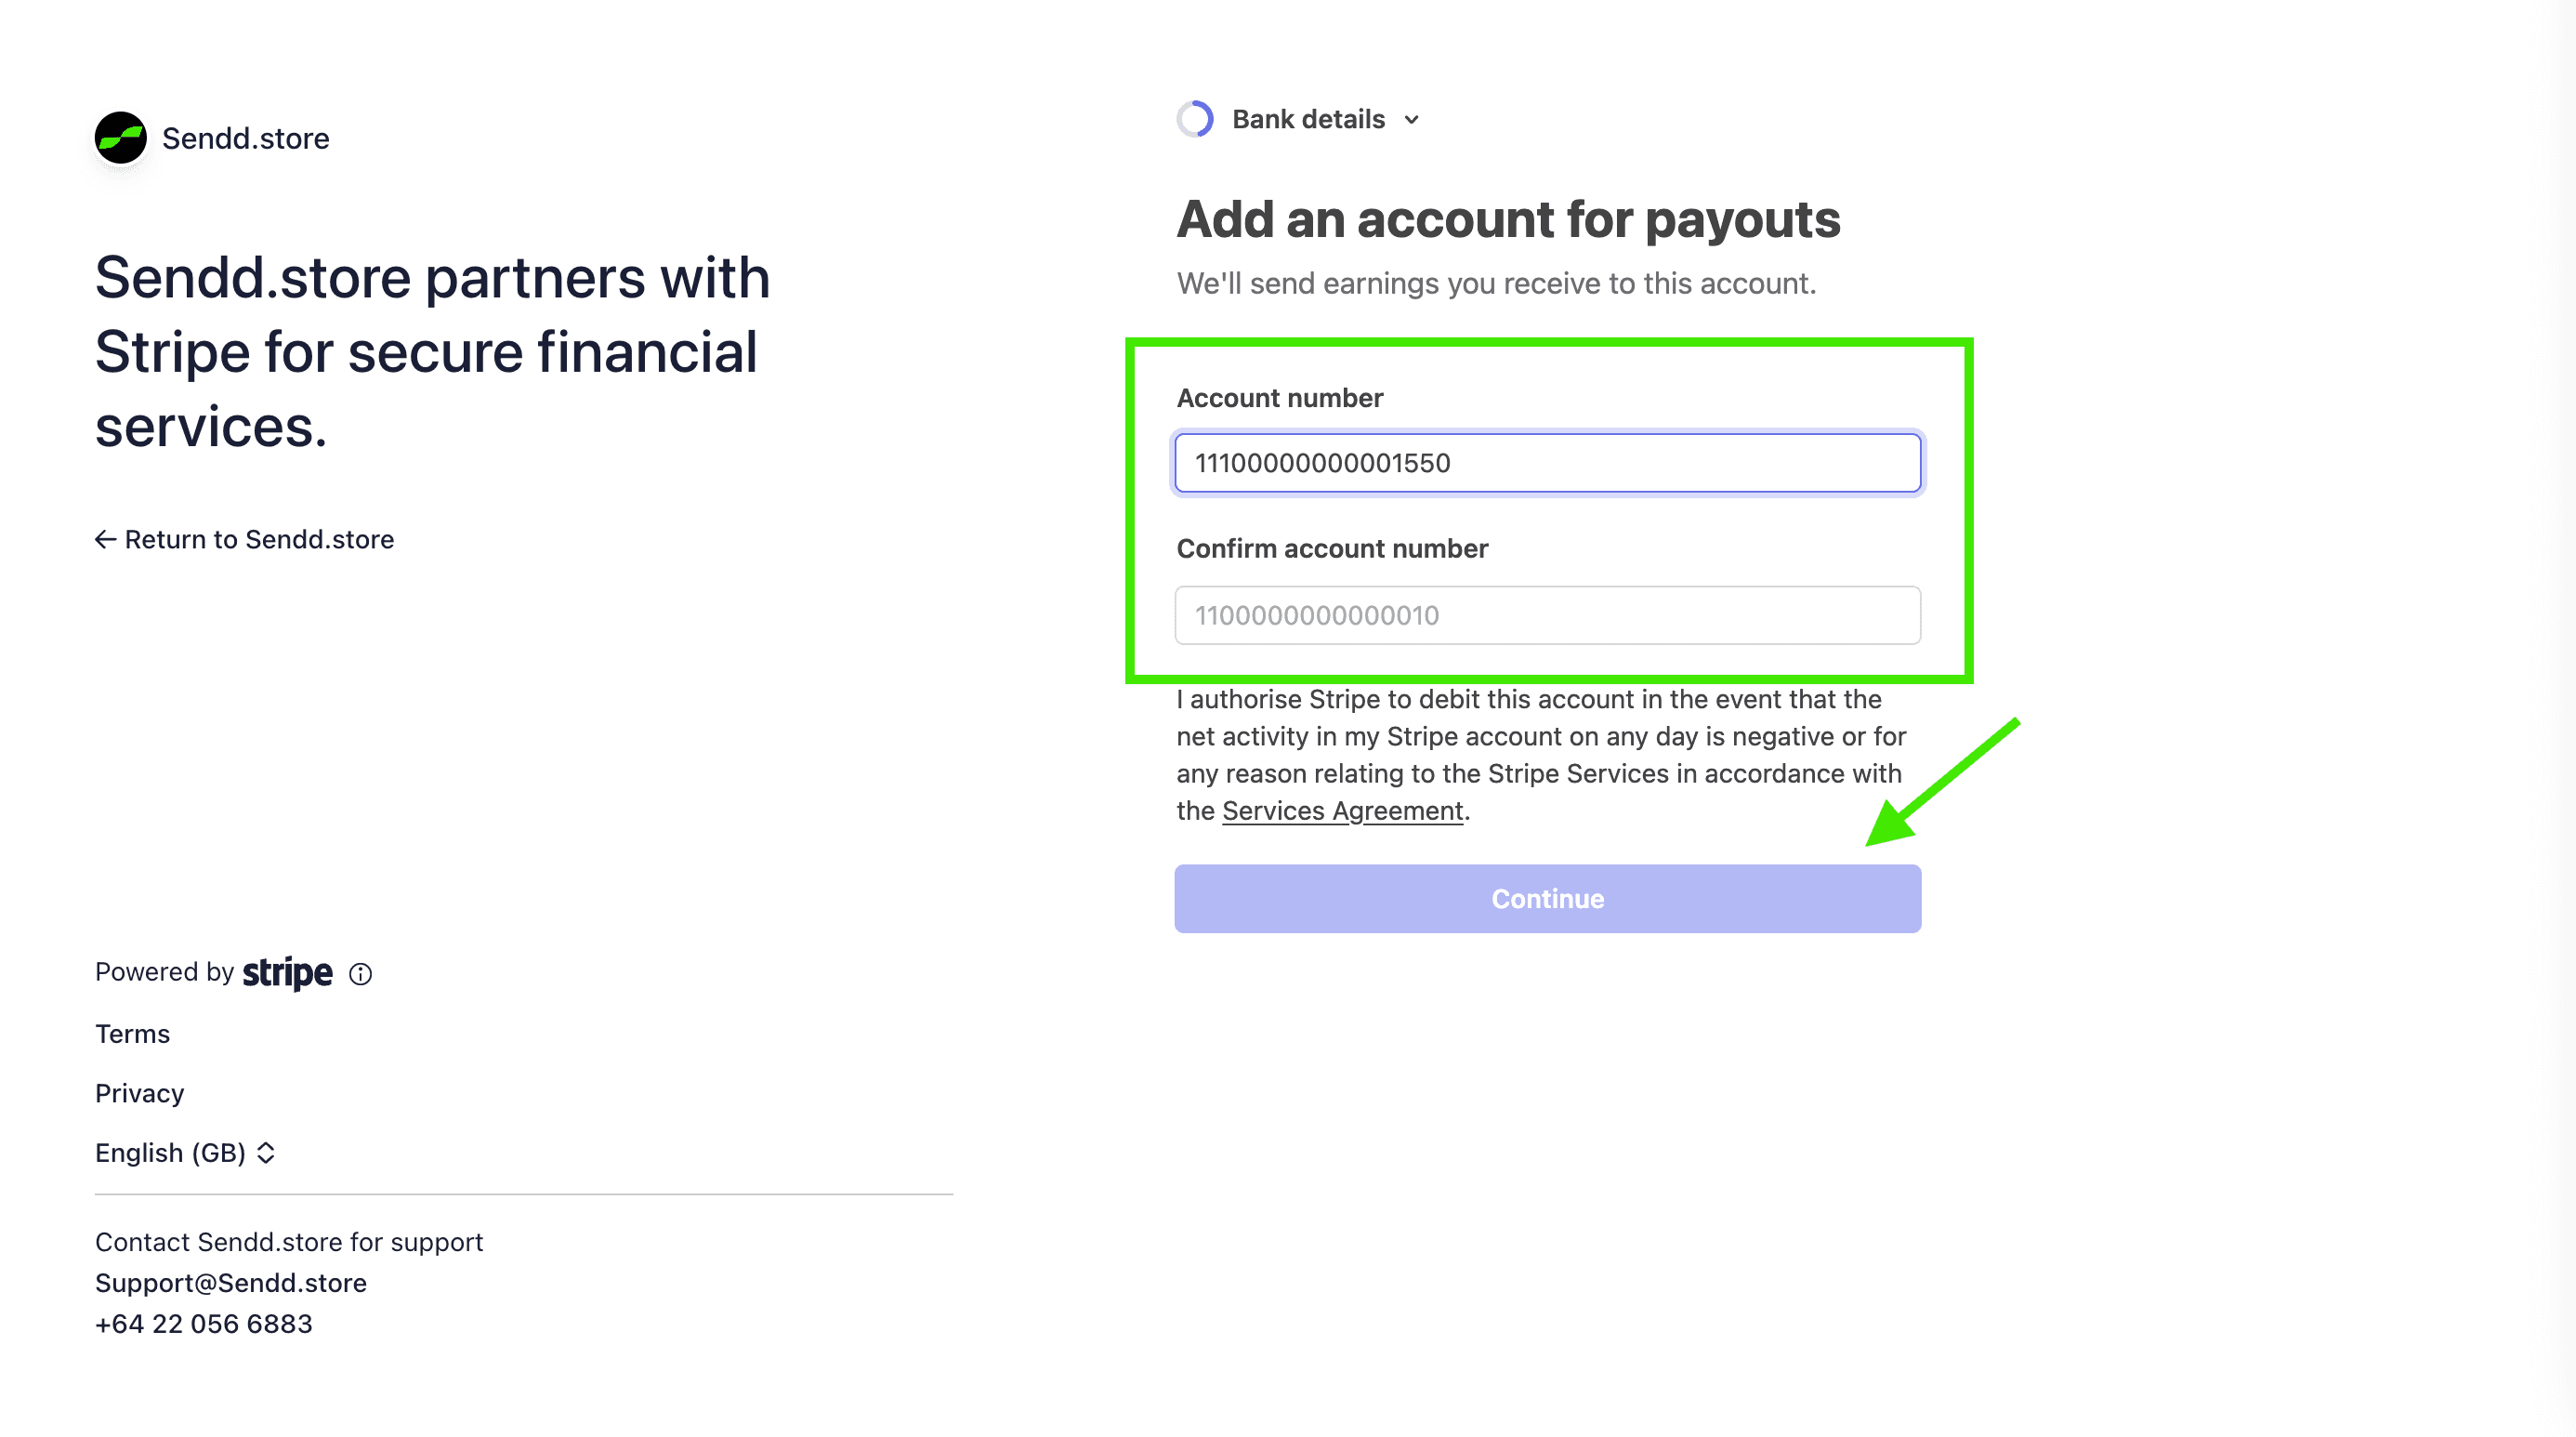
This is where Stripe will send your earnings.
Enter and confirm your bank account number, then choose how you’d like to receive payouts:
Click Continue to proceed.
Stripe will show a summary of all the information you’ve entered.
Take a moment to check and edit if needed.
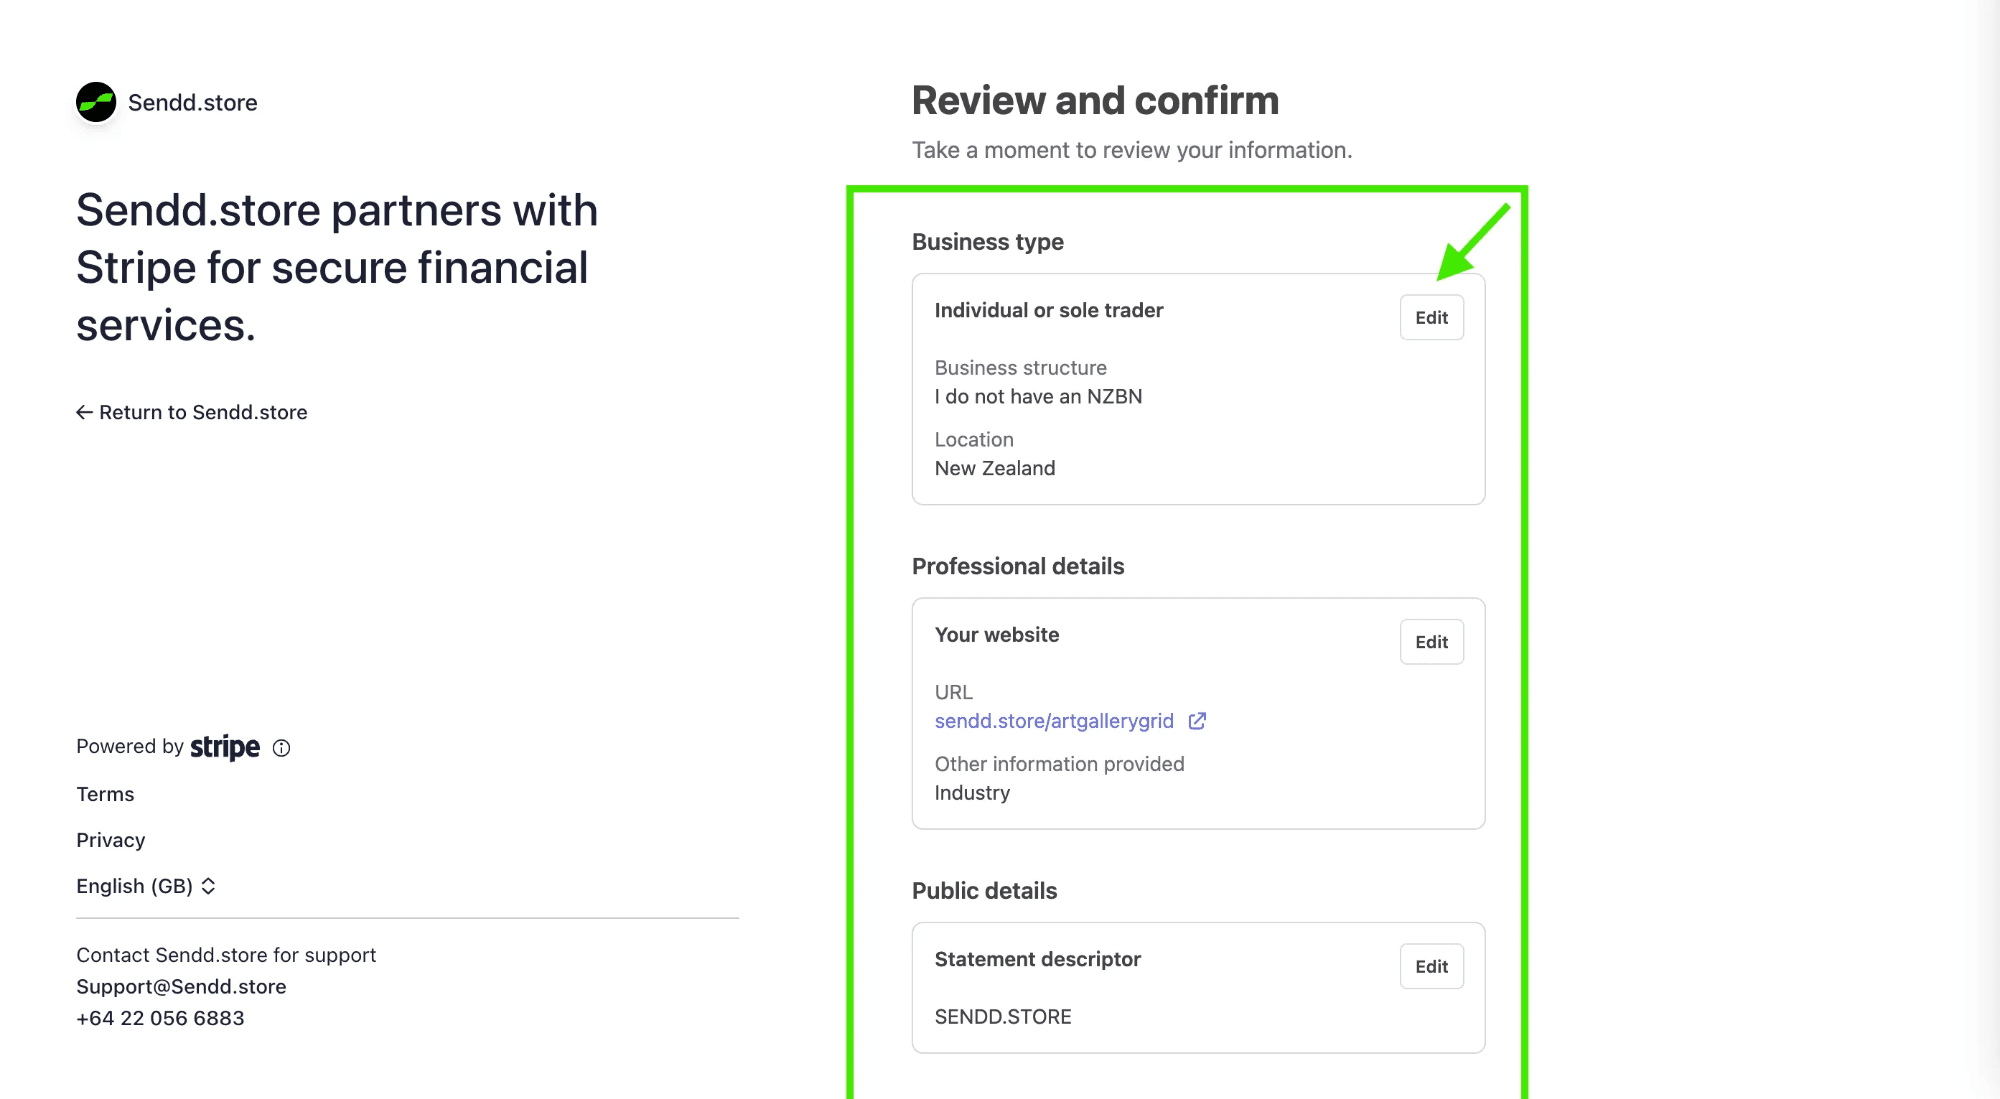
If everything looks correct, click Confirm to finish setting up your Stripe account.

You’ll see a message confirming that your account information has been submitted and is now under review.

Once Stripe finishes reviewing your details, your Sendd Store will be ready to accept payments and send payouts to your bank account.
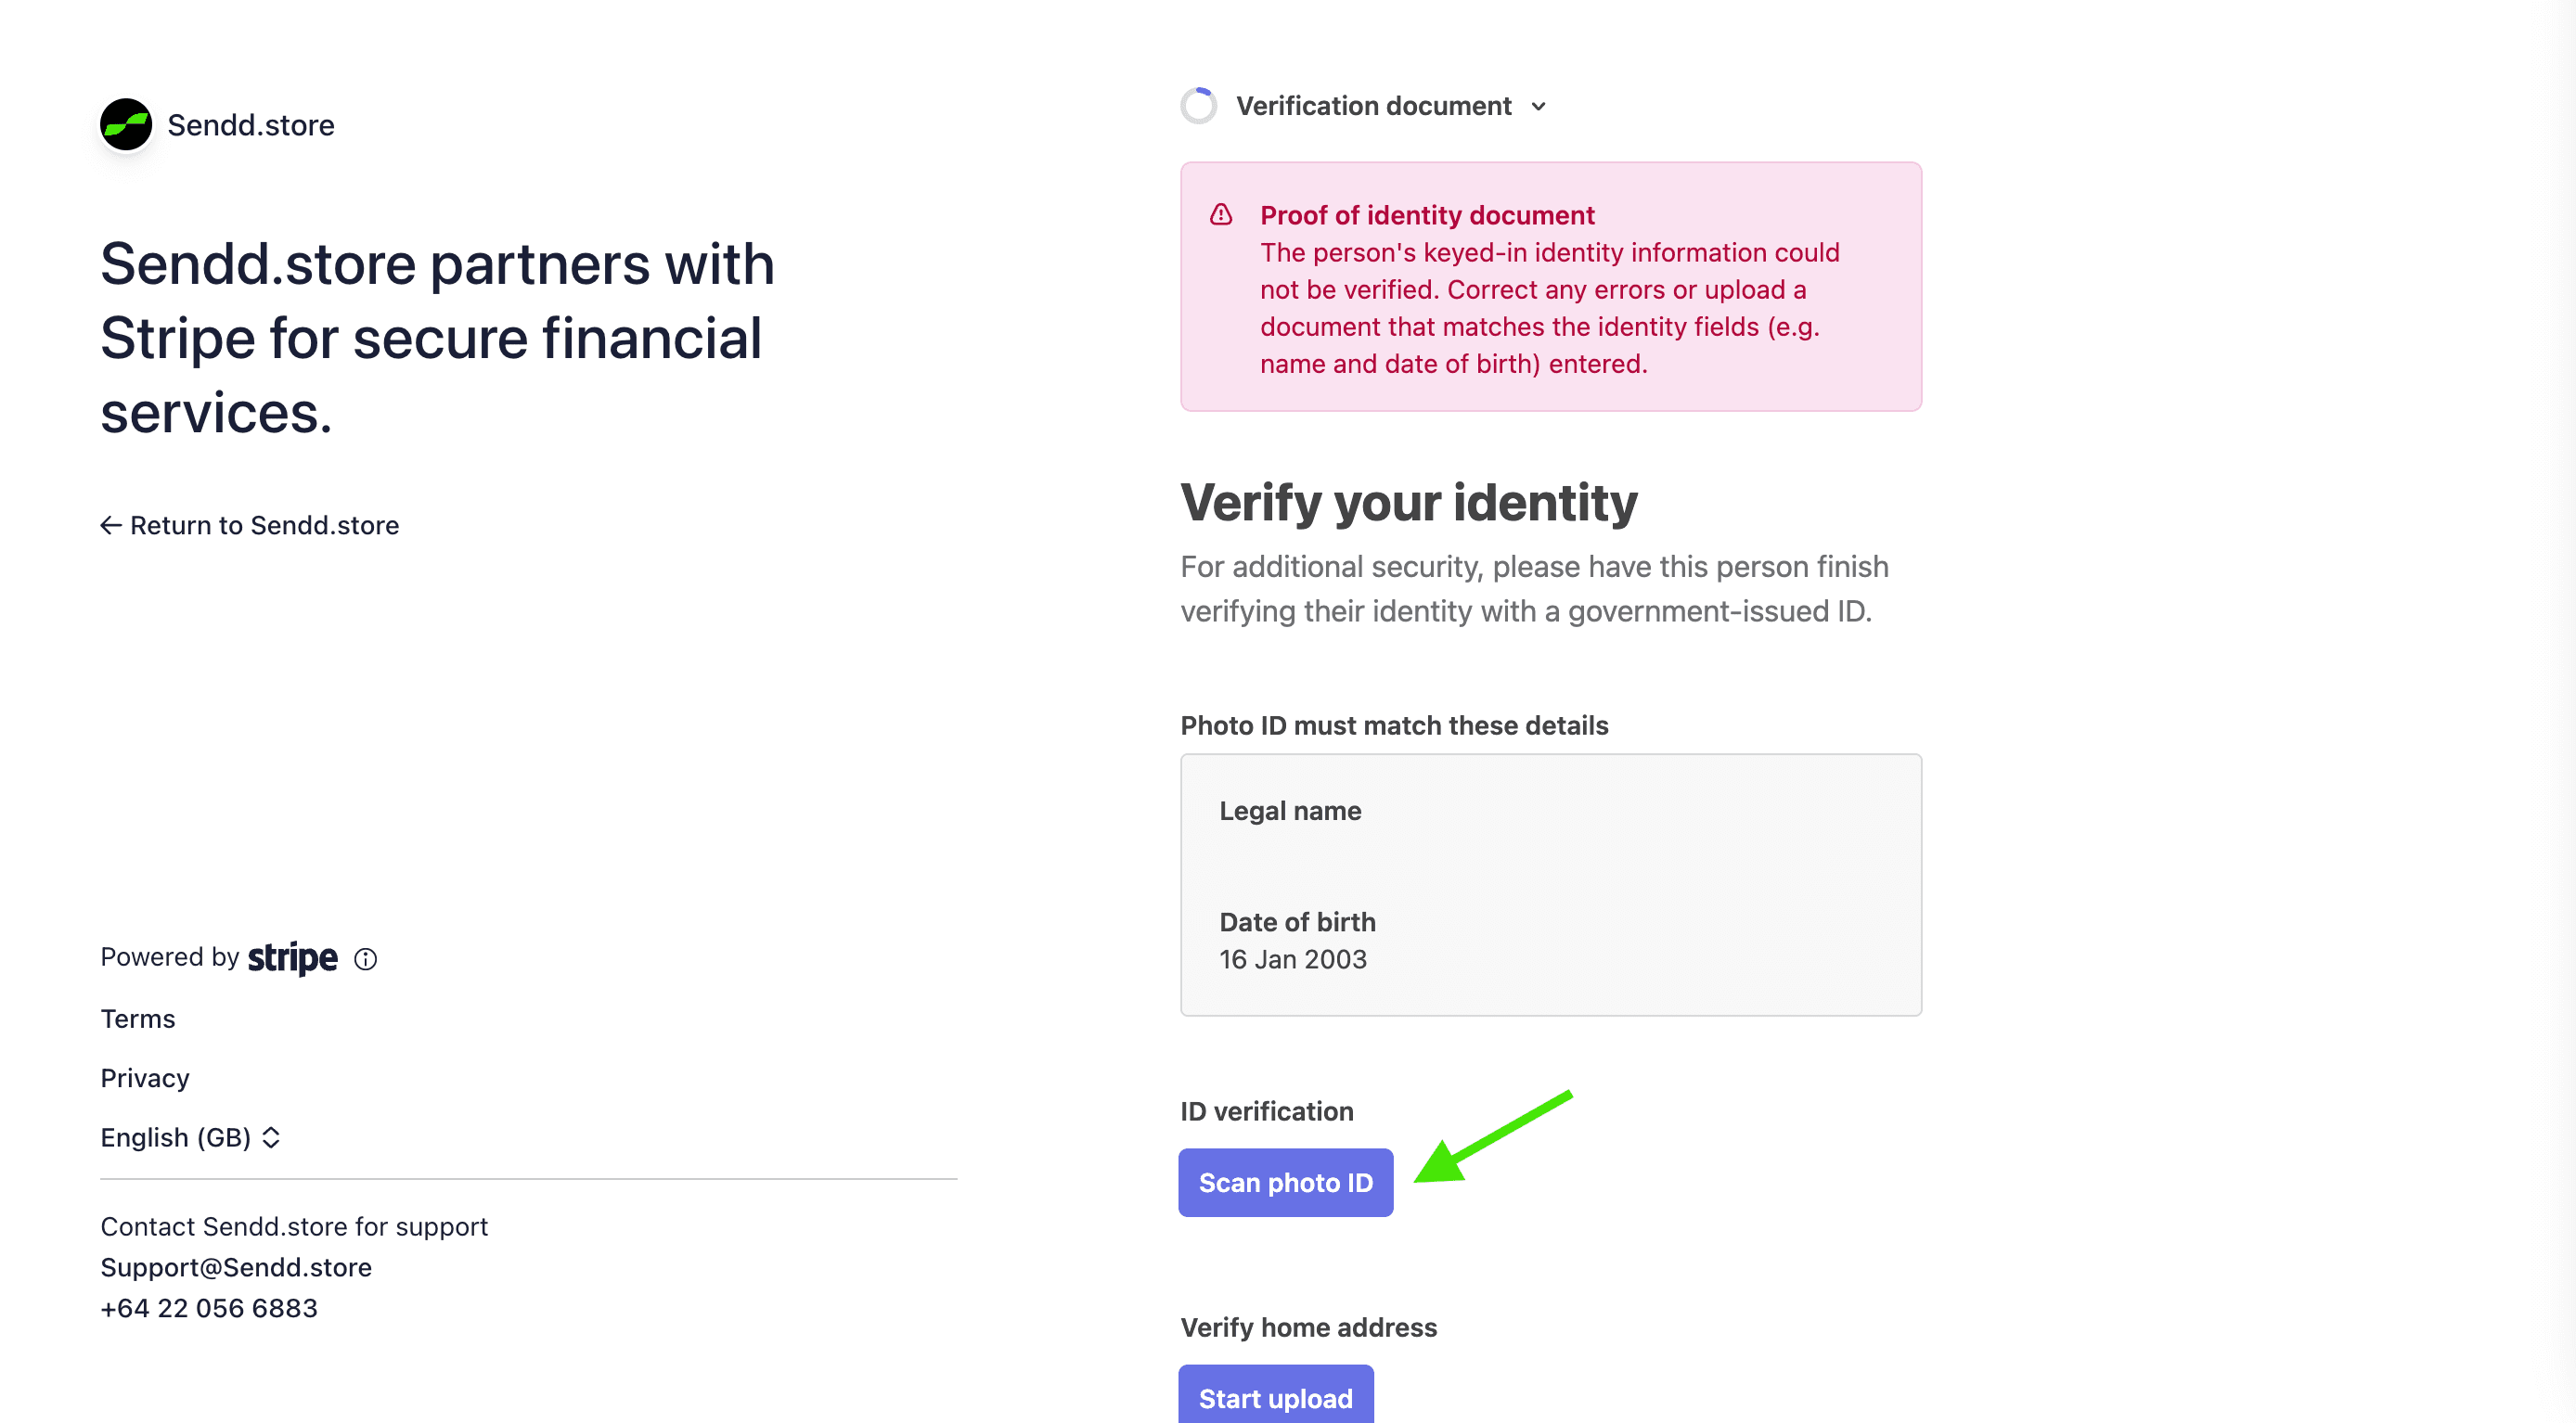
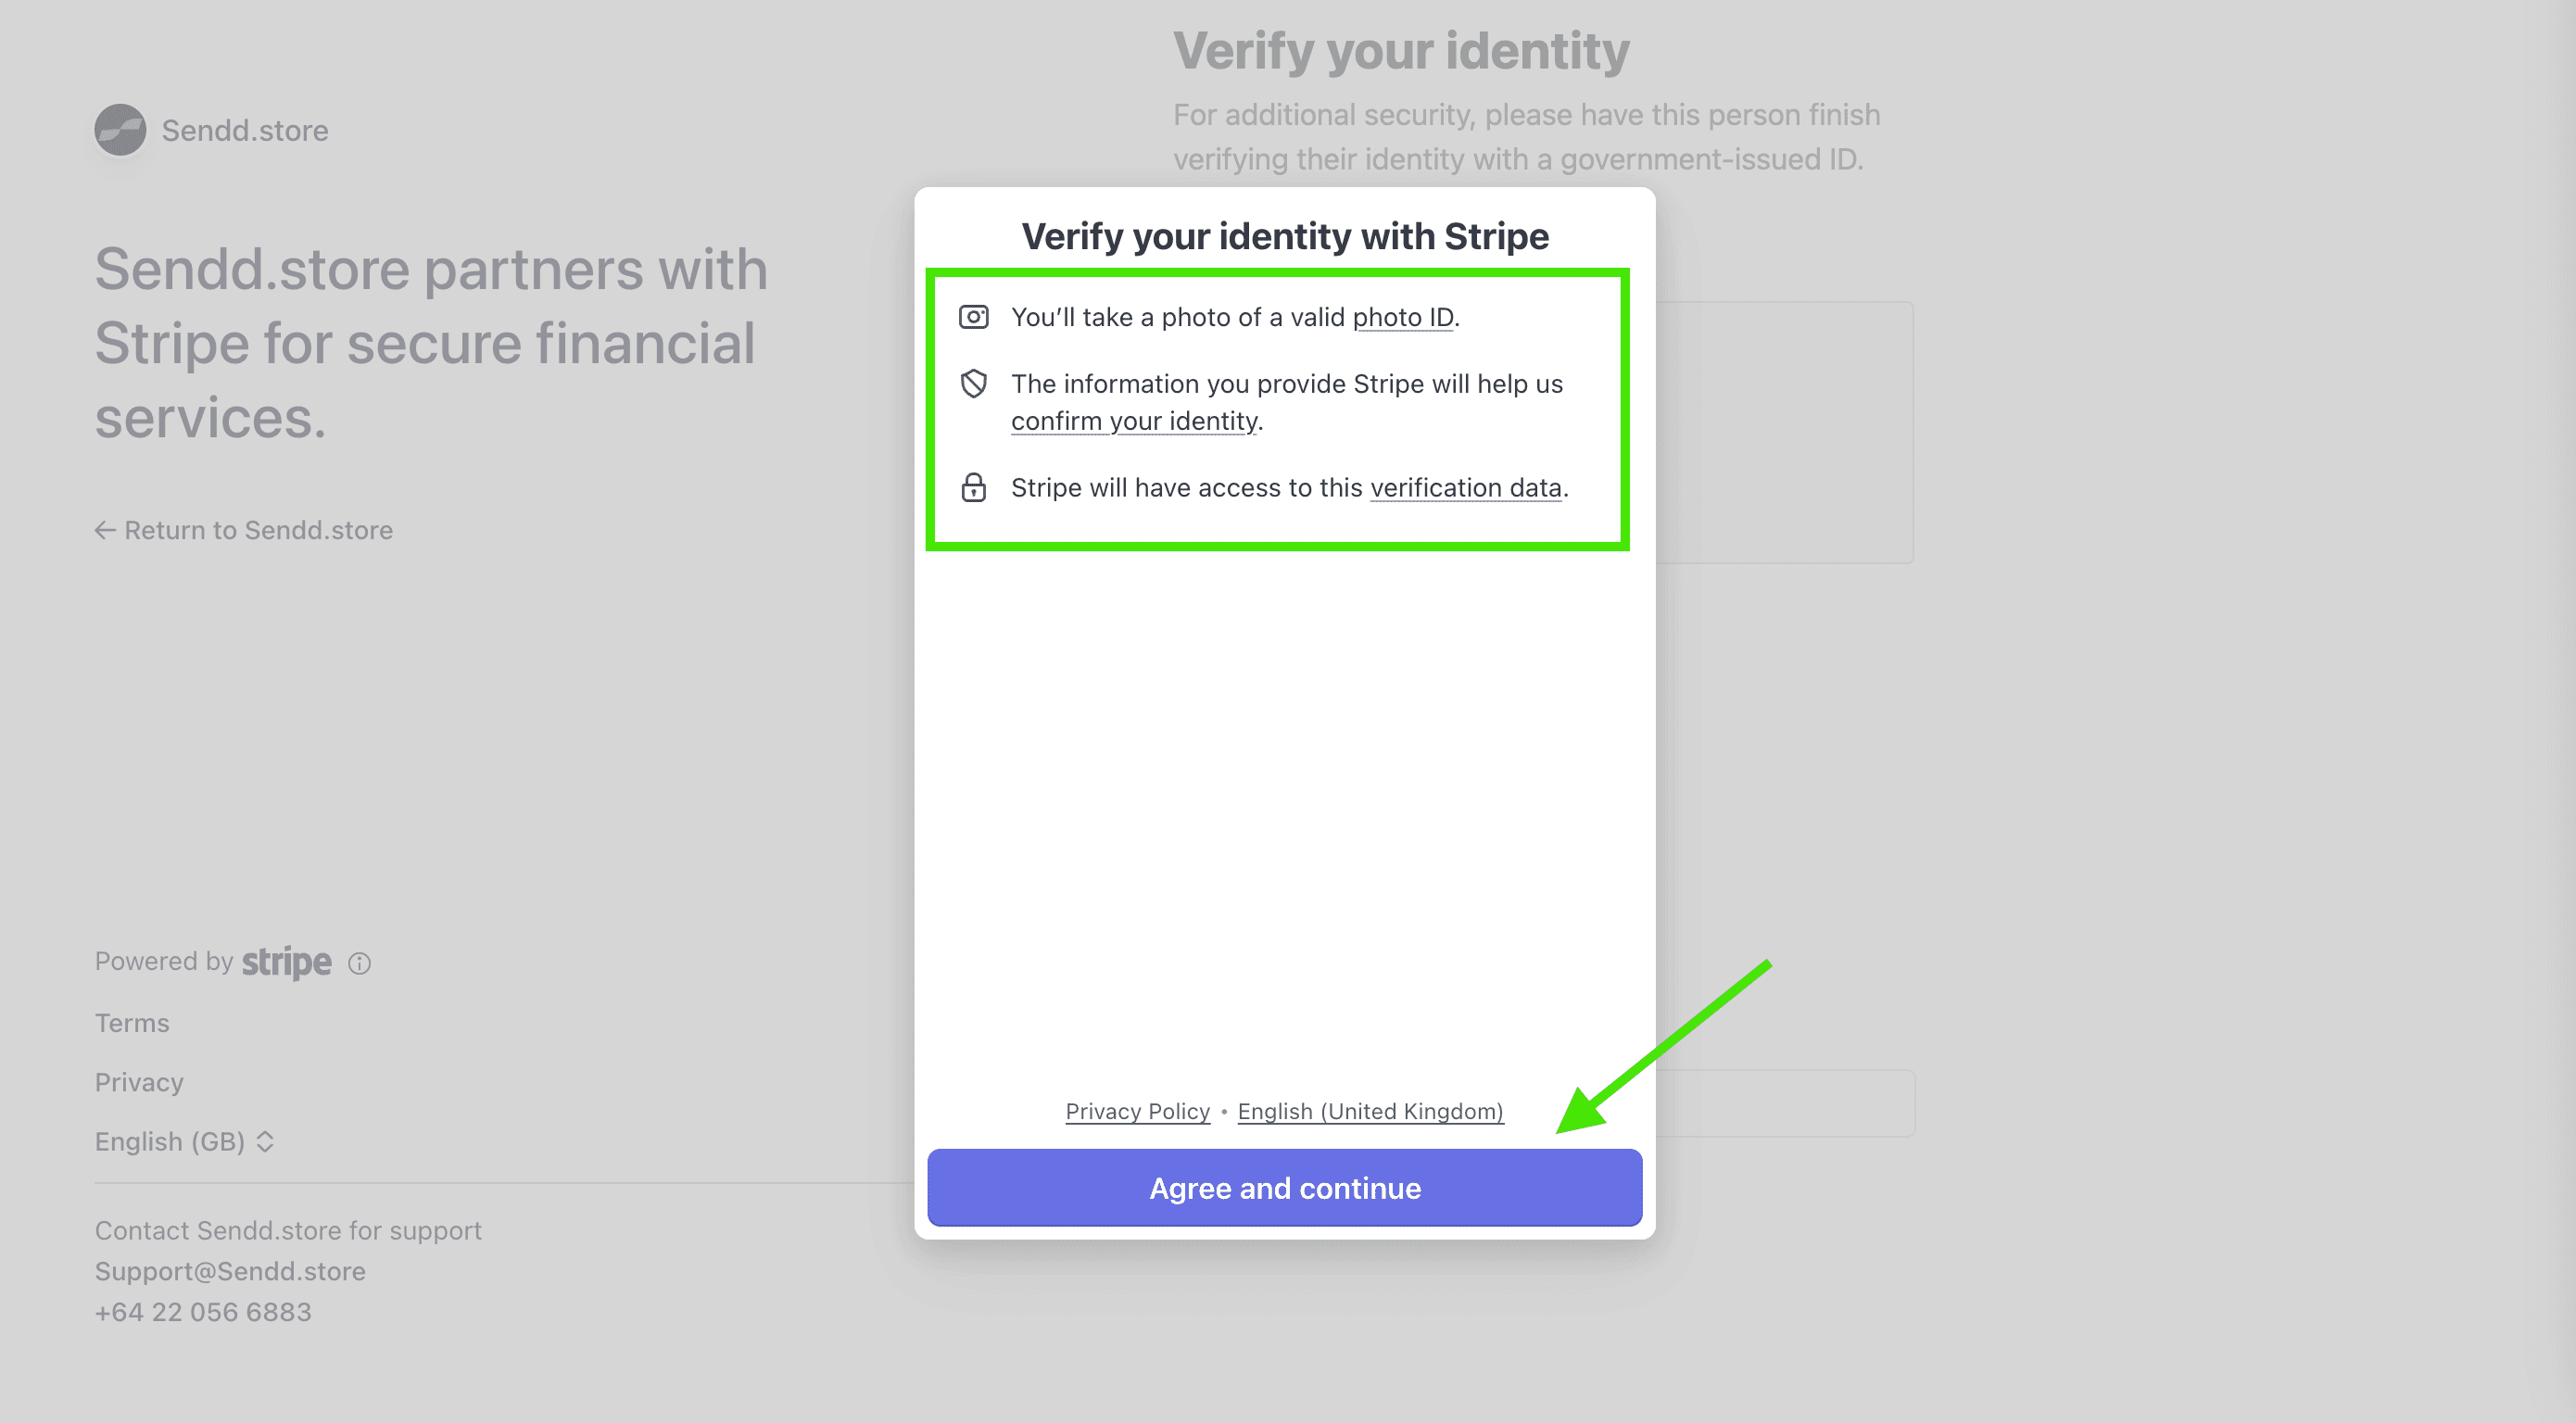
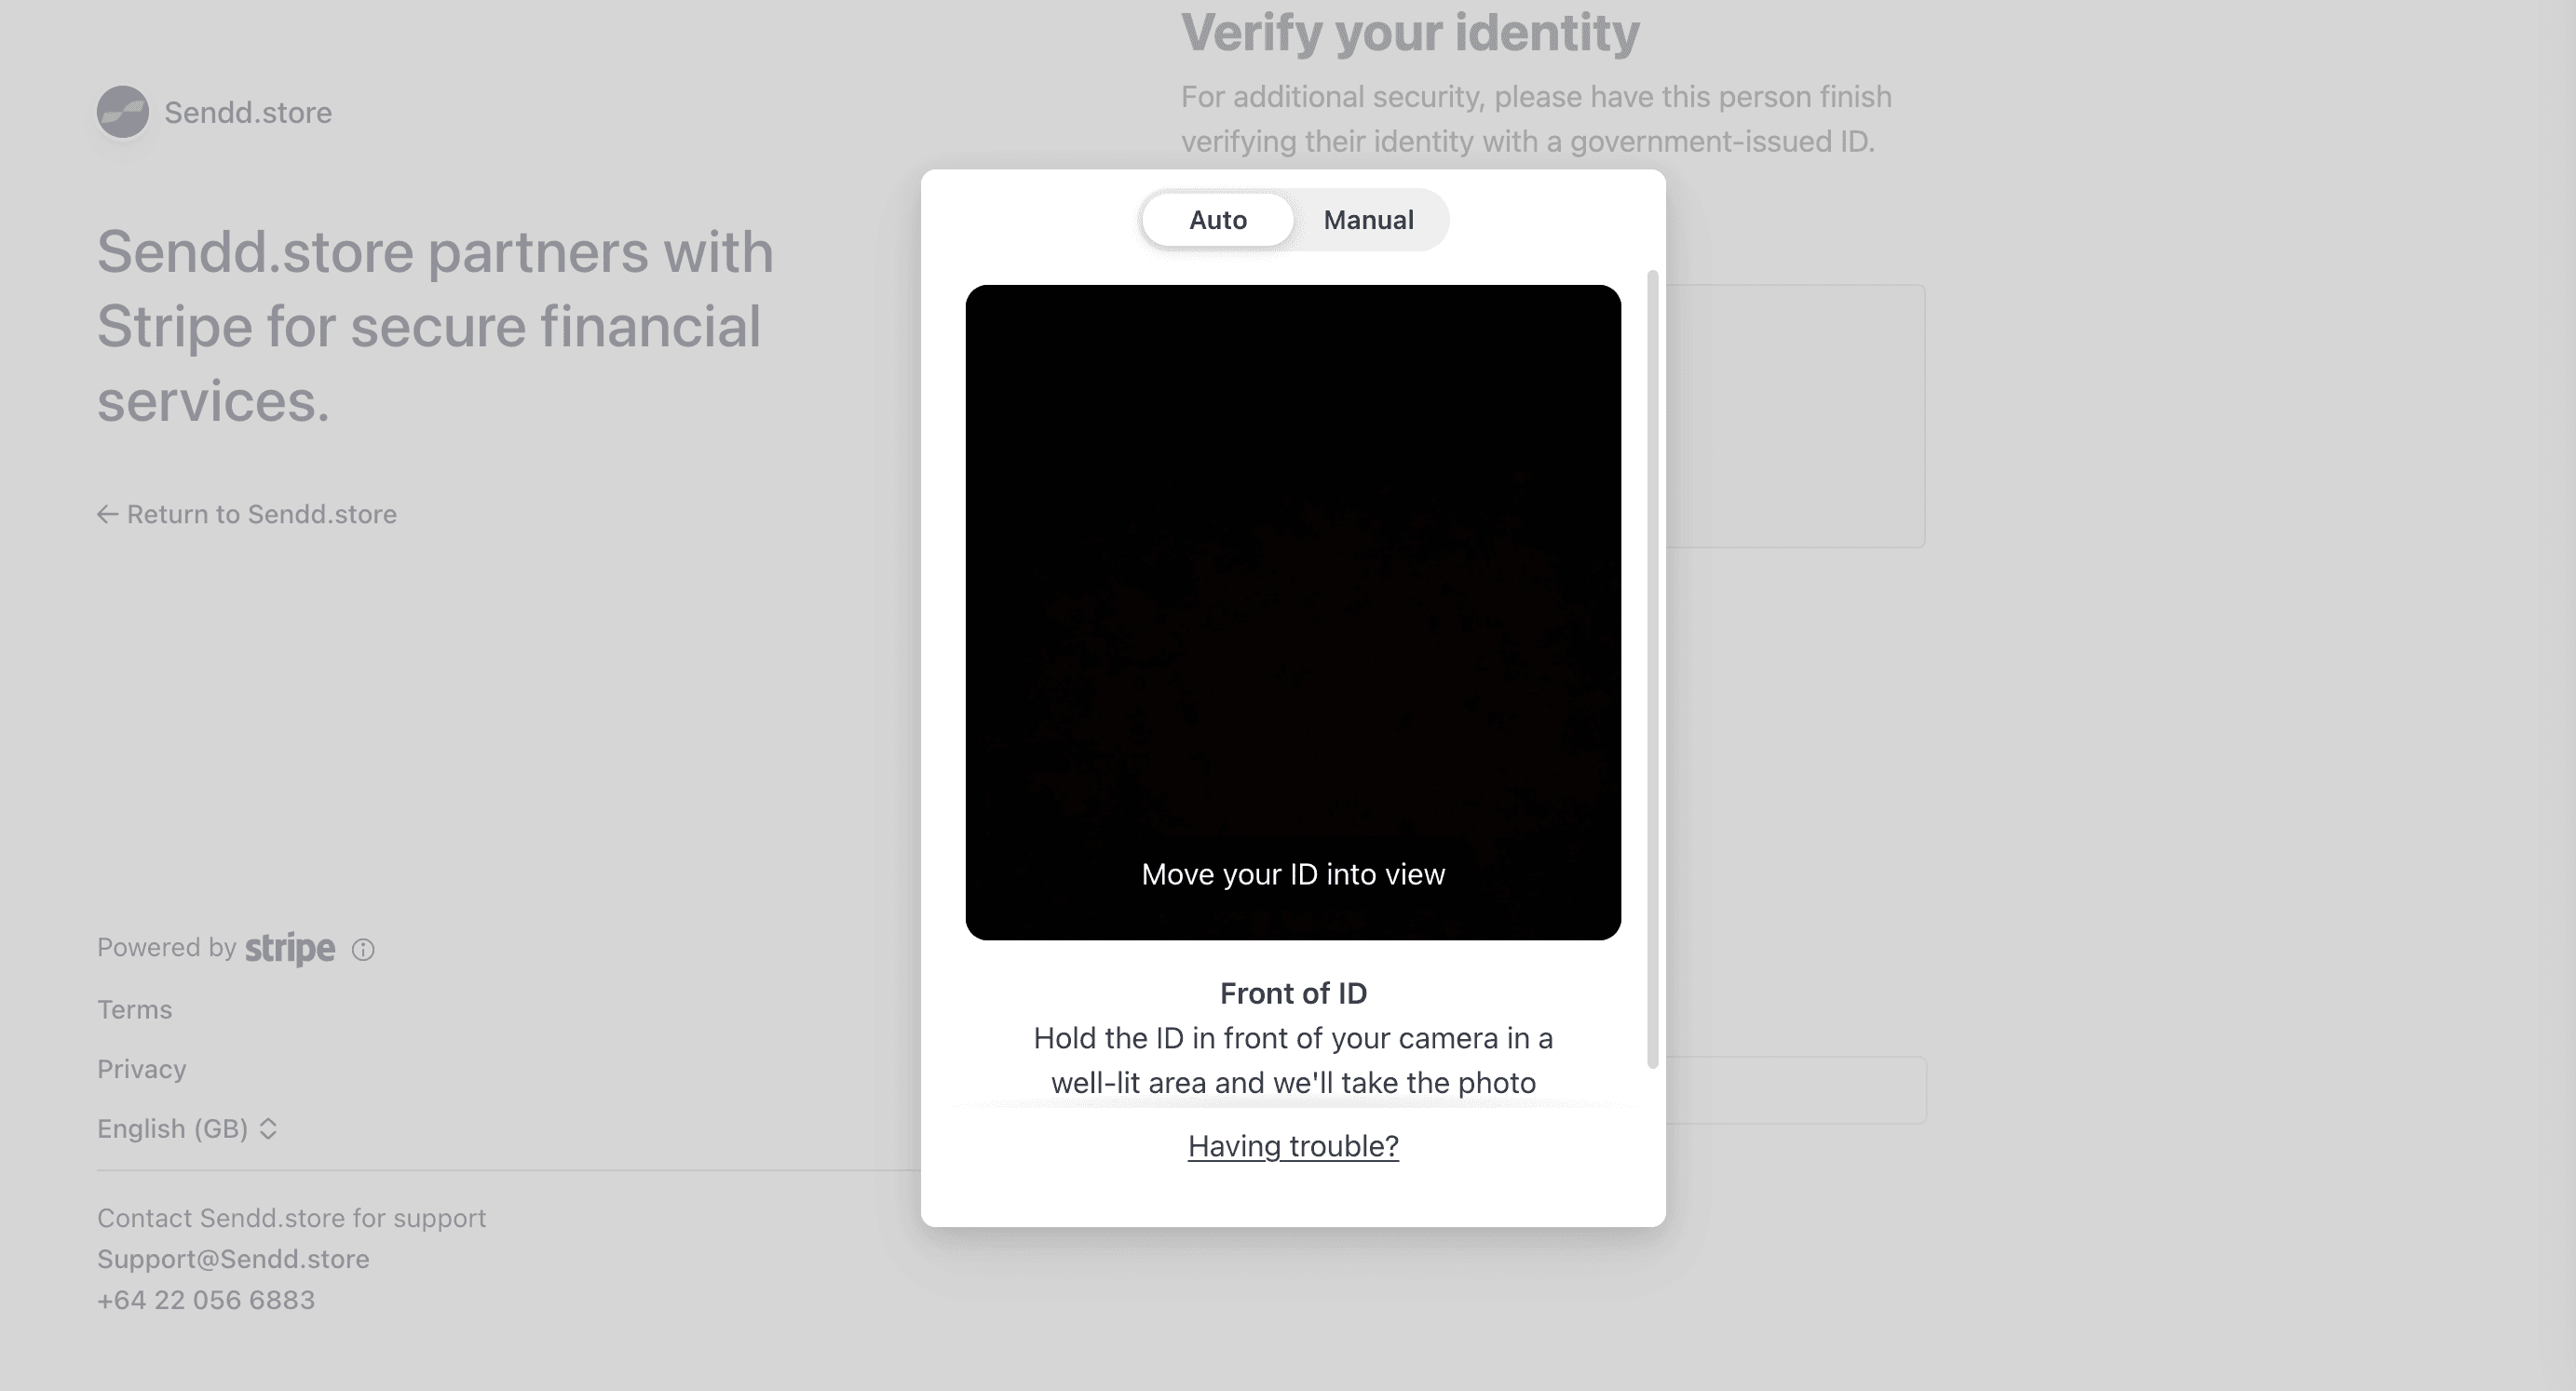
For security and compliance, Stripe may ask you to verify your identity using a government-issued photo ID.
This helps protect your account and ensures payouts aren’t delayed.
Start the ID verification
Click Scan photo ID to begin.
Stripe will guide you through the process securely.
You’ll see a message explaining how Stripe uses your verification data.
Click Agree and continue.
Choose your ID type
Stripe accepts:
Passport
Driving licence
National ID
Any valid government-issued photo ID
Your ID must clearly show your face, name, and date of birth.
To scan your ID, Stripe will ask you to switch to your phone.
Scan the QR code with your mobile camera.
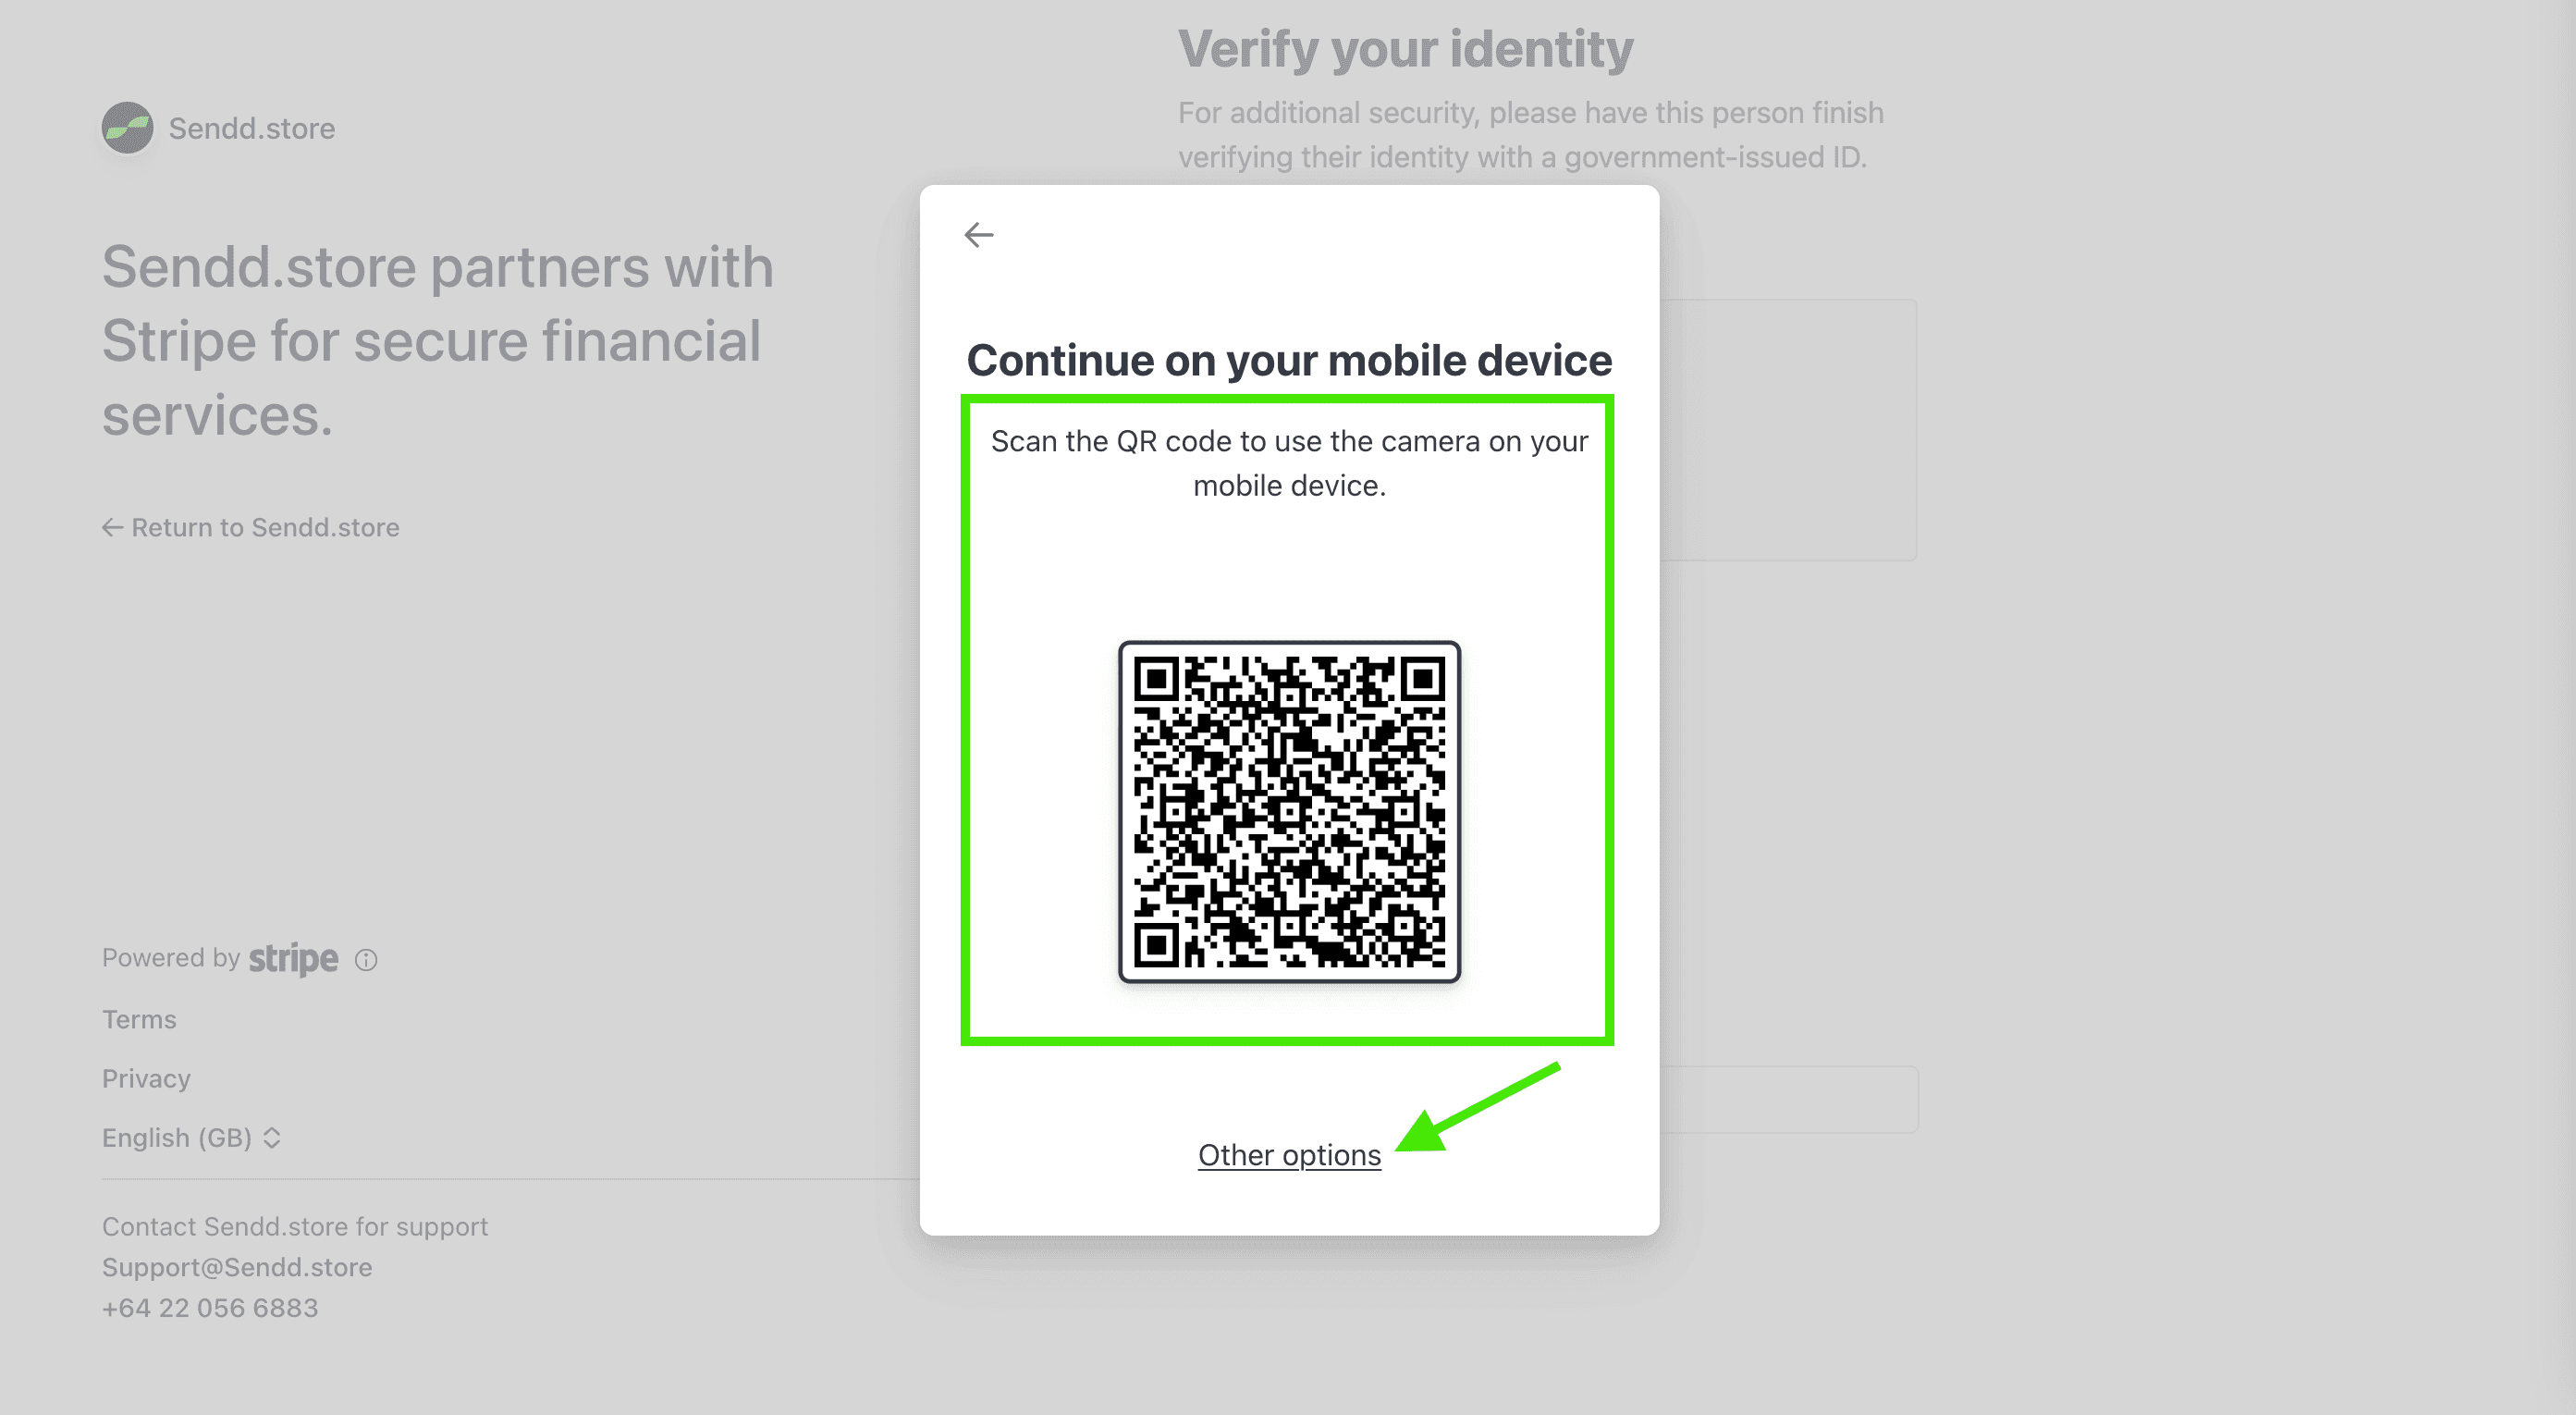
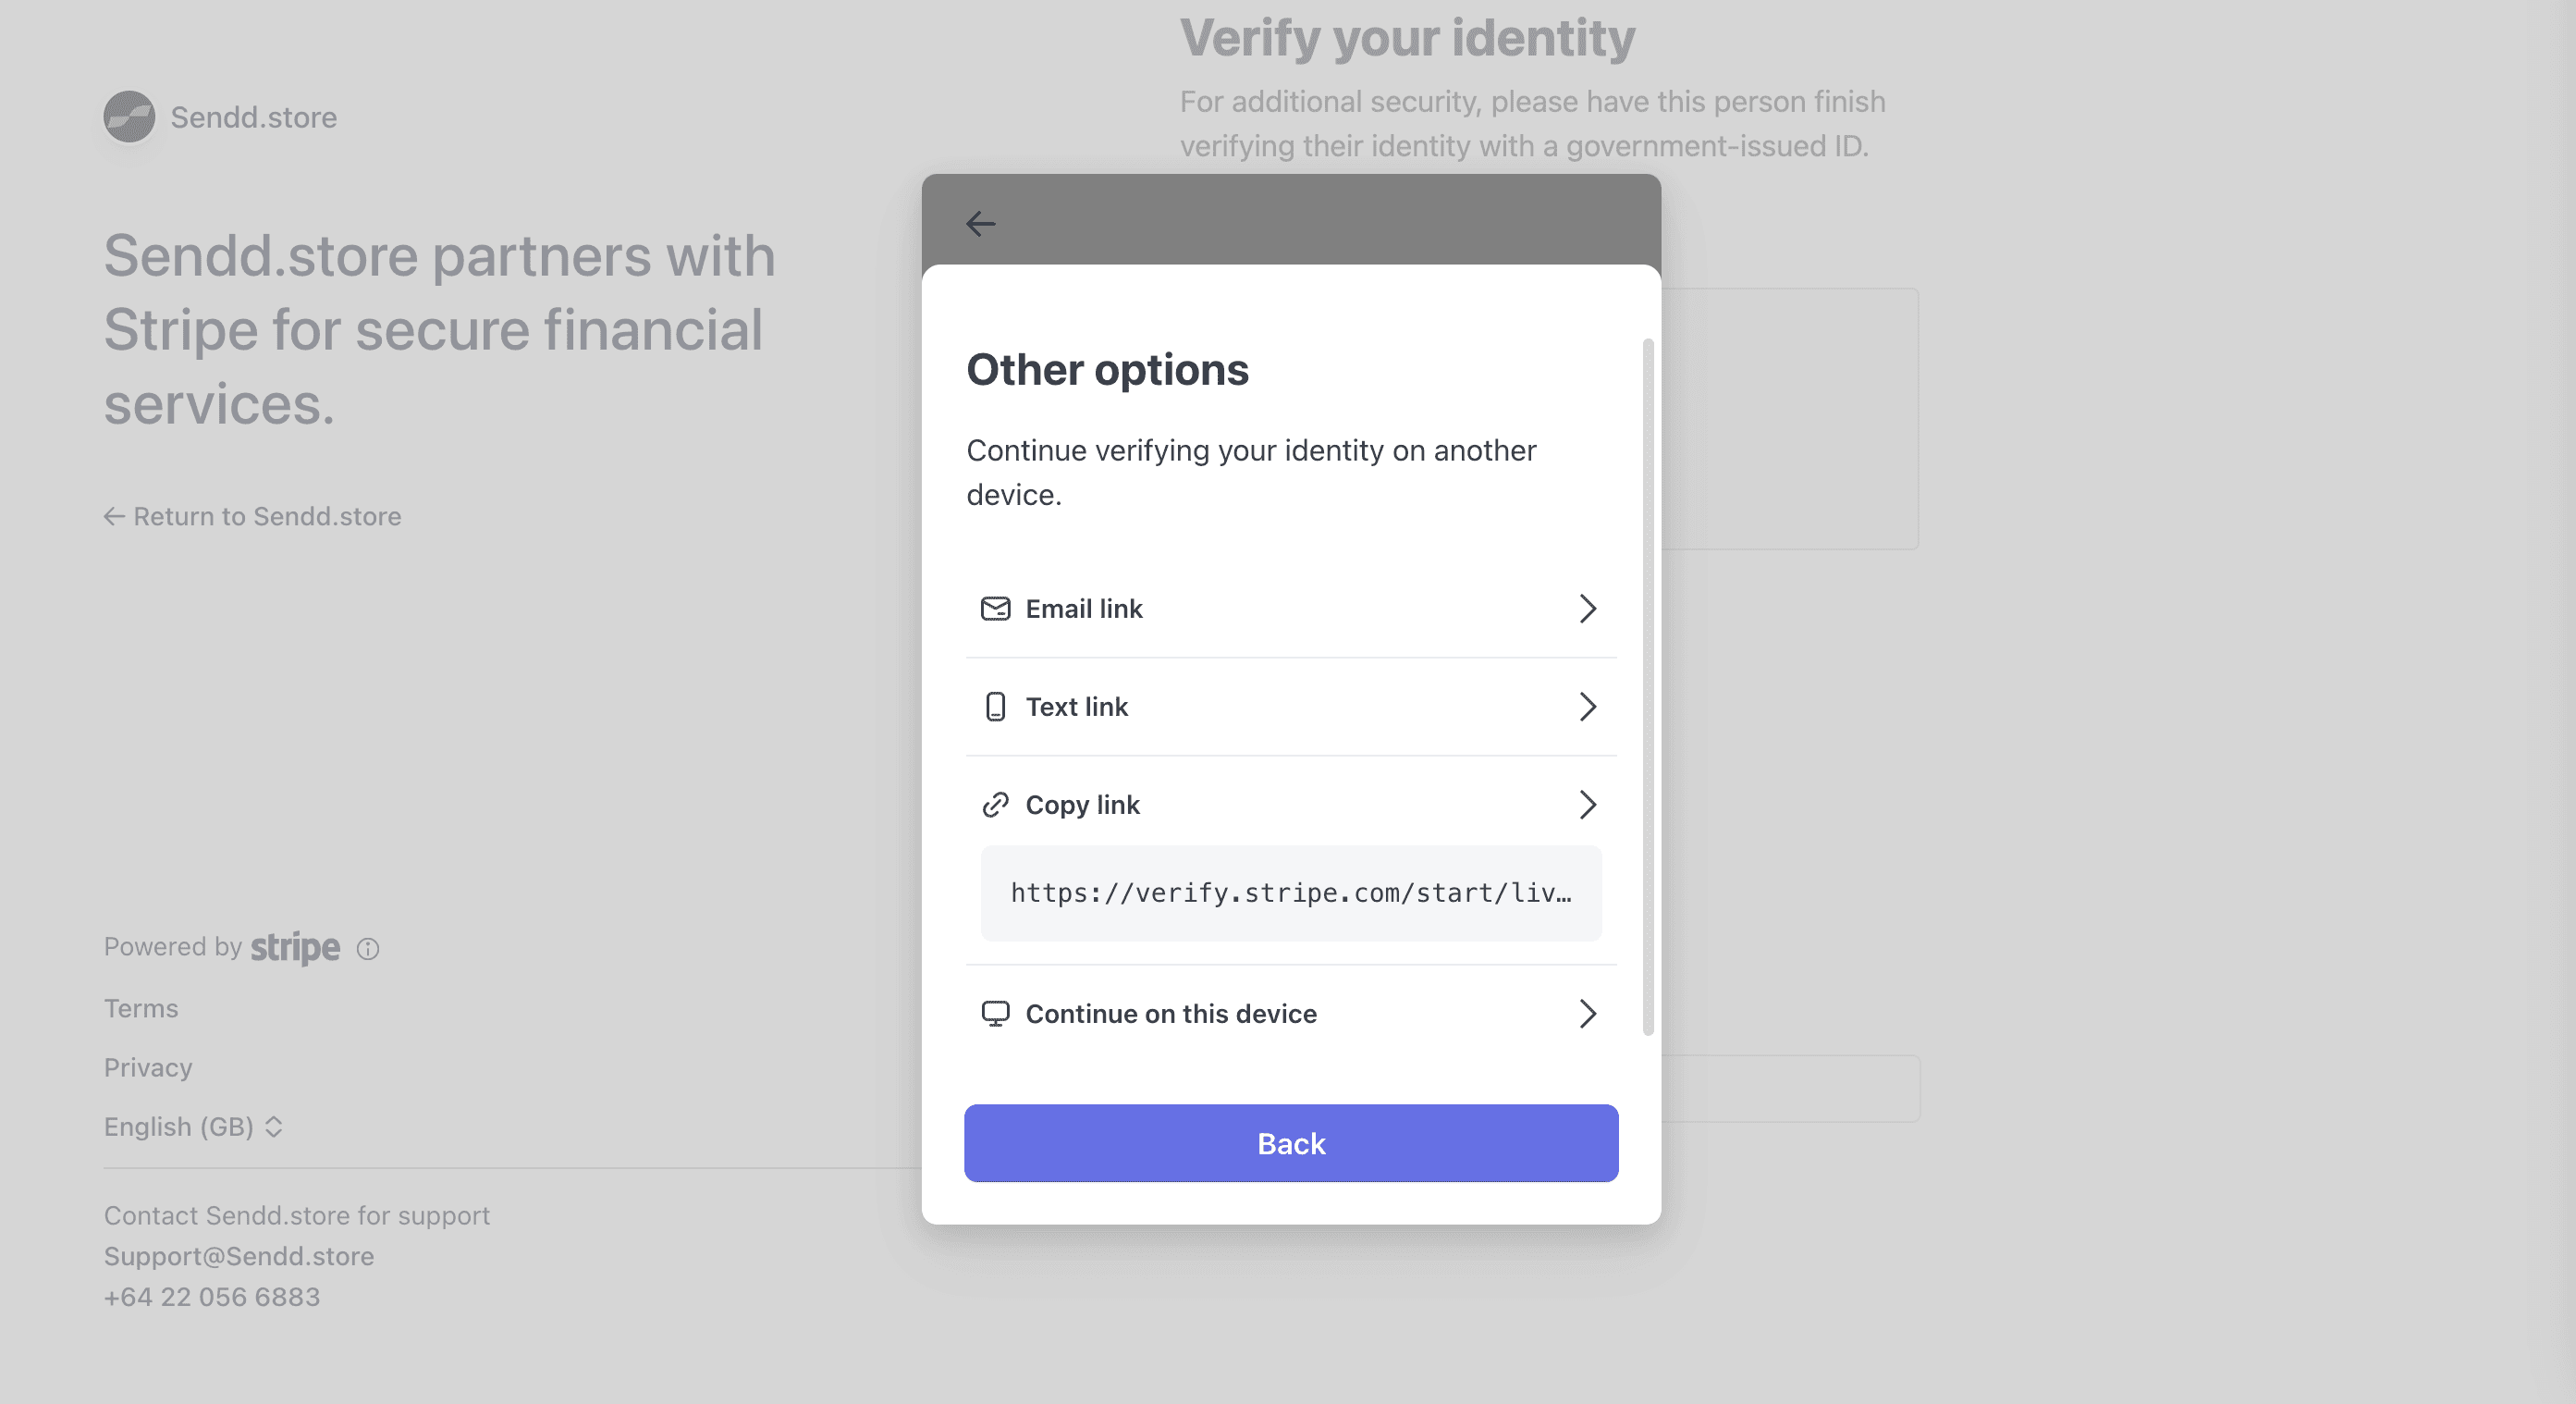
If needed, you can continue verification via:
Email link
Text link
Copying the verification link
Continuing on the same device
Choose the option that works best for you.
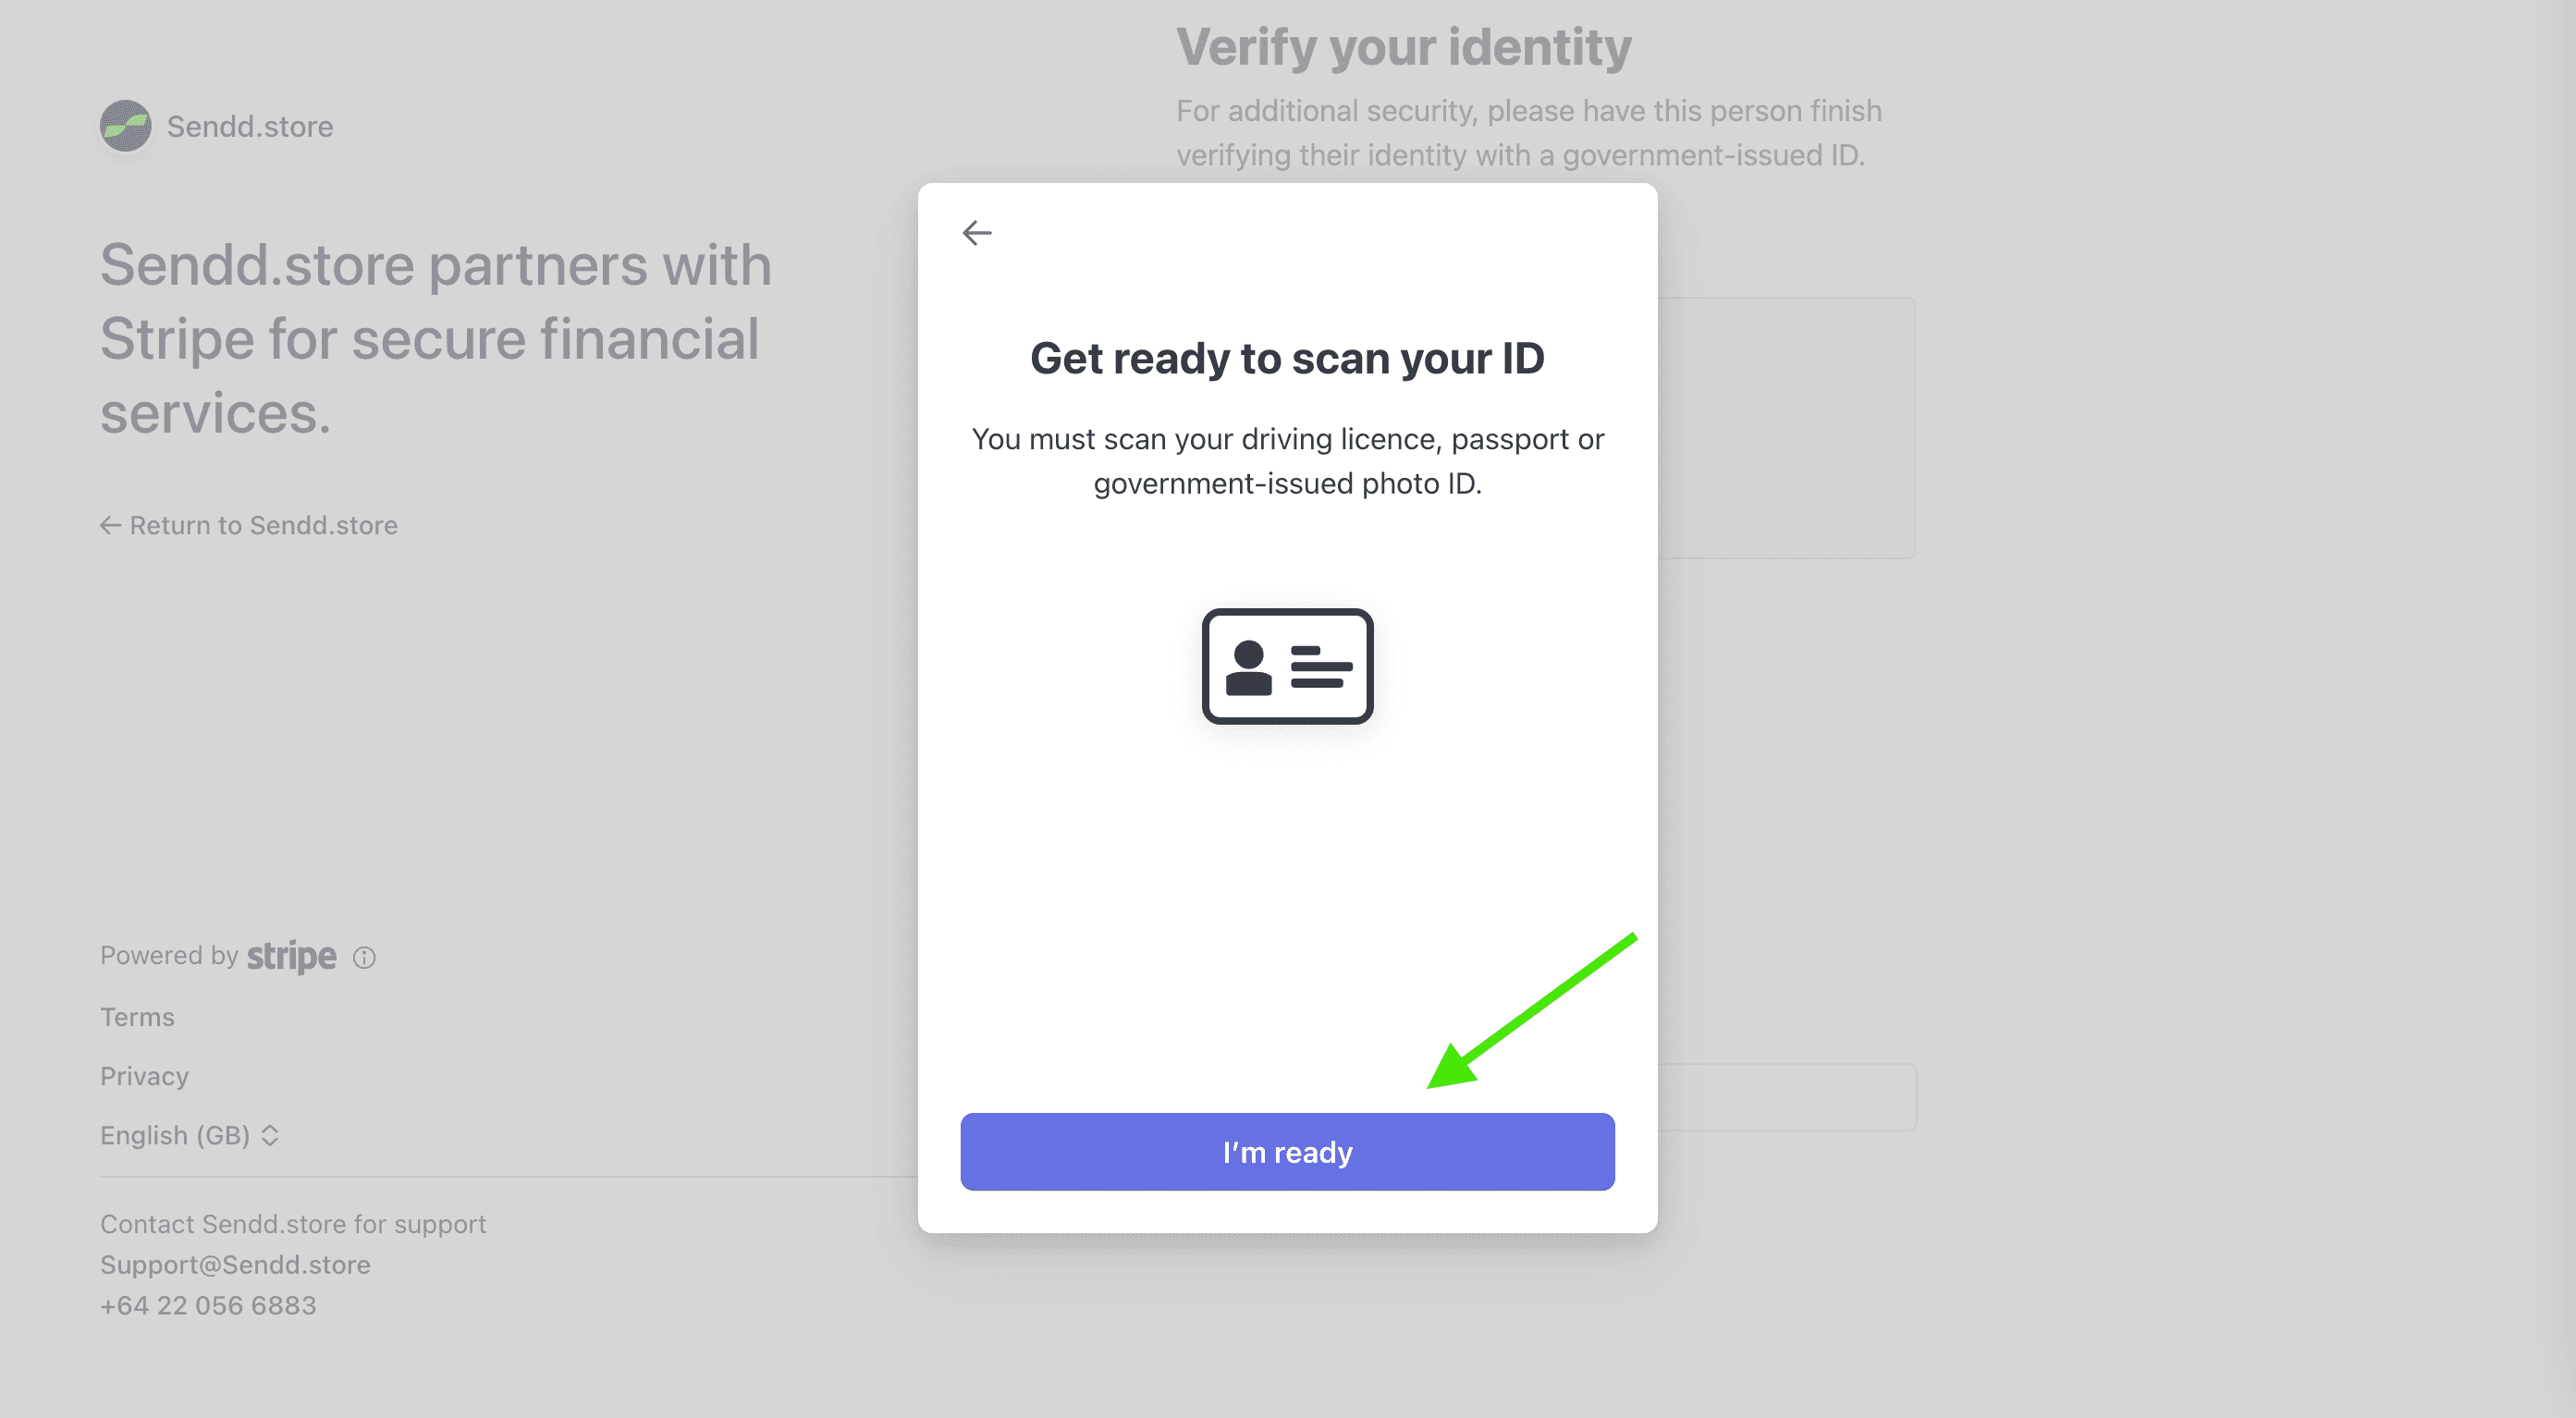
Make sure your ID is:
Clear and readable
Not blurry
In good lighting
Click I’m ready.
Hold your ID in front of the camera and follow the on-screen instructions.
Stripe will automatically capture the image.
If needed, click Having trouble? for help.
Once submitted, Stripe will review your ID and notify you if anything else is required.
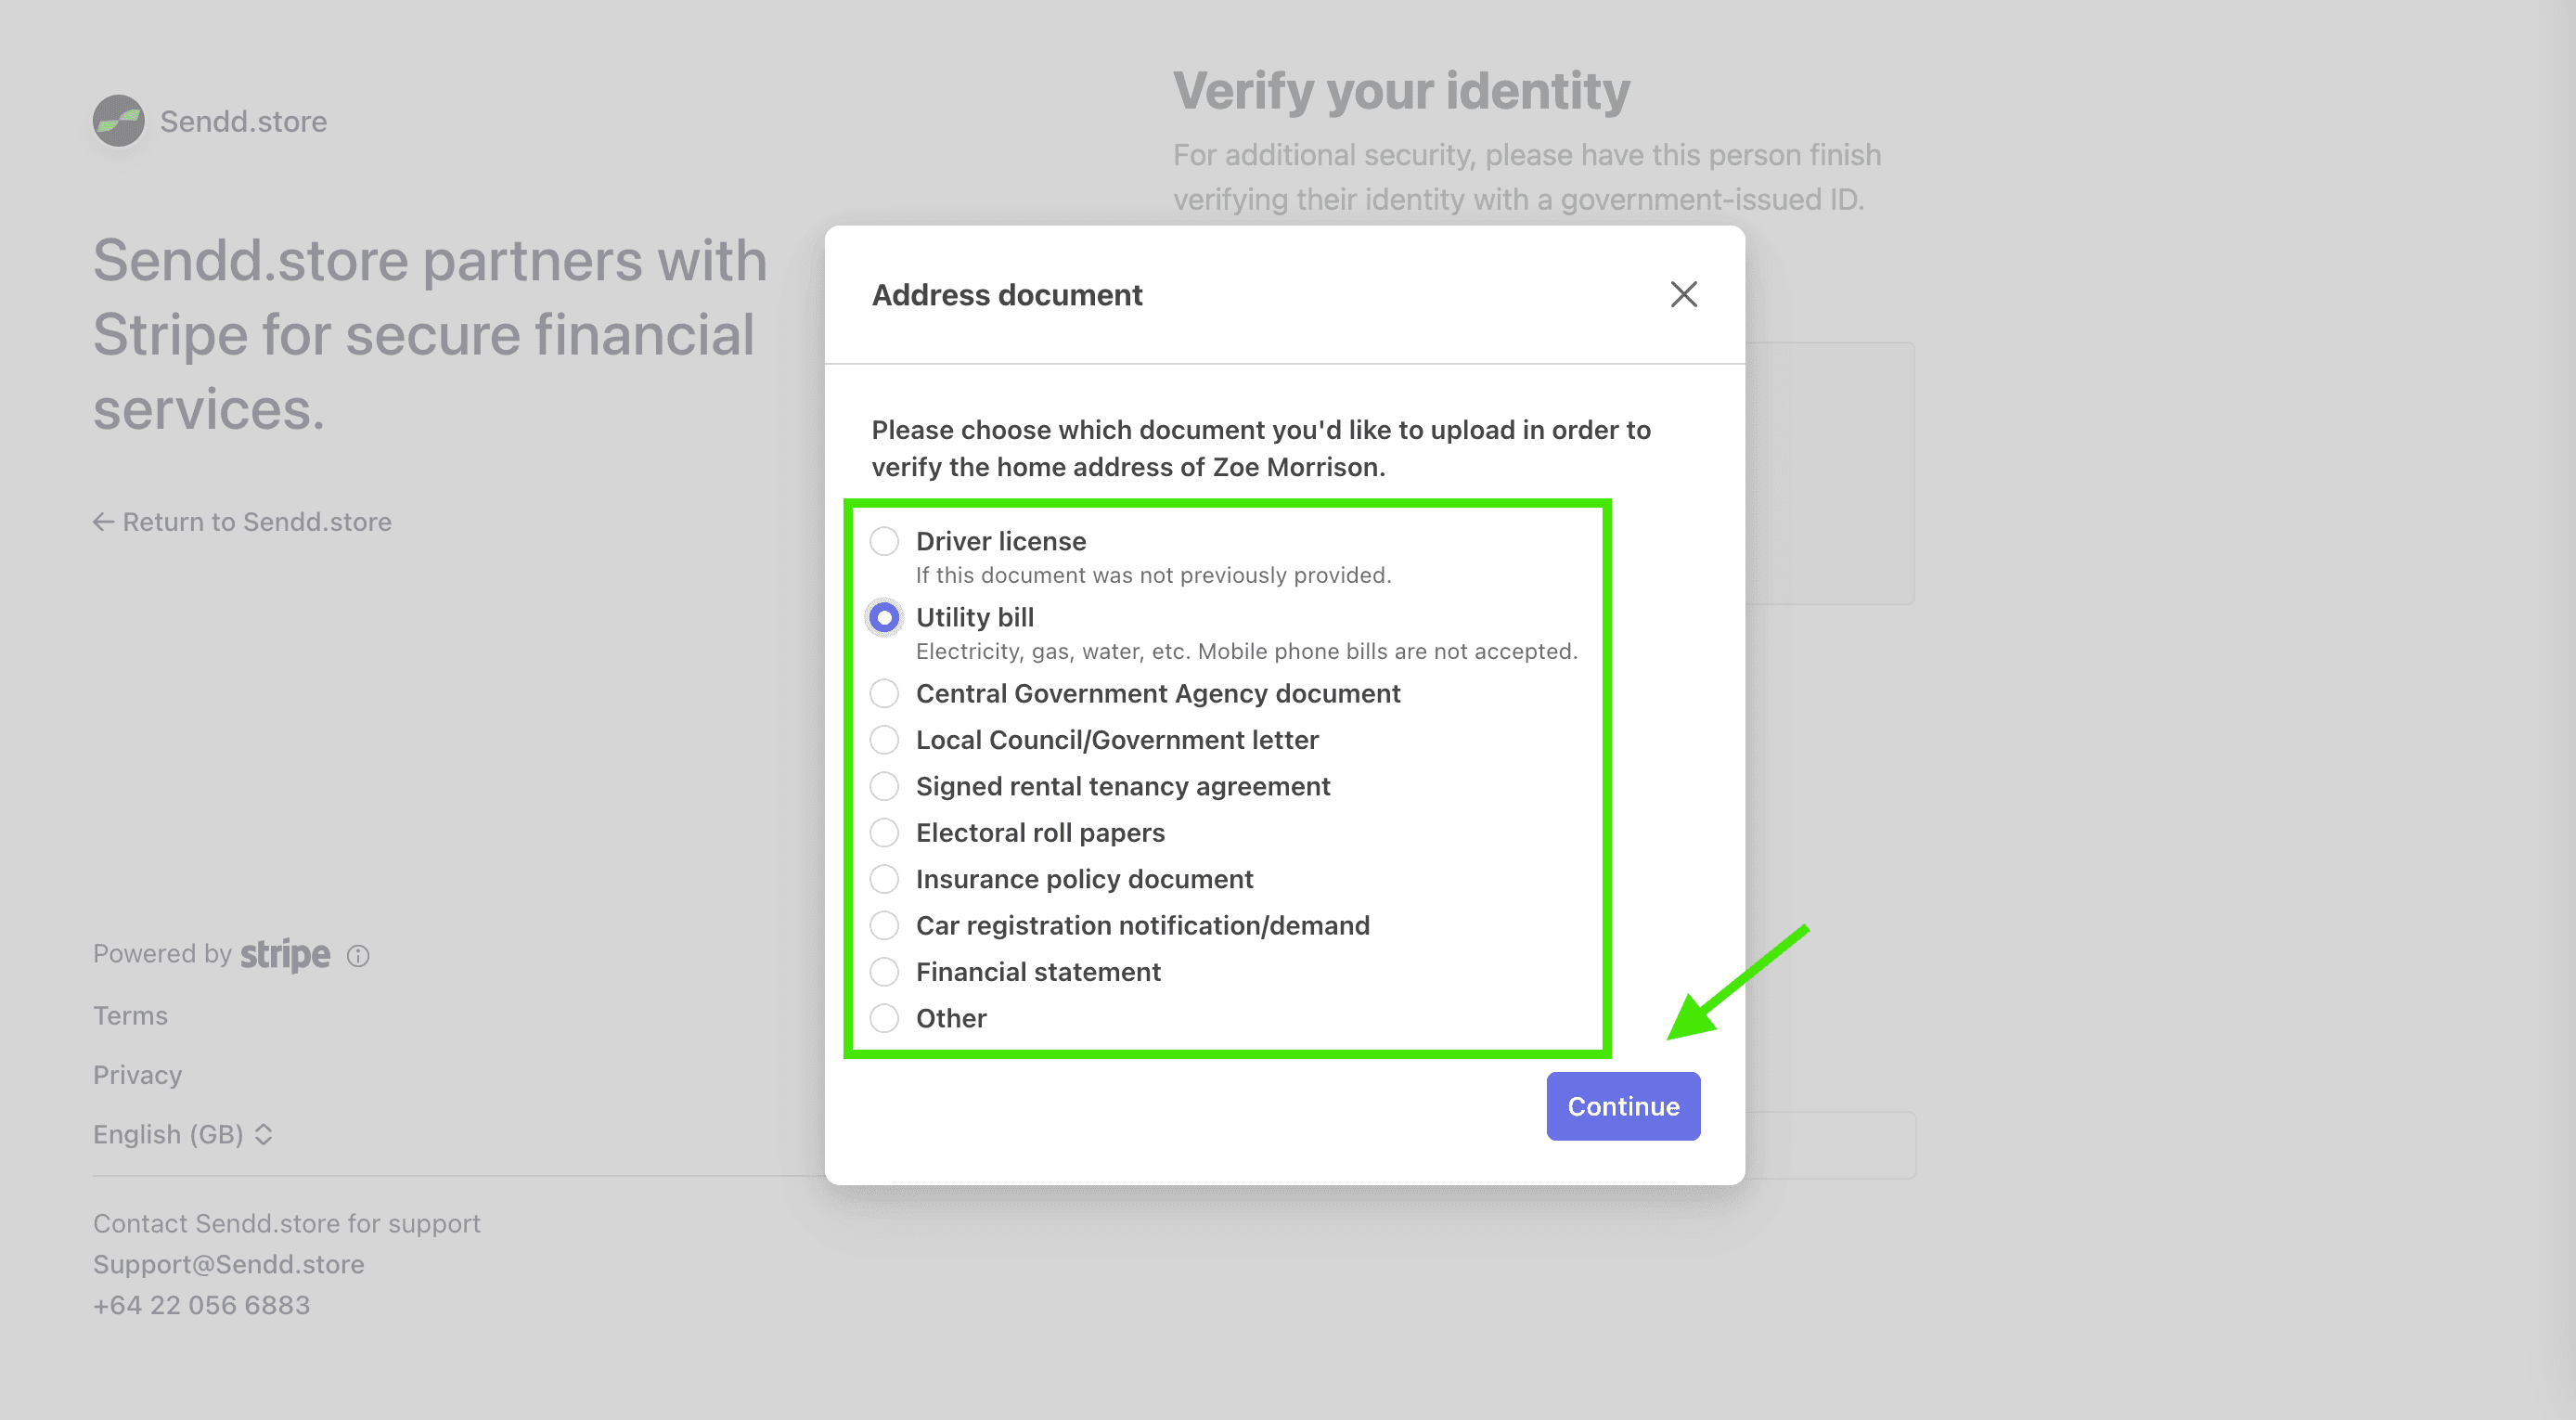
In some cases, Stripe may also ask you to verify your home address to complete your account setup.
This helps confirm your identity and prevents payout delays.
Accepted documents include:
Driver licence
Utility bill (electricity, gas, or water)
Government agency document
Council or government letter
Rental tenancy agreement
Electoral roll papers
Insurance policy document
Car registration notice
Financial statement
⚠️ Mobile phone bills are not accepted.
Click Continue.
Upload your address document.
Your document must:
Show your full name and address
Match the details you entered
Be clear and not cropped
Be in JPG, PNG, or PDF format
Click Select file (or drag and drop).
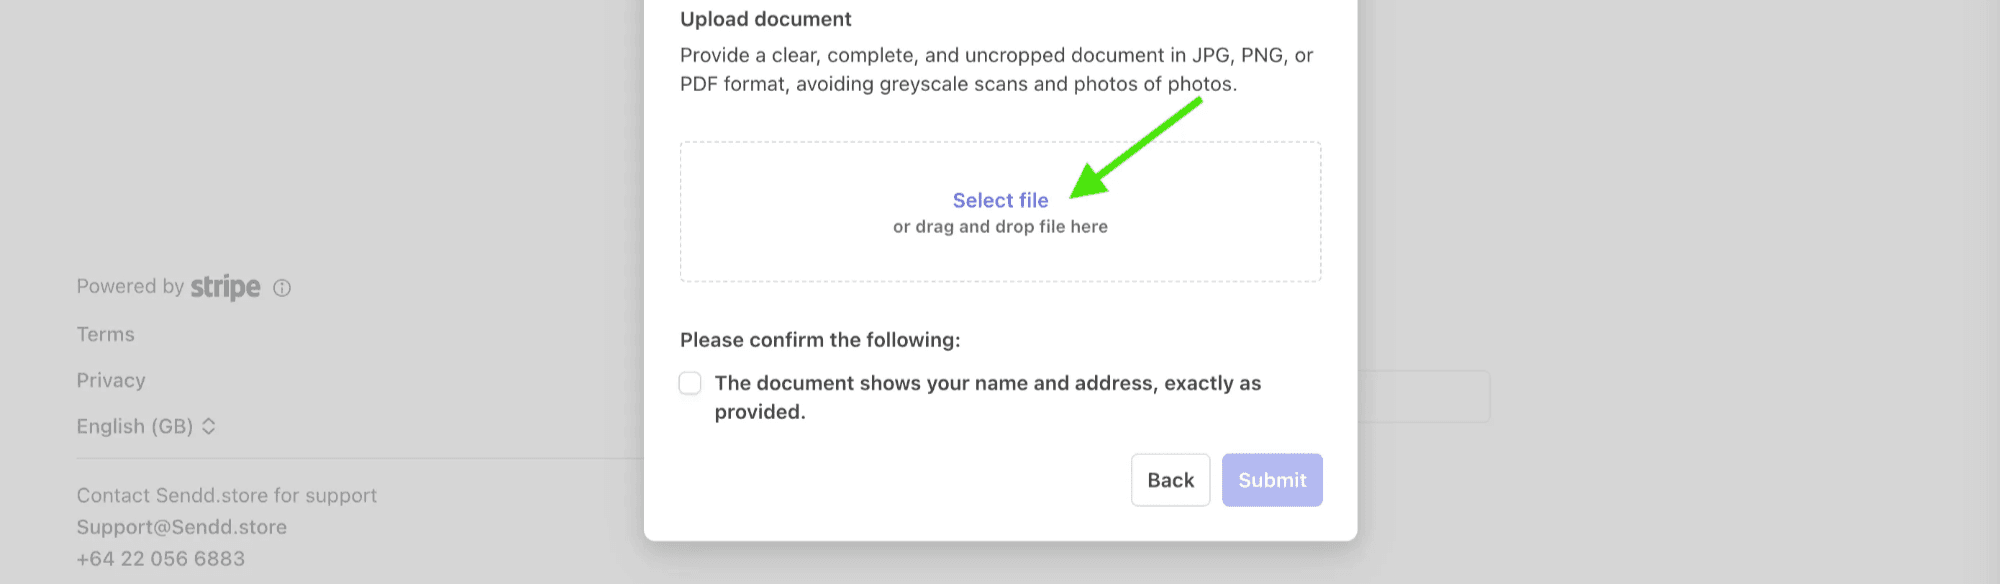
Tick the checkbox to confirm the document matches your details.
Click Submit to send it to Stripe for review.
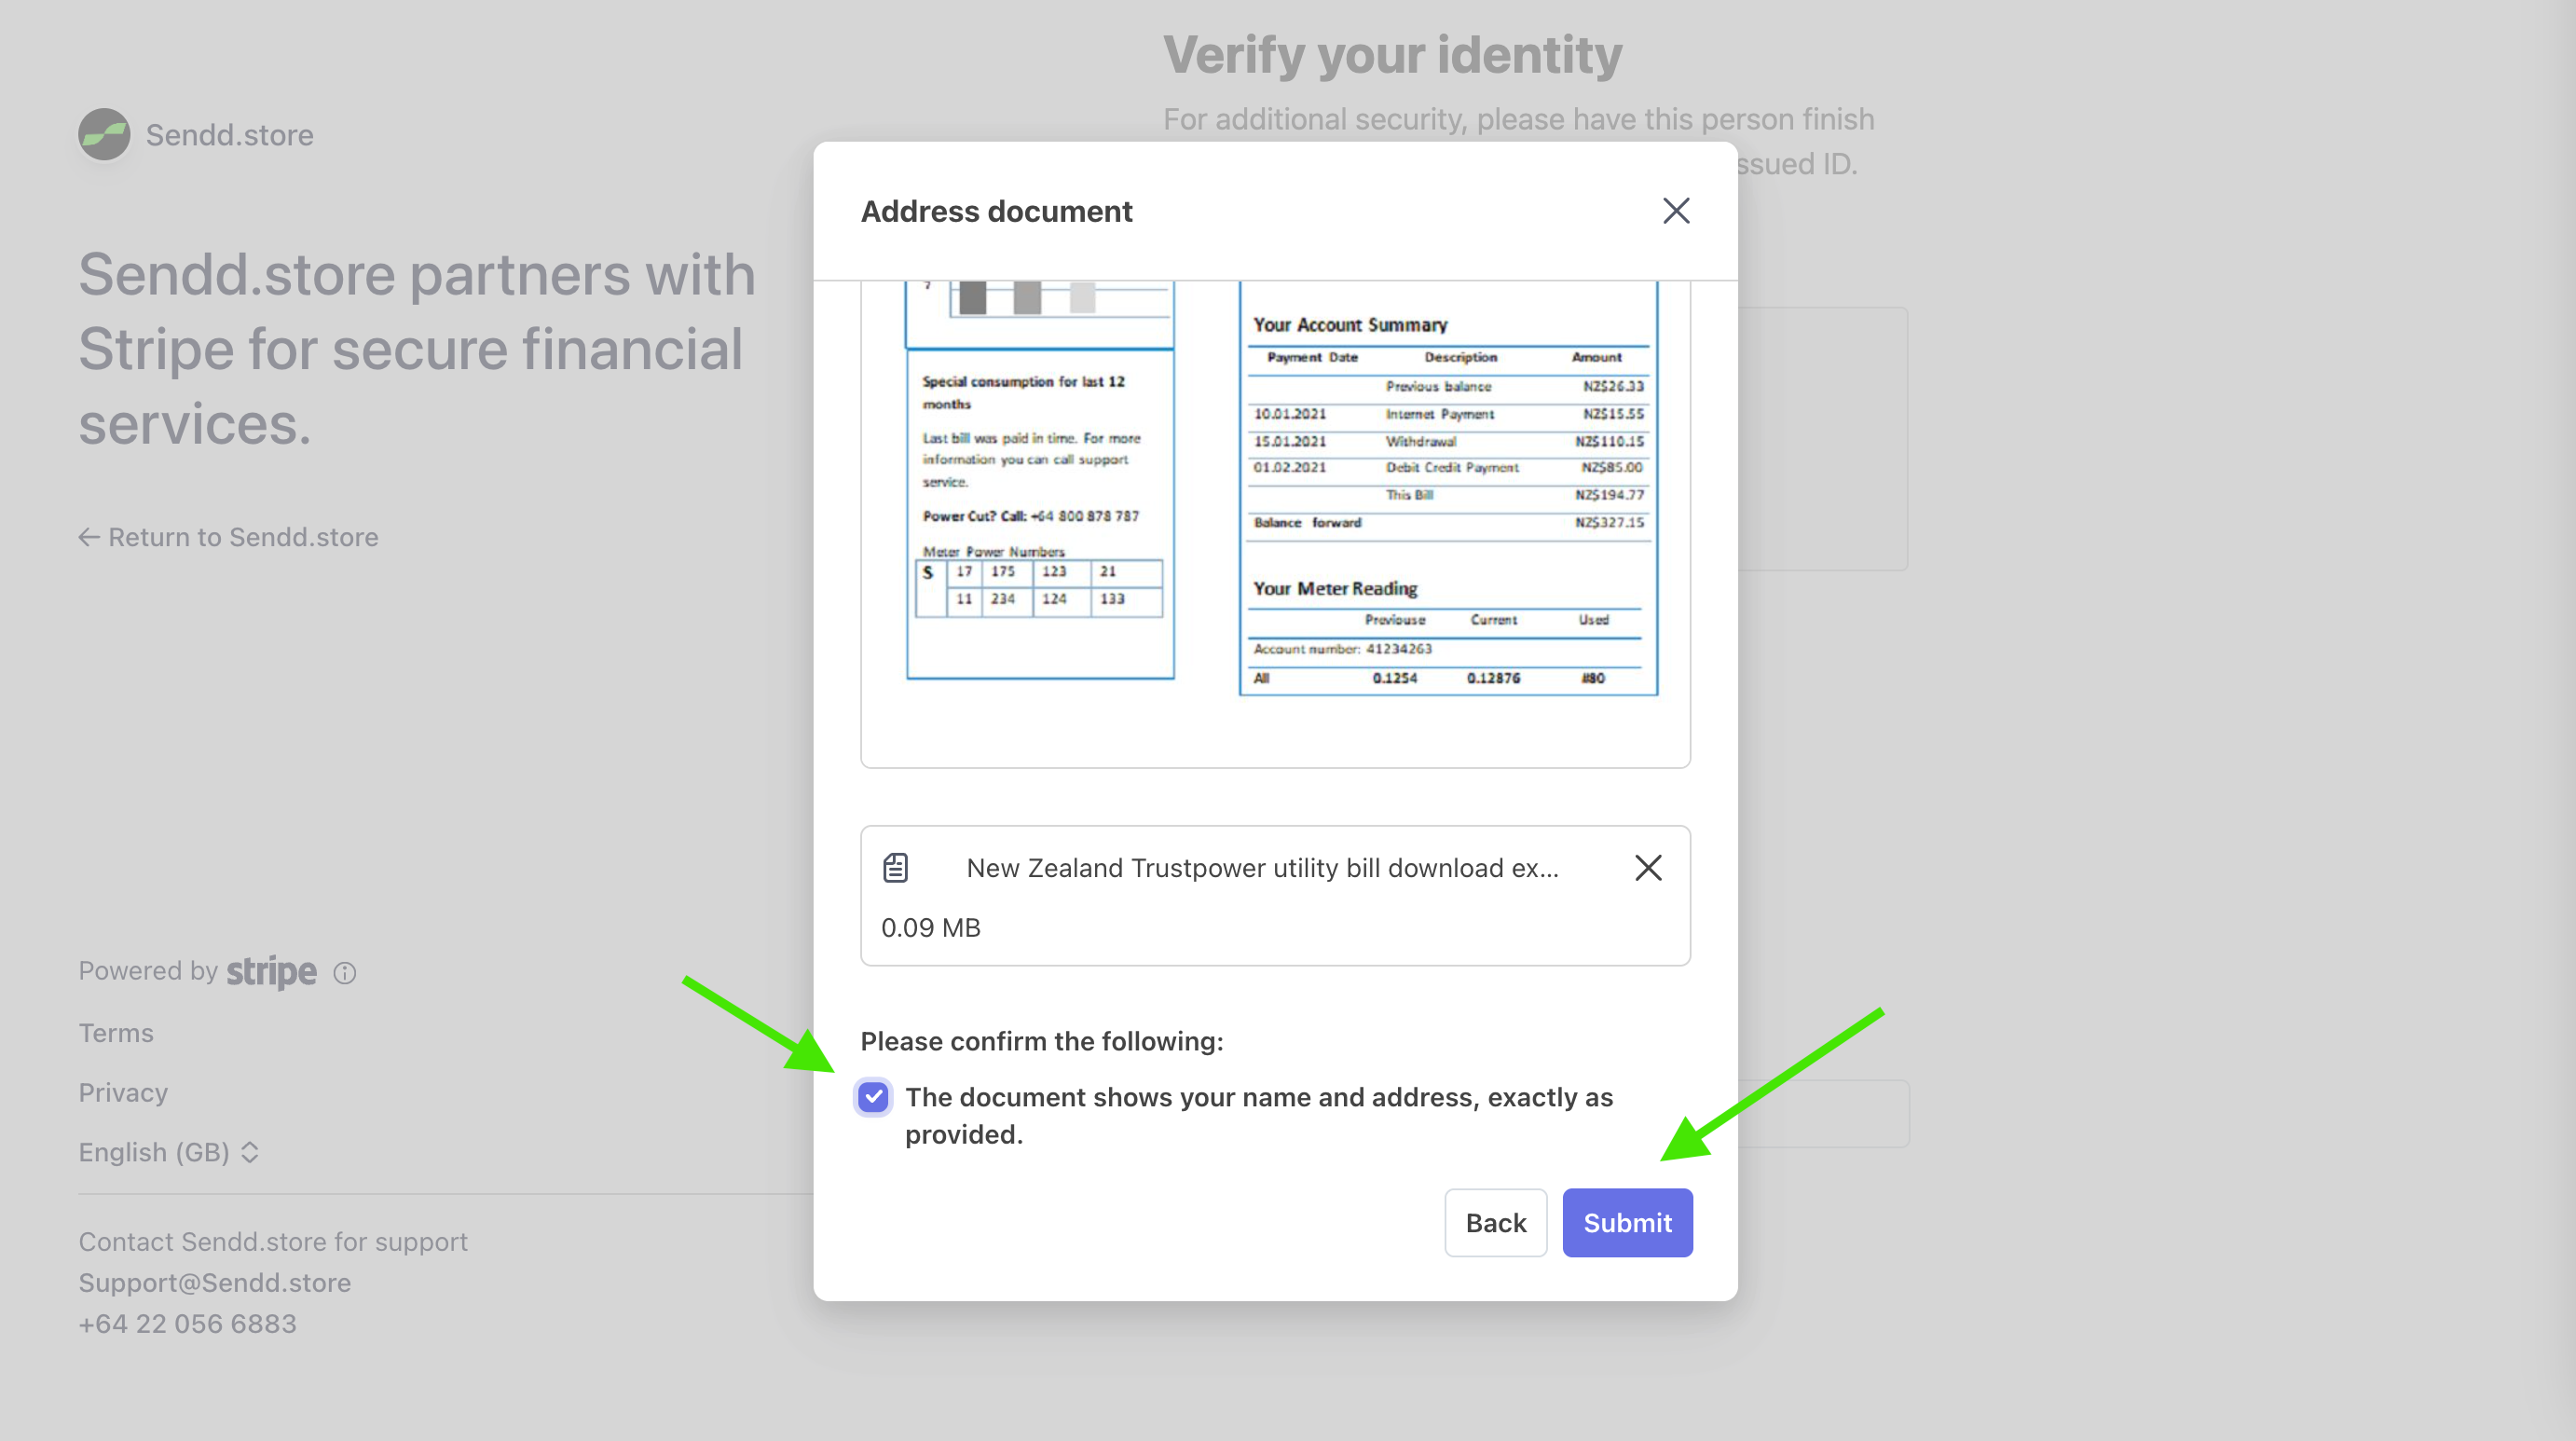
Stripe will review your address document and notify you if anything else is needed.
You’re all set! 🥳
You can now:
Accept card payments
Receive money to your bank
Track your sales in Sendd
If you need help at any point, contact us at:
Any other questions? Get in touch