Store Setup
Add Rental Product's
This article helps you add a Rental Product to your Sendd Store
Rental Products on Sendd are ideal for businesses that lend or lease items for a set period of time instead of selling them outright. This feature works well for equipment rental companies, event suppliers, photography gear rentals, party and wedding hire businesses, or even sports and outdoor gear providers.
Sellers can list items customers can reserve for specific dates, making it easy to manage availability and bookings in one place. Instead of coordinating rentals through messages or spreadsheets, Sendd lets businesses handle enquiries, bookings, and payments through a simple storefront.
How to add a Rental Product to your Sendd Store?
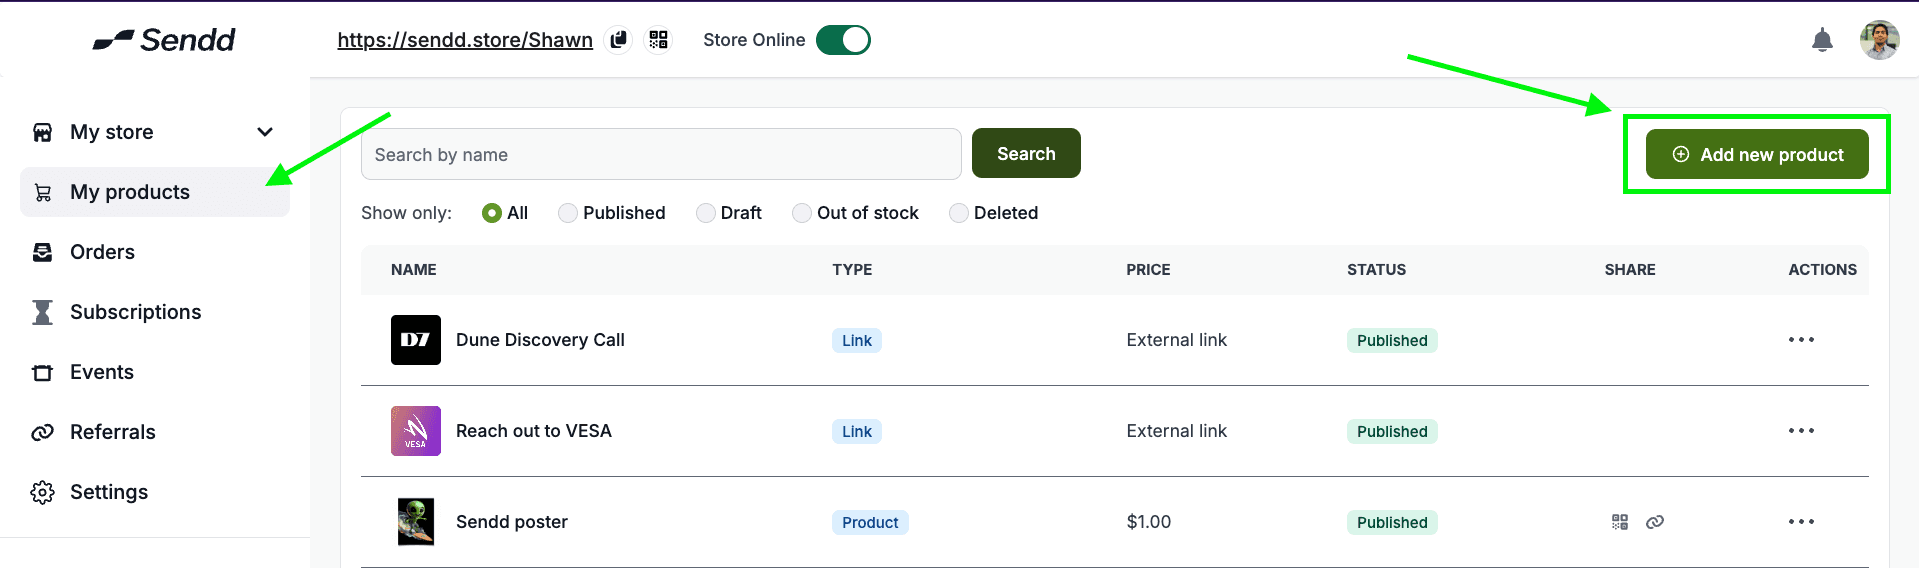
Click on My Products and then click on Add new product,
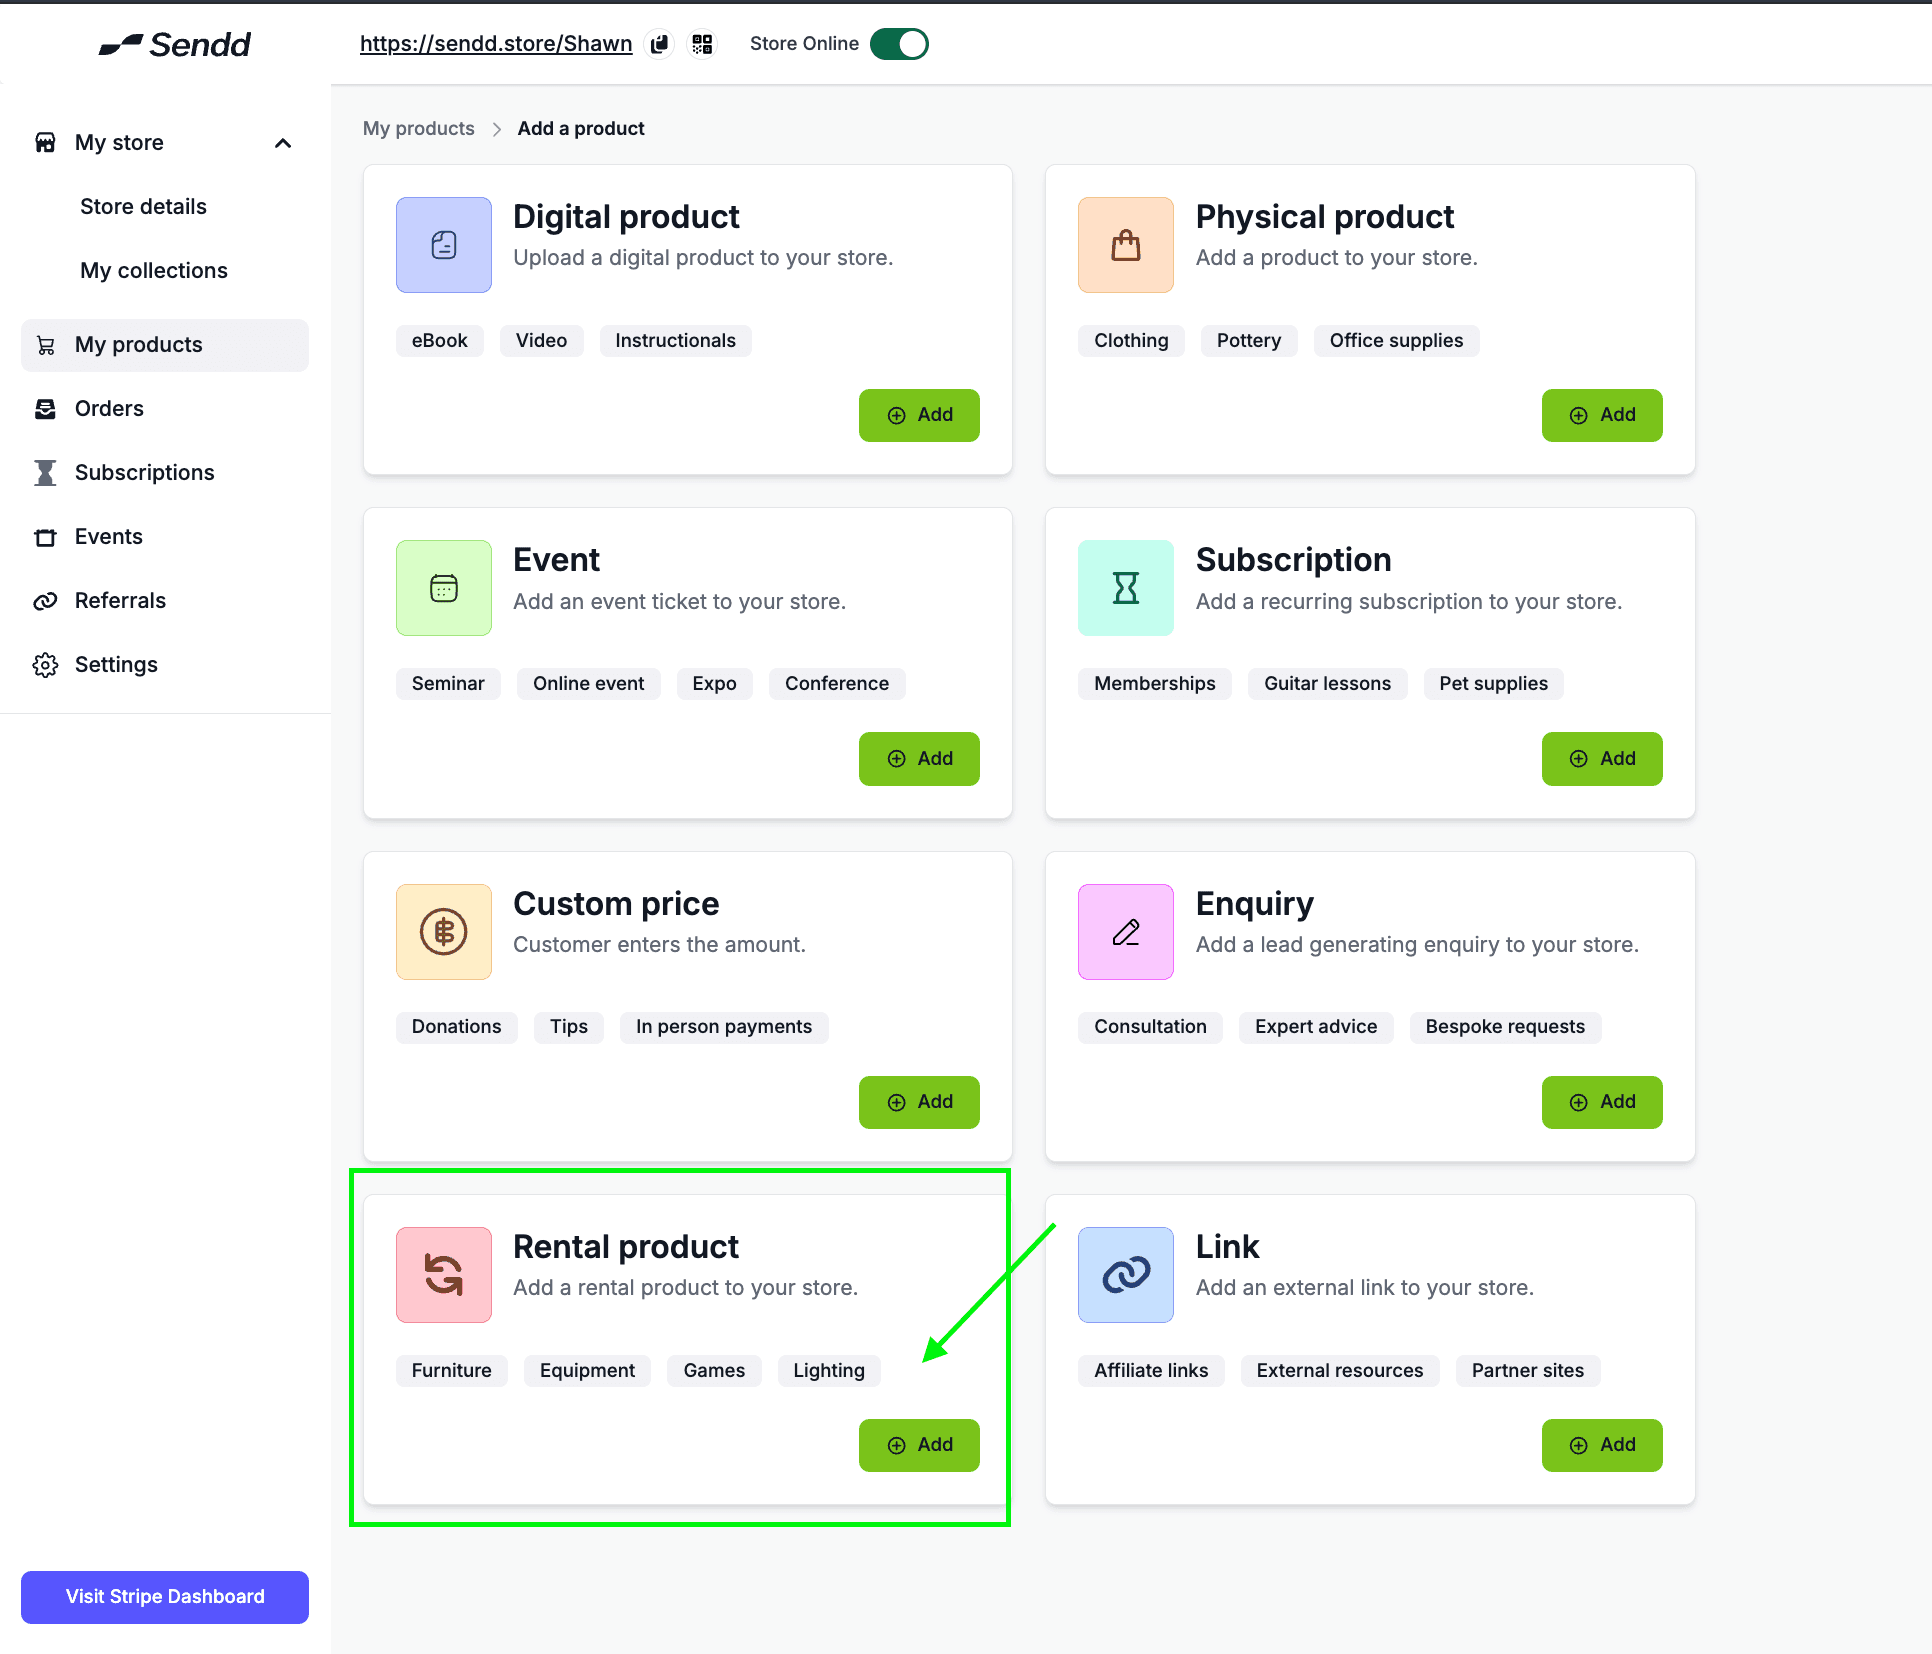
Click on Rental Product as shown below
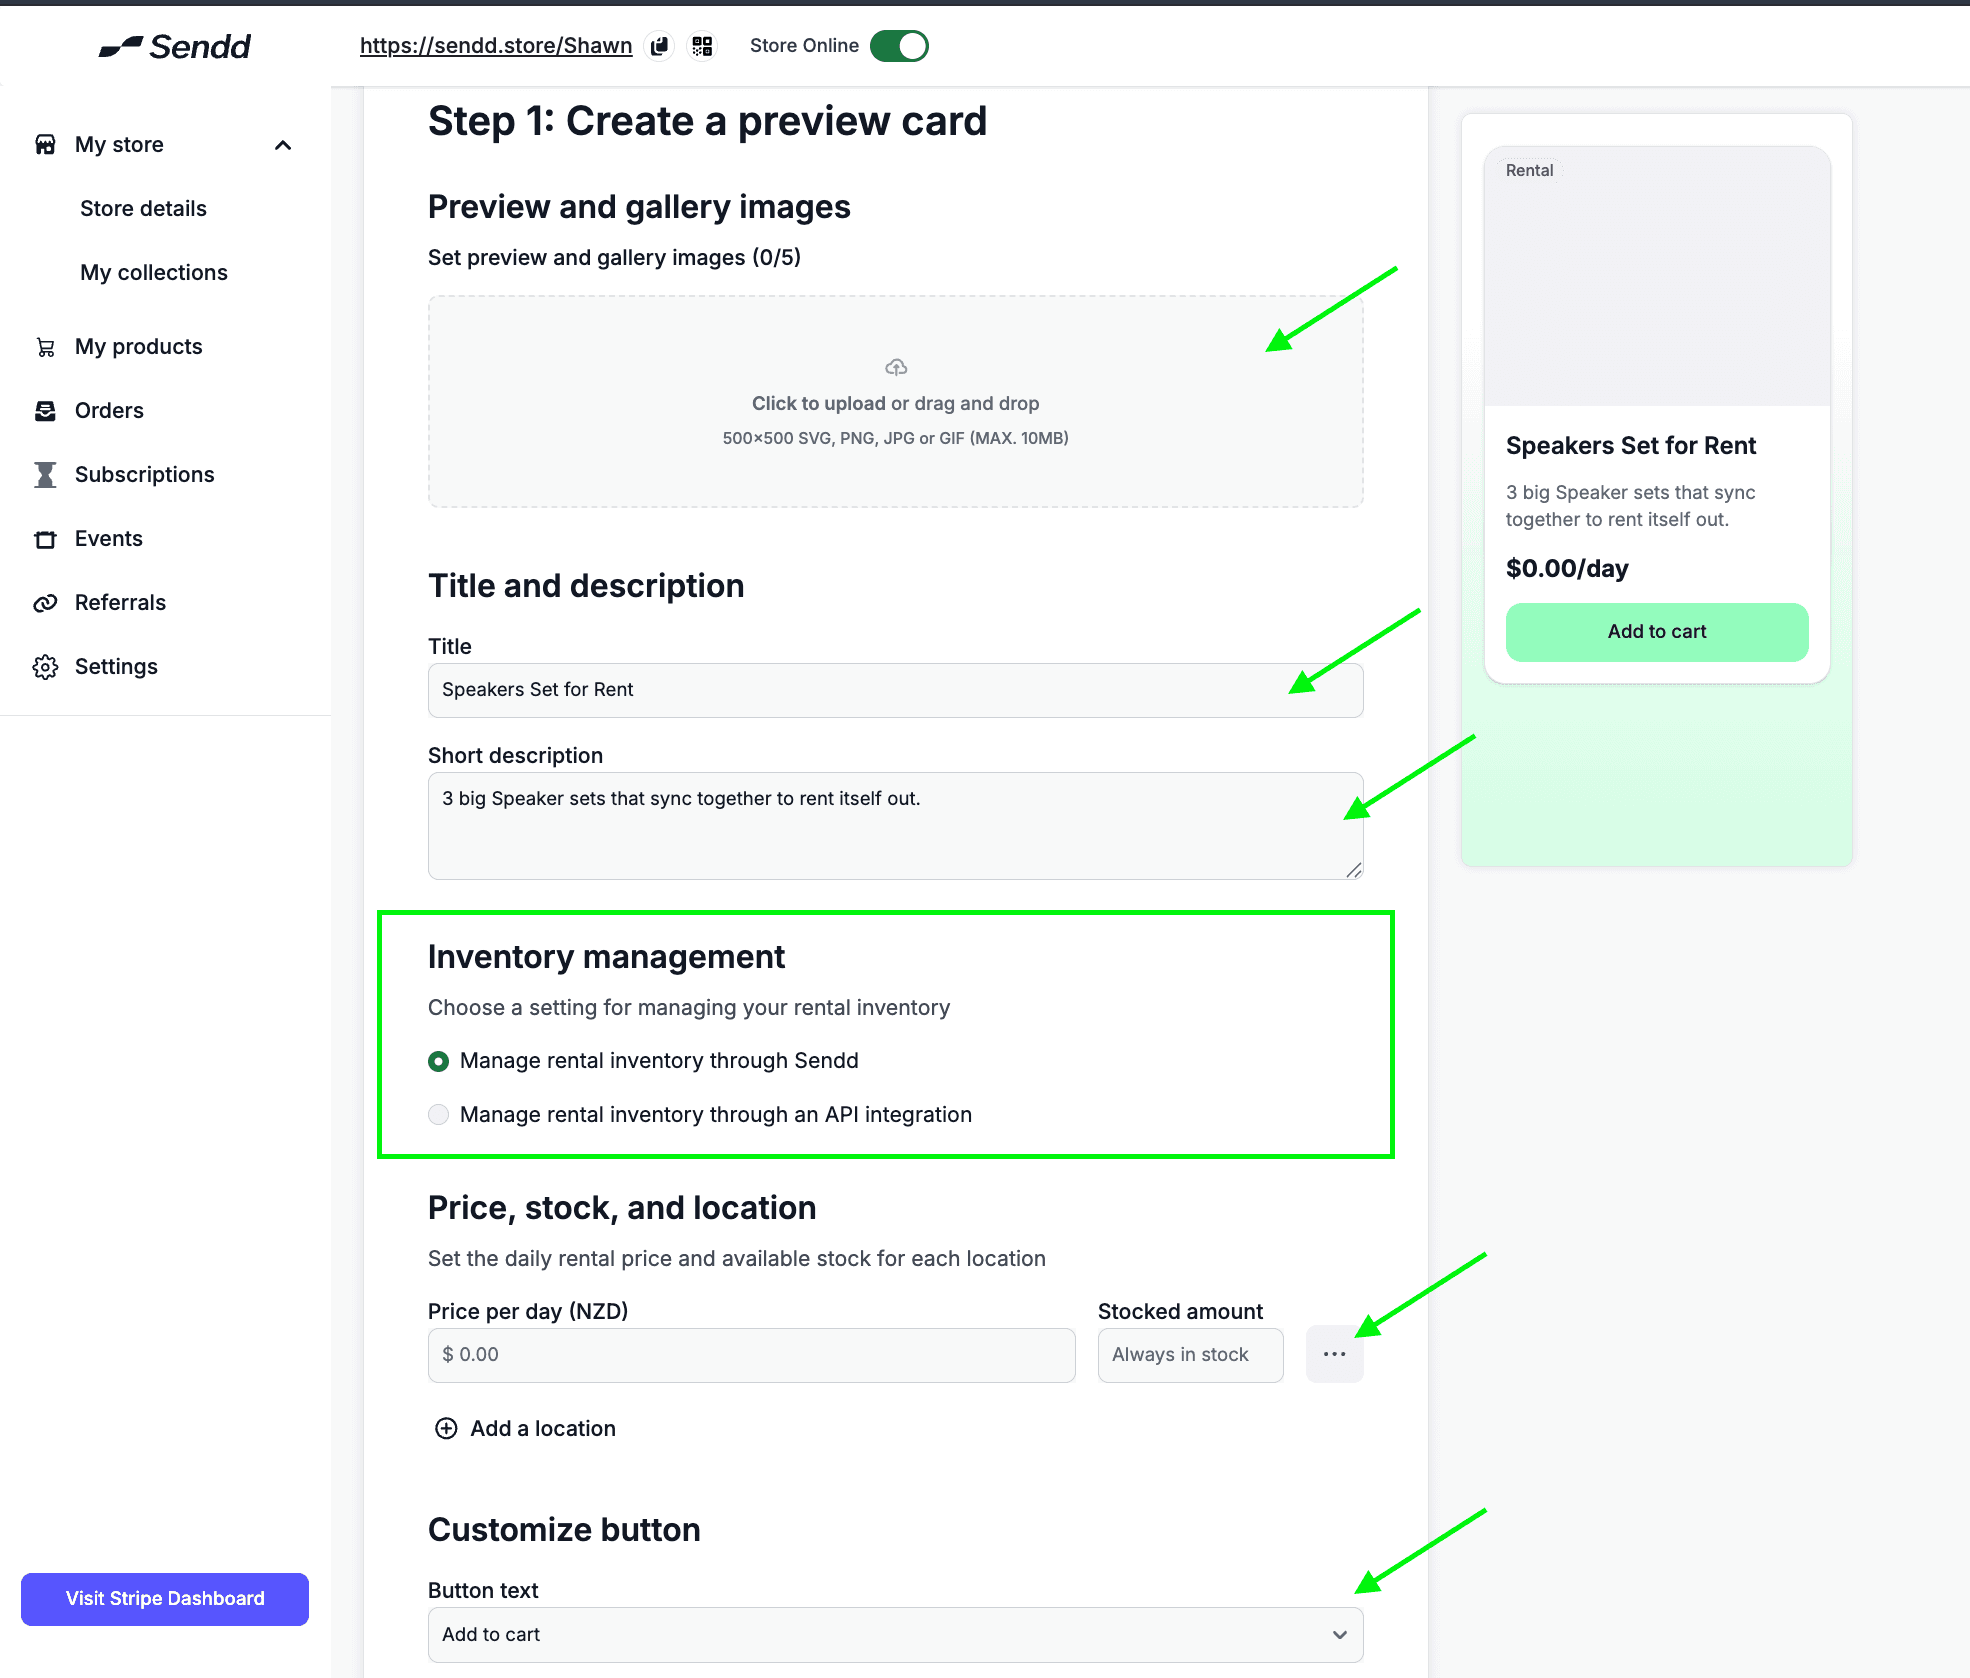
You will be taken to the first Preview page to setup your Preview card.
Add a Preview image of the product you are renting out
Add a Title and Description to describe your product
Select an option for you to manage your rental Inventory (there are two options):
Through your Sendd store (recommended for now)
Through an API Integration with your Inventory management system (TBC)
Add the price per day for the product as well as the Amount you have in stock.
You can split this up for different locations by click on Add a Location.
Note: If you decided to add a couple of different locations it will look like the following.

Sendd Marketplace Option: get your service/ subscription visible on larger marketplaces. This Commission threshold will dictate how much marketplace commissions you are willing to give away for more visibility. Read more at : https://www.sendd.store/docs/getting-started
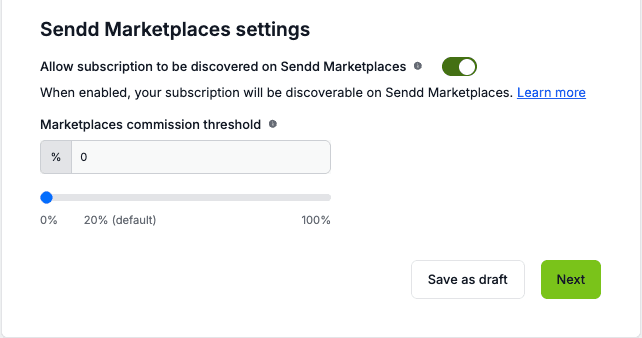
Hit Next After you are done with the preview card.
Now to setup a details page:
Add some Rental Details to your product, give it a Detailed Description of what it is and how it works, any instructions can go here as well.
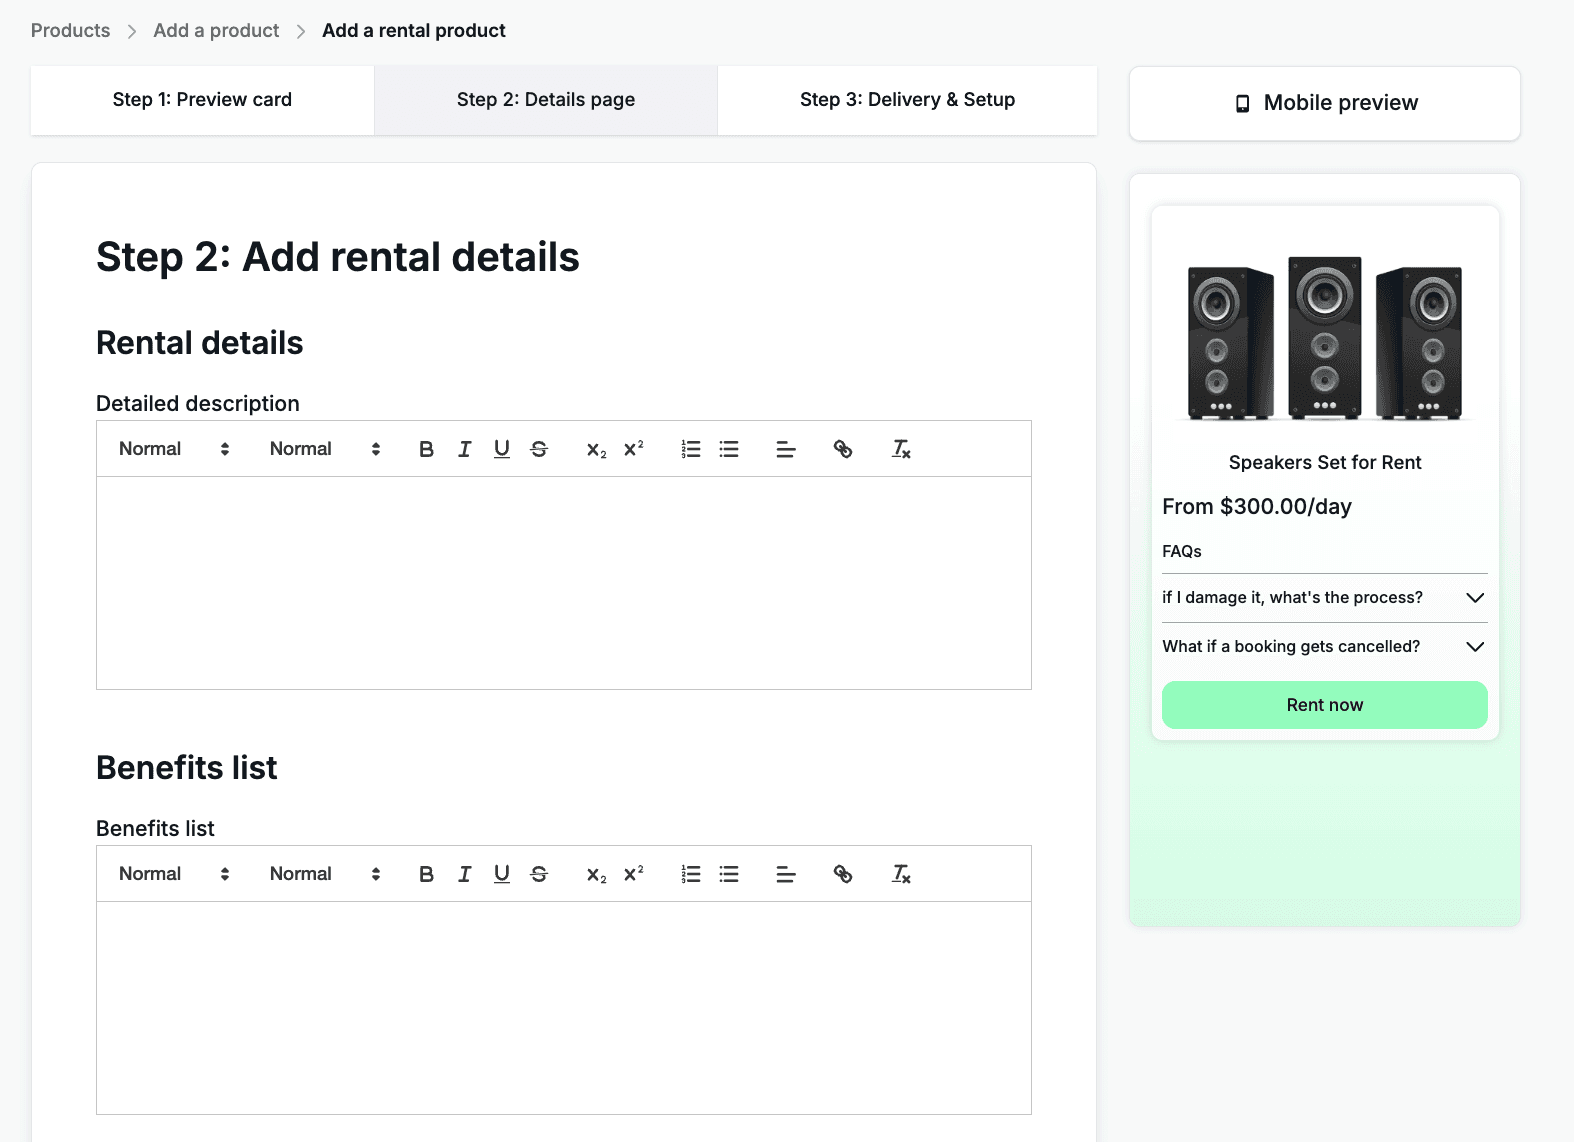
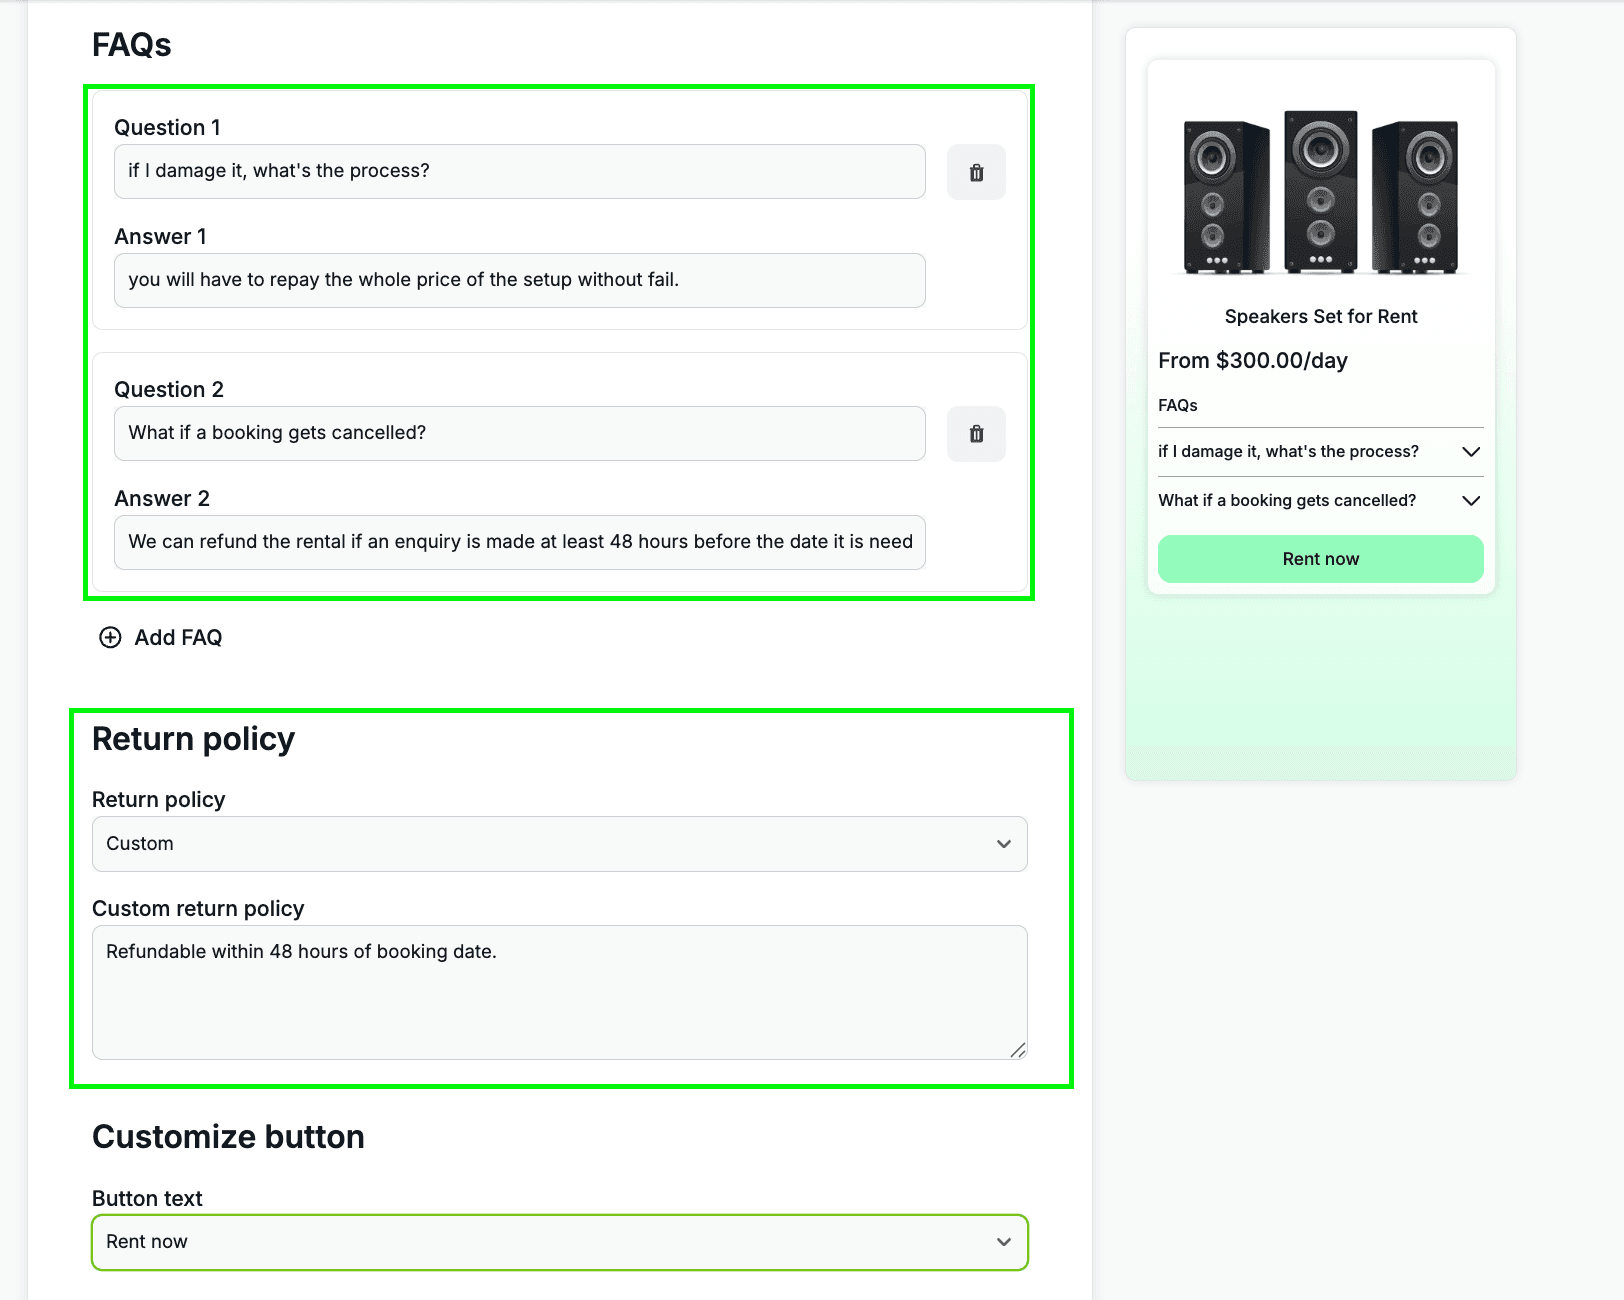
You get to add a couple of FAQs to the product, this helps set customer expectations and let them know what happens in certain situations.
Setup a Return Policy: in this case it will be a refund, but set your own terms so that the customer know what they are signing up for.
Customize the button that the customer sees within the Details page.
Hit Next to proceed to the final page to setup Rentals
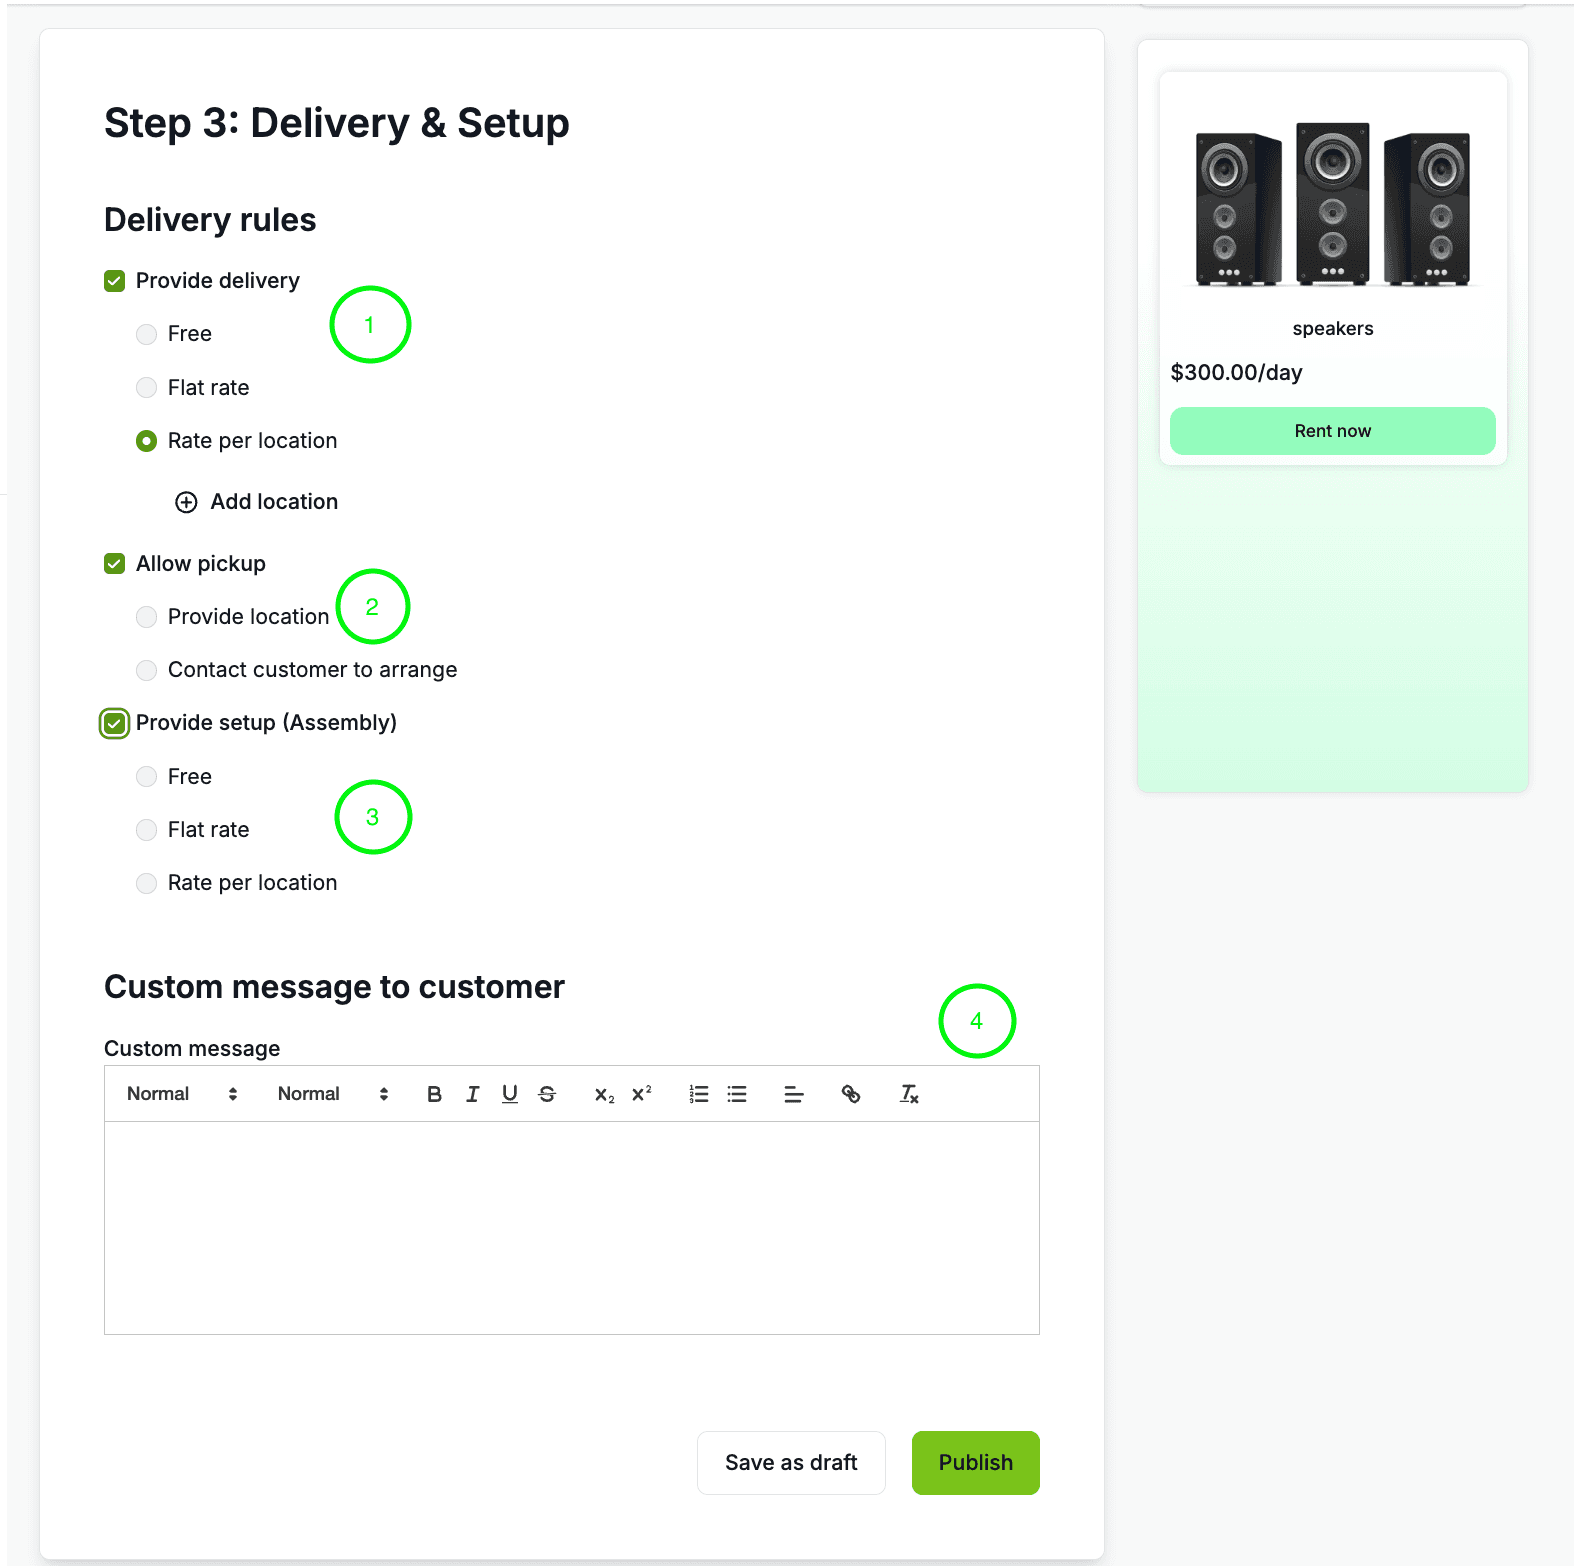
In this page, we will do the Delivery and Setup of the Rental product.
first option lets you provide delivery with the following options:
Free: free shipping
Flat rate: fixed shipping cost delivery.
Rate per location: lets customer add the location so you can give them a quote
Allow pickup, lets the customer show up and pickup the rental product from you
Provide location: the customer can pick it up from the provided location.
Contact customer to arrange: contact your customer using their details to arrange shipping between the two parties.
Provide setup, lets you manage your setup and assembly of your rental product (optional, and useful if you have big speakers and events equipments)
Free: setup cost is free of charge.
Flat rate: fixed setup cost charged to the customer
Rate per location: again lets you price the setup based on the customer's location.
Enter a custom message to the customer, this helps them understand next steps in how they can get a hold of your product and what the steps are within that process.
Hit Publish and your rental product is setup on your sendd store!
Below is a preview of the expanded details view of your recently setup rental product!
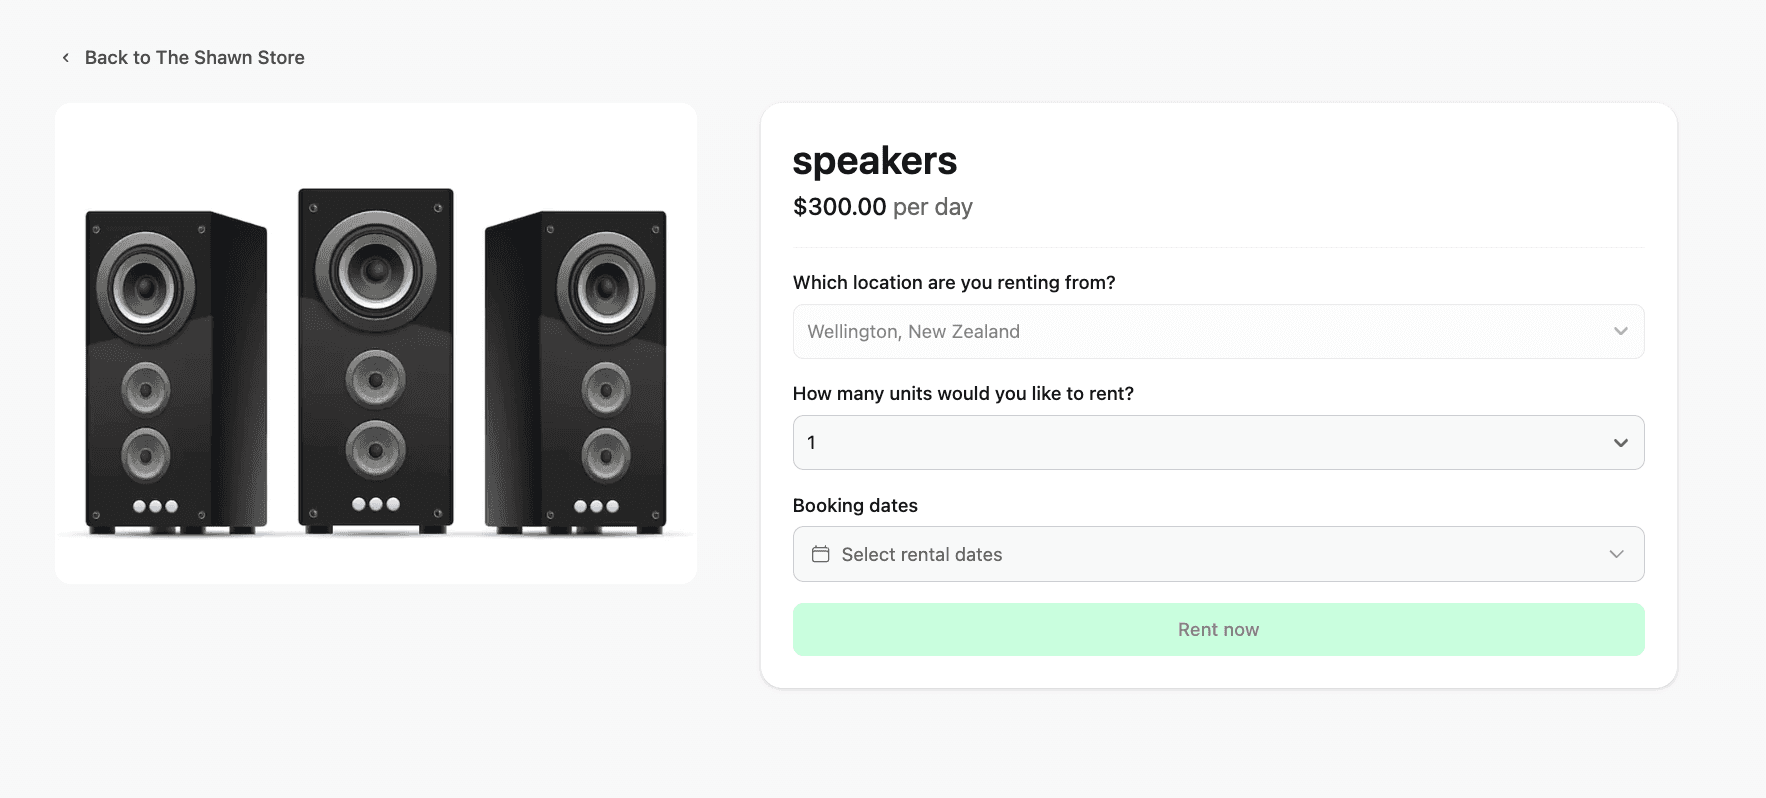
Any other questions? Get in touch