Store Setup
Getting Started Page
this article describes the Getting Started Page
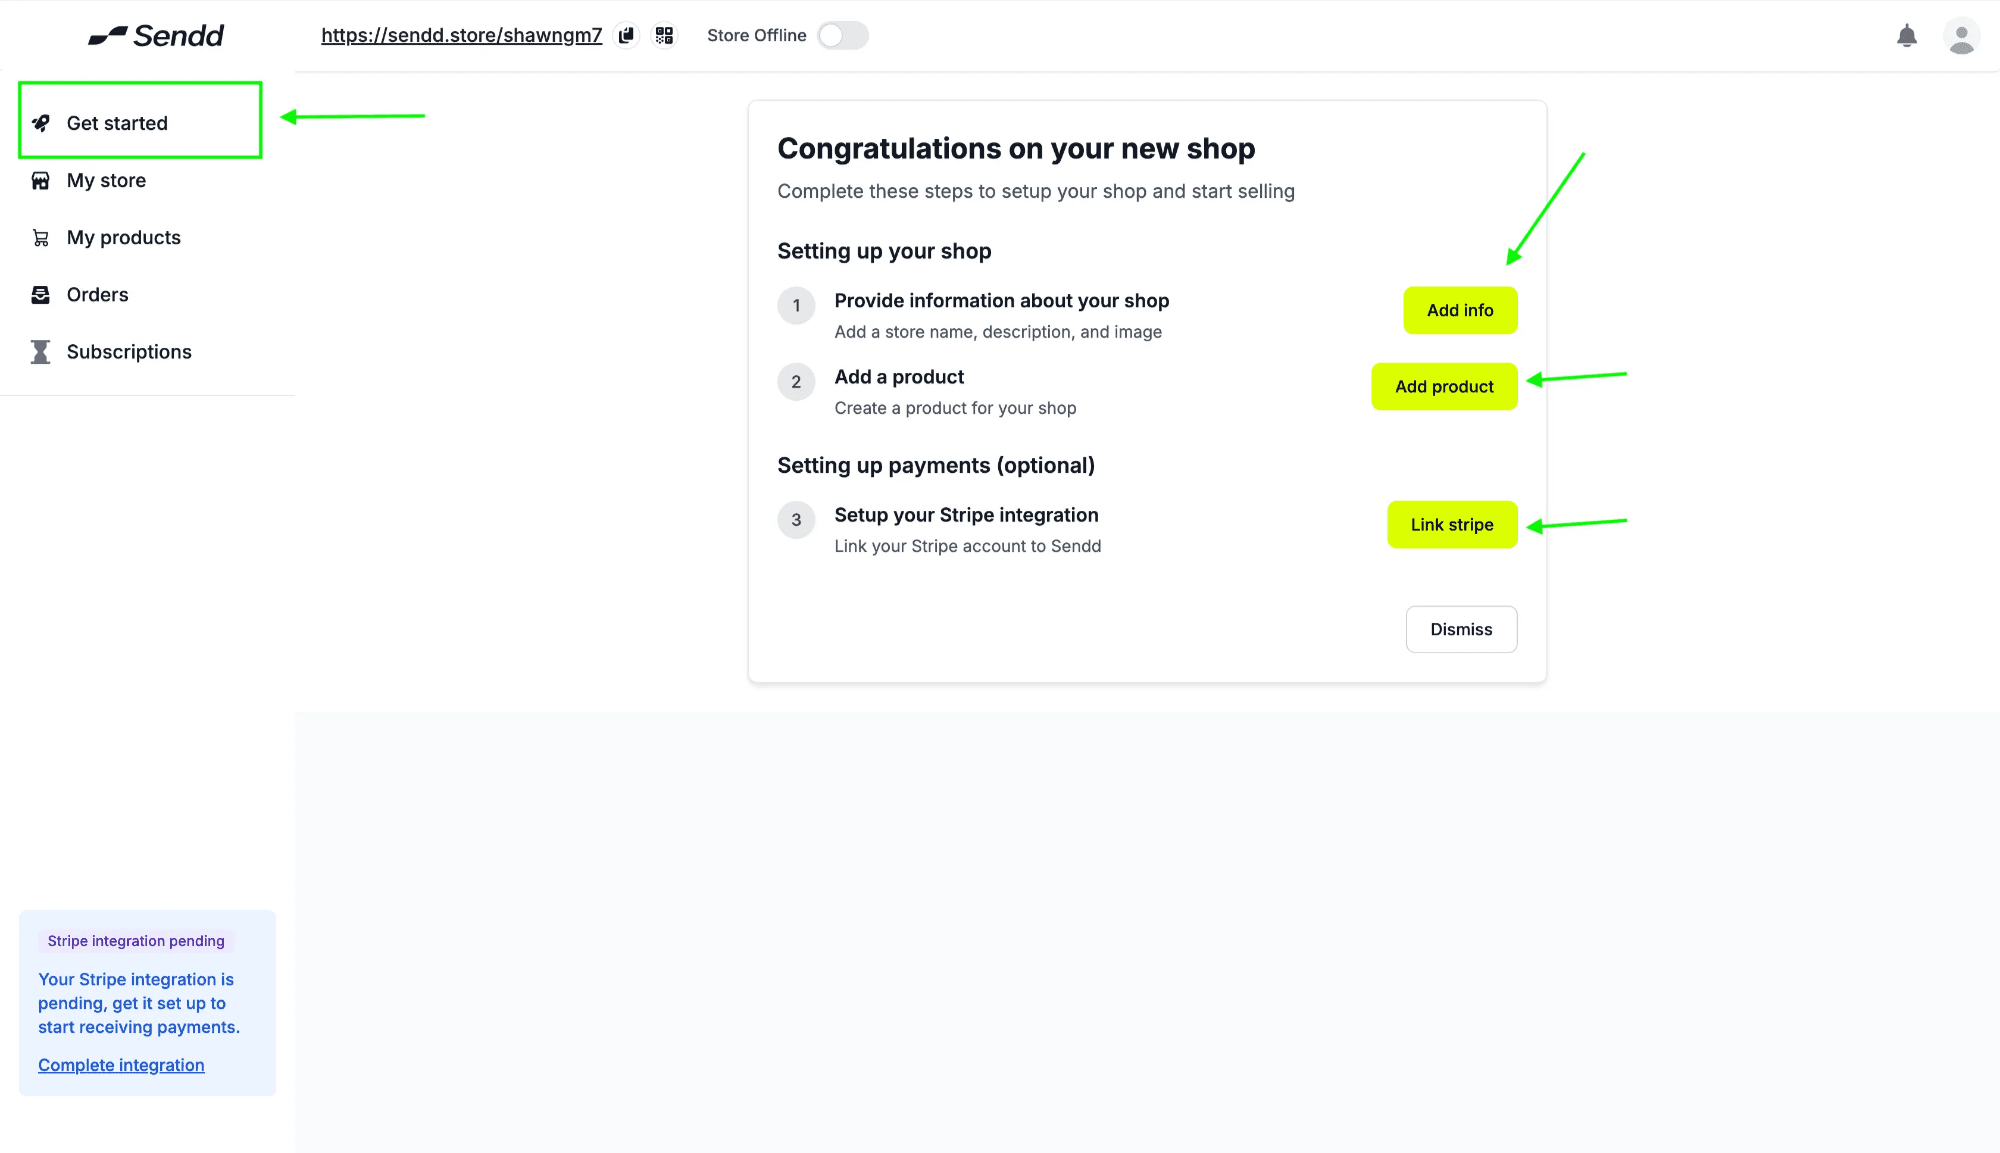
Now you are at the start of building a great one stop shop for your products, As you can see below, your sendd store is not designed or filled out yet, lets get your started by click on Get Started
As you can see you have three options to go with to setup your sendd store:
Add Info: takes you to your store so that you can start filling out more information on your store details.
Add Product: helps you add your product or service onto your store.
Link Stripe: Gets your setup with Stripe’s payment processor, so that you can start receiving payments through Sendd Store.
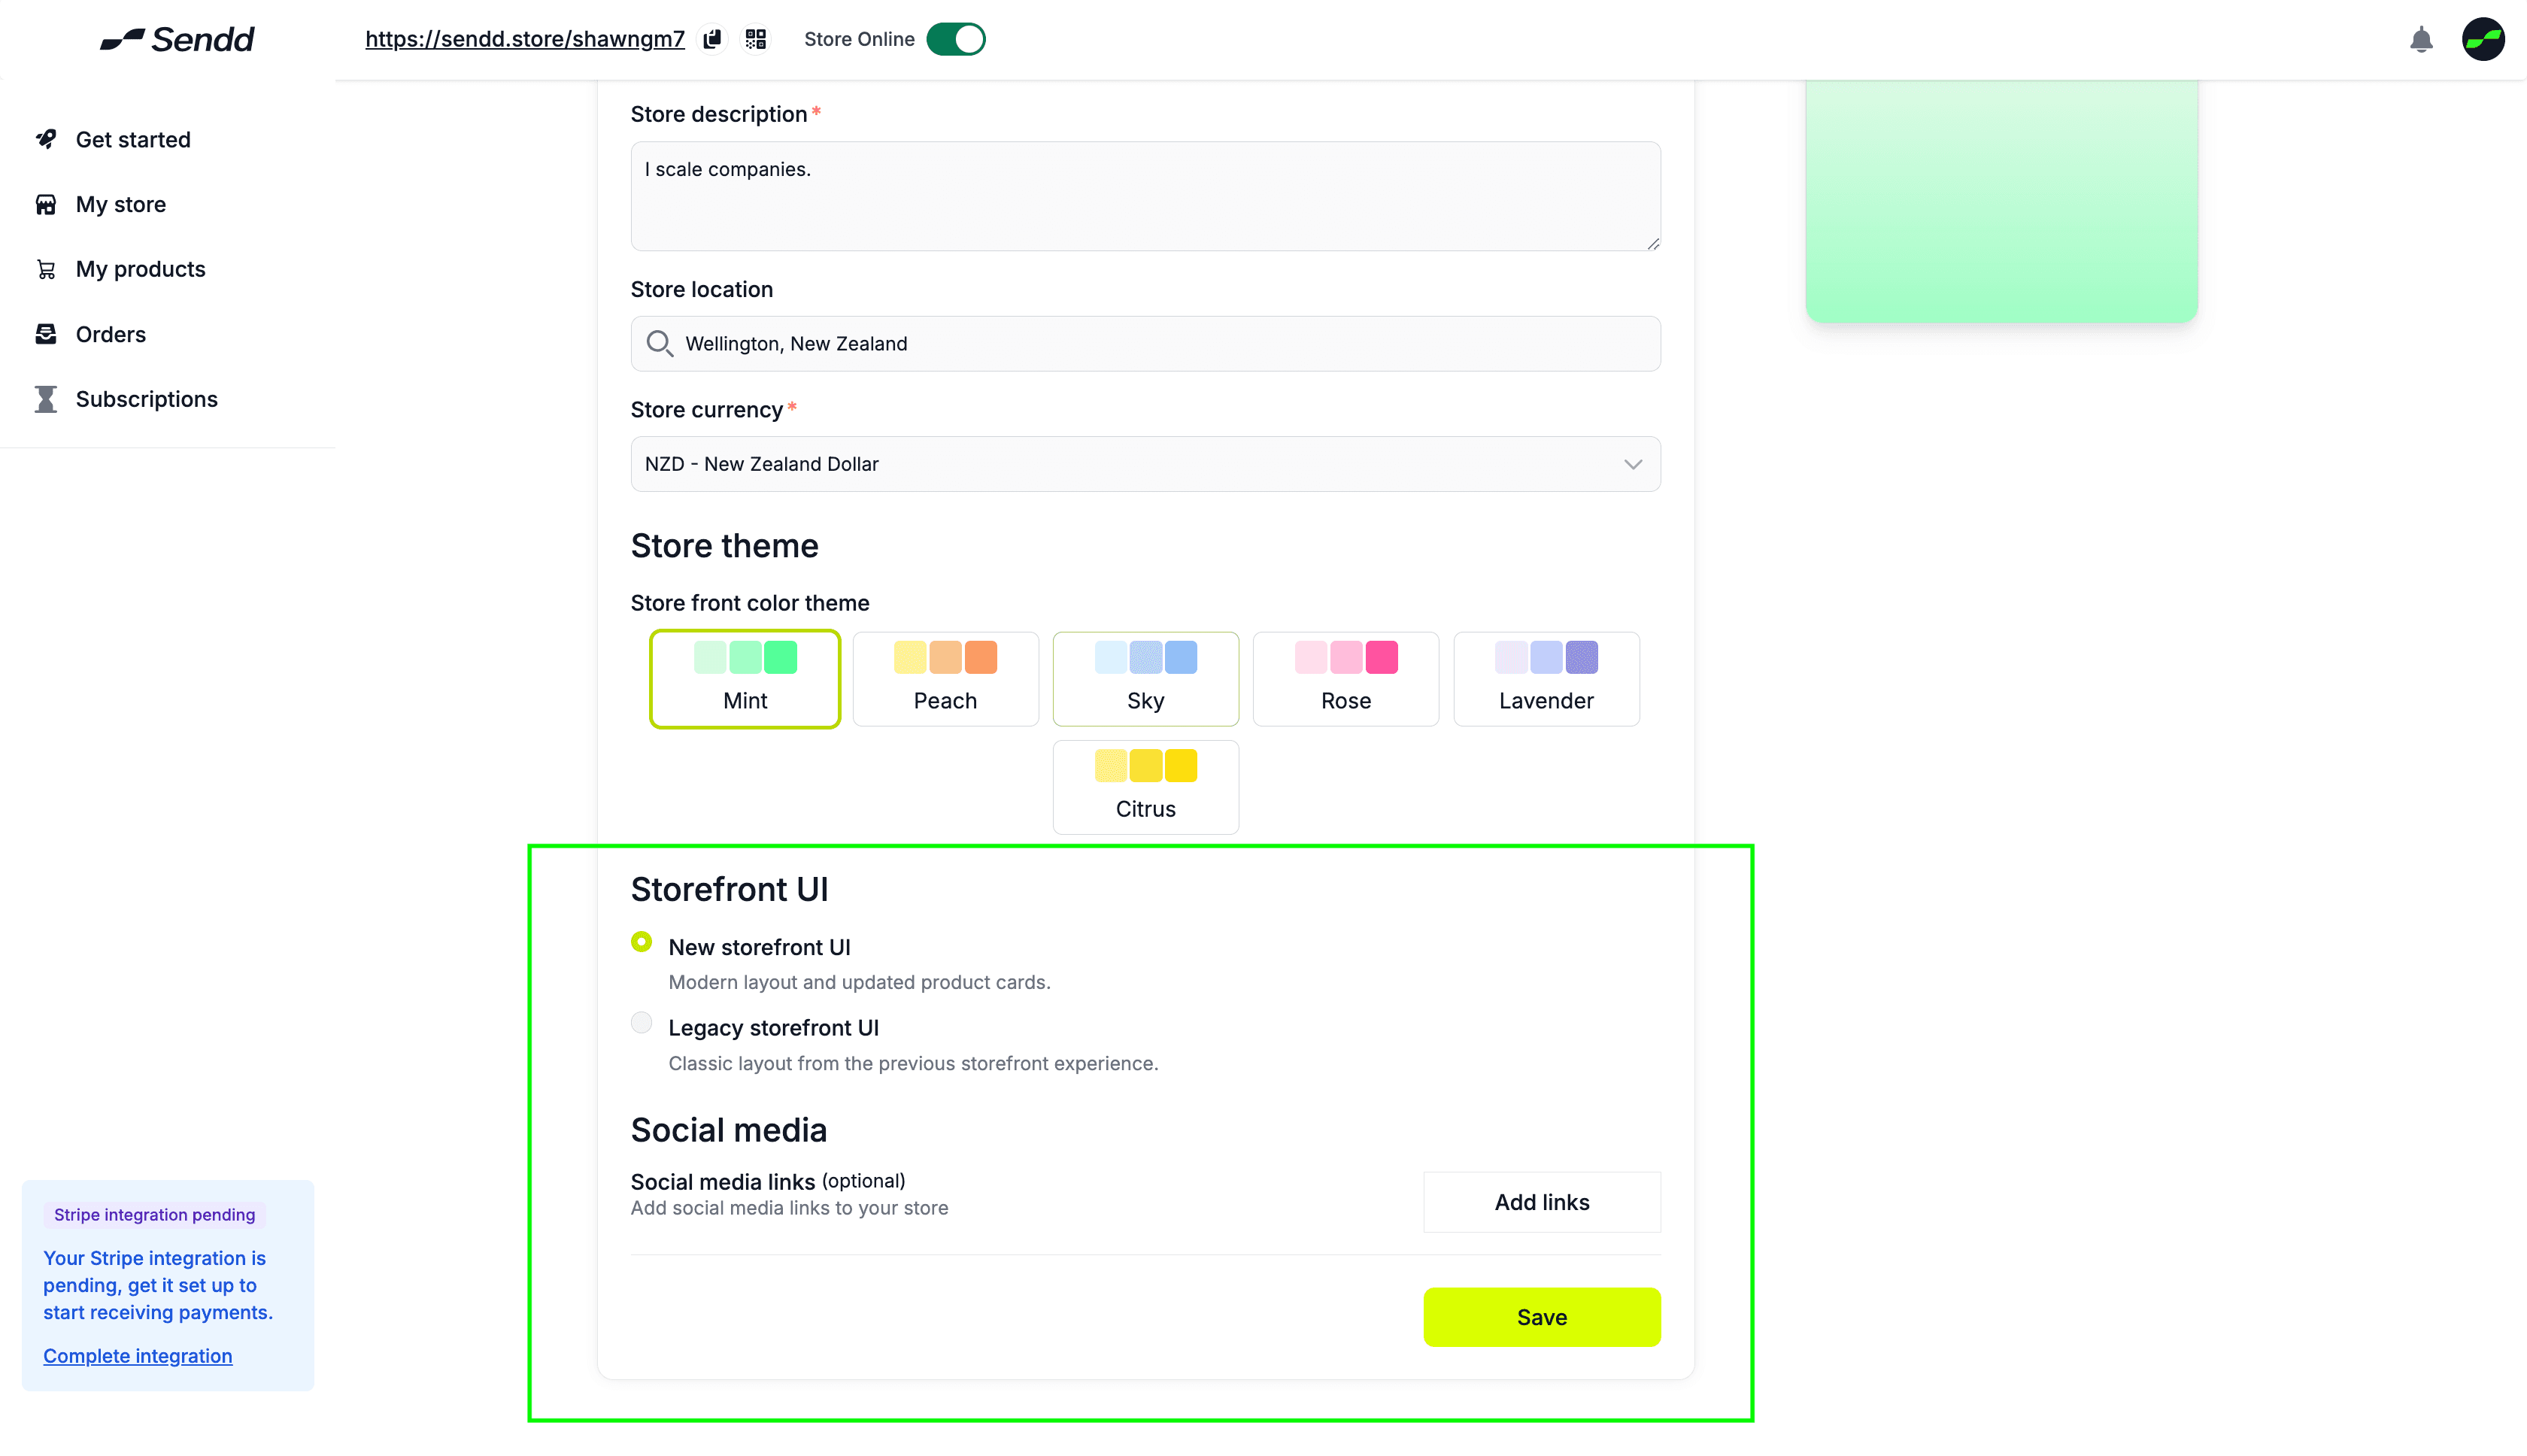
Lets go ahead and click on Add Info, Upload an image into your Sendd Store and also go ahead and add in all your store details.
In the final section of Adding your Info, you have an option to choose between two styles of Sendd Store UI’s and also the link to adding your social media links.
It is recommended to go with the New Storefront UI if you have more than 4 products.
For the Legacy Storefront UI, its better to be at 4 products or under.
Any other questions? Get in touch